Fisher and Paykel RF170WLKUX6 Installation Guide - Joiner Kit - Page 8
INSTALLATION, Before you begin
 |
View all Fisher and Paykel RF170WLKUX6 manuals
Add to My Manuals
Save this manual to your list of manuals |
Page 8 highlights
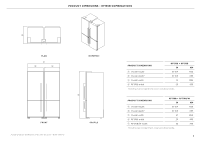
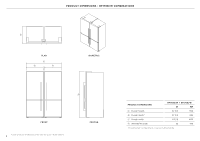
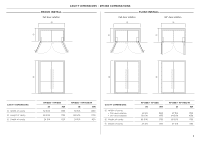
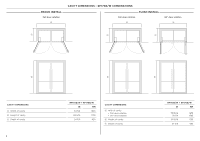
INSTALLATION Before you begin z Check cavity dimensions are correct for the type of dual installation you require. z Unpack appliances from packaging following guidance on individual cartons. z Ensure the floor is protected from damage during unpacking and installation. z Check that the Joiner Kit is complete. 1 z Always position the two appliances side-by-side with the door hinges on the far left and right, ensuring you have enough space to access the rear of the appliances. 2 3 4 FRONT VIEW 5 8 Remove the rear compartment cover using a Phillips screwdriver. This will be re-attached later. Remove the screw on the filter dryer retaining bracket using a Phillips screwdriver. Remove the retaining bracket, ensuring the filter dryer does not touch any pipes or the side of the rear compartment. The rear bracket should only be added to the left-hand appliance as viewed from the front. Align the top edge of the rear bracket to the bottom edge of the back panel. Holes for the bracket will need to be drilled into the side of the chassis. Secure bracket from the side using three of the 8x16 screws. Slot the second, right-hand appliance as viewed from the front, into the bracket, ensuring it sits securely. Do not fix in place.
-
 1
1 -
2
-
 3
3 -
 4
4 -
 5
5 -
 6
6 -
 7
7 -
 8
8 -
 9
9 -
 10
10 -
 11
11
 |
 |
