Frigidaire FEQ332ES Complete Owner's Guide (English) - Page 5
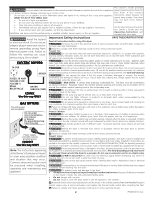
Avoid Ser, void Ser, void Service, Checklist - installation instructions
 |
UPC - 012505374395
View all Frigidaire FEQ332ES manuals
Add to My Manuals
Save this manual to your list of manuals |
Page 5 highlights
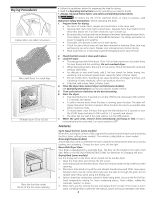
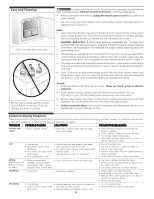
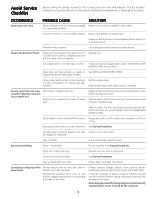
Avoid Service Checklist Before calling for service, review this list. It may save both time and expense. The list includes common occurrences that are not the result of defective workmanship or materials in this dryer. OCCURRENCE Dryer does not start. POSSIBLE CAUSE Electrical power cord is not securely plugged in or plug may be loose. SOLUTION Make sure the plug fits tightly in wall outlet. House fuse blown or circuit breaker tripped. Reset circuit breaker or replace fuse. Make sure electrical line is not overloaded and the dryer is on a separate circuit. Thermal limiter tripped. Call authorized service person for replacement. Dryer runs but won't heat. There are 2 house fuses in the dryer circuit. If 1 of the 2 fuses is blown, the drum may turn but the heater will not operate. Replace fuse. Gas supply valve is not open (gas models). Check to make sure supply valve is open. See INSTALLATION INSTRUCTIONS for procedure. Dryer does not have anough air supply to See INSTALLATION INSTRUCTIONS. support the burner flame (gas models). LP gas supply tank is empty or there has been a utility interruption of natural gas (gas models). Refill or replace tank. Dryer should heat when utility service is restored. Drying cycle takes too long, outside of the dryer feels too hot or smells hot. Lint screen is clogged with lint. Exhaust duct requirements have not been met. Make sure all lint has been removed from the dryer lint screen before starting each cycle. Exhaust duct must be at least 4 inches in diameter and made of rigid or flexible metal. When in place, the duct must have no more than two 90° bends and must not exceed length listed in INSTALLATION INSTRUCTIONS. Electric dryer is connected to a 208 volt circuit. Drying time will be 20% longer than drying on a 240 volt circuit. Drying procedures have not been followed. See Drying Procedures . Outside exhaust hood or exhaust duct may Clean out any obstruction. be clogged or restricted. High humidity. Use a dehumidifier near the dryer. Excessive wrinkling. Dryer is overloaded. Do not overload. See Drying Procedures . Items left in dryer too long. Remove items as soon as cycle ends. Insufficient sorting of items. See Drying Procedures . Drying temperature too high. Follow fabric care label instructions. Scratching or chipping of the drum finish. Foreign objects such as coins, pins, clips or buttons are inside the dryer. Permanently attached items such as belt buckles, zippers and fasteners may be hitting the inside of the drum. Always remove foreign objects from pockets before laundering. Remove objects from drum and restart dryer. It may be necessary to baste a scrap of material securely around ornaments before drying to prevent scratching and damage to the dryer. Drum damage caused by foreign objects or permanently attached items is not covered by the warranty. 5
-
 1
1 -
 2
2 -
 3
3 -
 4
4 -
 5
5 -
 6
6
 |
 |