Frigidaire FFRU17G8QW Complete Owner's Guide - Page 6
First Steps, Setting The, Temperature Control, Optional Features
 |
View all Frigidaire FFRU17G8QW manuals
Add to My Manuals
Save this manual to your list of manuals |
Page 6 highlights
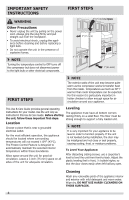
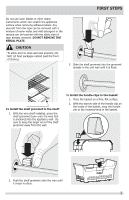
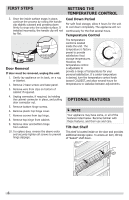
FIRST STEPS SETTING THE TEMPERATURE CONTROL 3. Once the inside surface snaps in place, continue the process by rolling the handle clip slightly outward and pressing down firmly to snap onto the outside surface. If installed incorrectly, the handle clip will not lay flat. Door Removal If door must be removed, unplug the unit. 1. Gently lay appliance on its back, on a rug or blanket. 2. Remove 2 base screws and base panel. 3. Remove wire from clips on bottom of cabinet if required. 4. Unplug connector, if required, by holding the cabinet connector in place, and pulling door connector out. 5. Remove bottom hinge screws. 6. Remove plastic top hinge cover. 7. Remove screws from top hinge. 8. Remove top hinge from cabinet. 9. Remove door and bottom hinge from cabinet. 10. To replace door, reverse the above order and securely tighten all screws to prevent hinge slippage. Cool Down Period For safe food storage, allow 4 hours for the unit to cool down completely. The appliance will run continuously for the first several hours. Temperature Control The temperature control is located inside the unit. The temperature is factory preset to provide satisfactory food storage temperatures. However, the temperature control is adjustable to provide a range of temperatures for your personal satisfaction. If a colder temperature is desired, turn the temperature control knob toward COLDEST, and allow several hours for temperatures to stabalize between adjustments. OPTIONAL FEATURES NOTE Your appliance may have some, or all of the features listed below. Become familiar with these features, and their use and care. Tilt-Out Shelf This shelf is located inside on the door and provides additional storage space. To access an item, tilt top of "basket" shelf down. 6
-
 1
1 -
 2
2 -
 3
3 -
 4
4 -
 5
5 -
 6
6 -
 7
7 -
 8
8 -
 9
9 -
 10
10 -
 11
11 -
 12
12
 |
 |
