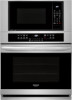
Frigidaire FGMC3066UF Installation Instructions
Frigidaire FGMC3066UF Manual
 |
View all Frigidaire FGMC3066UF manuals
Add to My Manuals
Save this manual to your list of manuals |
Frigidaire FGMC3066UF manual content summary:
- Frigidaire FGMC3066UF | Installation Instructions - Page 1
INSTRUCTIONS INSTALLATION AND SERVICE MUST BE PERFORMED BY A QUALIFIED INSTALLER. IMPORTANT: SAVE FOR LOCAL ELECTRICAL INSPECTOR'S USE. READ AND SAVE THESE INSTRUCTIONS chart below for your model. You may find . NOTES: 1. Base must be capable of supporting 225 pounds (102 kg). 2. Allow at least - Frigidaire FGMC3066UF | Installation Instructions - Page 2
Guide for future reference. Do not discard oven removal tools found in the literature bag. IMPORTANT SAFETY INSTRUCTIONS • Be sure your combination oven is installed and grounded properly by a qualified installer or service The oven support surface may by your model, see Electrical Code, Part 1, and - Frigidaire FGMC3066UF | Installation Instructions - Page 3
MICROWAVE/ WALL OVEN COMBINATION INSTALLATION INSTRUCTIONS Electrical Shock Hazard • Electrical ground is required on this /NFPA No. 70-latest edition, or with CSA Standard C22.1, Canadian Electrical Code, Part 1, and local codes and ordinances. Risk of electrical shock (Failure to heed this warning - Frigidaire FGMC3066UF | Installation Instructions - Page 4
MICROWAVE/ WALL OVEN COMBINATION INSTALLATION INSTRUCTIONS If oven is used in a new branch circuit oven and visible when the door is opened. When ordering parts for or making inquires about your oven, always be sure to include the model and serial numbers and a lot number or letter from - Frigidaire FGMC3066UF | Installation Instructions - Page 5
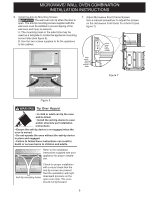
to the cabinet. 7. Adjust Microwave Front Frame Screws Use a manual screwdriver to adjust the screws on the microwave front frame for a killed. • Install the anti-tip device to oven and/or structure per installation instructions. • Ensure the anti-tip device is re-engaged when the oven is moved. - Frigidaire FGMC3066UF | Installation Instructions - Page 6
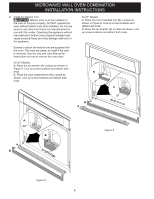
supplied with the oven. The trims are easier to install if the door is removed. See the Use and Care Manual for instructions on how to remove the oven door. All 30" Models: A. Place the air diverter (A) in place as shown in Figure 8. Line up screw locations and attach both ends. B. Place the - Frigidaire FGMC3066UF | Installation Instructions - Page 7
IMPORTANT NOTE A cooling fan inside the upper rear part above the oven (some models) provides cooling of the oven electrical and electronic components . Before You Call for Service Read the Before You Call for Service Checklist and operating instructions in your Use and Care Guide. It may save you - Frigidaire FGMC3066UF | Installation Instructions - Page 8
NOTES 8 - Frigidaire FGMC3066UF | Installation Instructions - Page 9
debe ser capaz de soportar un peso de 225 libras (102 kilogramos). 2. Permita un espacio de al menos 21" (53,3 cm) en la parte delantera del horno para la profundidad de la puerta cuando está abierta. 3. La dimensión G (profundidad del espacio) es fundamental para la instalación adecuada - Frigidaire FGMC3066UF | Installation Instructions - Page 10
ón del horno que se encuentran en la bolsa con los manuales. INSTRUCCIONES IMPORTANTES DE SEGURIDAD • Asegúrese de que su combinaci última versión, o con la Norma Canadiense CSA C22.1 del Código Canadiense de Electricidad, Parte 1, y los códigos y leyes locales. No se debe usar un cordón de extensi - Frigidaire FGMC3066UF | Installation Instructions - Page 11
con el Código Eléctrico Nacional ANSI/NFPA No. 70, última versión, o con la Norma CSA C22.1 del Código Canadiense de Electricidad, Parte 1, y los códigos y leyes locales. Riesgo de choque eléctrico (el caso omiso de esta advertencia puede provocar electrocución u otras lesiones graves.) Este - Frigidaire FGMC3066UF | Installation Instructions - Page 12
horno. 3. Coloque el horno en la abertura del gabinete. Deslice el horno hacia adentro, dejando un espacio de 1½" (3,8 cm) entre el horno y la parte delantera del gabinete (vea la figura 5). 4. Tire del cable blindado a través del agujero destinado para eso en el gabinete y hacia la caja de empalme - Frigidaire FGMC3066UF | Installation Instructions - Page 13
dos tornillos proporcionados para fijar el electrodoméstico al mueble. 7. Ajustar los tornillos del marco frontal de microondas Use un destornillador manual para ajustar los tornillos en el marco frontal del microondas para un ajuste al ras (consulte figura 7). ADJUST SCREWS AJUSTAR LOS TORNILLOS - Frigidaire FGMC3066UF | Installation Instructions - Page 14
tornillos para fijar el borde inferior se suministran con el horno. Los adornos son más fáciles de instalar si se retira la puerta. Consulte el Manual de uso y cuidado para obtener instrucciones sobre cómo retirar la puerta del horno. Todos los modelos de 30 ": A. Coloque el desviador de aire (A) en - Frigidaire FGMC3066UF | Installation Instructions - Page 15
(asado a la parrilla), el elemento superior del horno debe volverse rojo. Figura 10 NOTA IMPORTANTE El ventilador de enfriamiento dentro de la parte trasera superior sobre el horno (algunos modelos) proporciona el enfriamiento de los componentes eléctricos y electrónicos del horno. Si el horno - Frigidaire FGMC3066UF | Installation Instructions - Page 16
NOTAS 16 - Frigidaire FGMC3066UF | Installation Instructions - Page 17
ÉLECTRICITÉ DE VOTRE LOCALITÉ. VEUILLEZ LIRE ET CONSERVER CES INSTRUCTIONS POUR VOUS Y REPORTER ULTÉRIEUREMENT. POUR VOTRE SÉCURITÉ qui pourrait entraîner des dommages ou un incendie. REMARQUES : 1. La base doit pouvoir supporter un poids de 102,1 kg (225 lb). 2. Laissez un dégagement d'au moins - Frigidaire FGMC3066UF | Installation Instructions - Page 18
À CÔTE. Remarque importante pour l'utilisateur Conservez ces instructions avec le guide de l'utilisateur pour vous y reporter ultérieurement. Ne la terre de façon appropriée par un installateur qualifié ou un technicien de service. • Ce four encastré doit être mis à la terre conformément aux codes - Frigidaire FGMC3066UF | Installation Instructions - Page 19
INSTRUCTIONS D'INSTALLATION DE LA COMBINAISON DE FOURS À MICRO-ONDES ET ENCASTRÉ Risque de décharge électrique • Une mise à la terre électrique est requise sur cet appareil. • Ne - Frigidaire FGMC3066UF | Installation Instructions - Page 20
INSTRUCTIONS D'INSTALLATION DE LA COMBINAISON DE FOURS À MICRO-ONDES ET ENCASTRÉ Si le four est raccordé à un nouveau circuit de dérivation (Code national de l'électricité de - Frigidaire FGMC3066UF | Installation Instructions - Page 21
ée. • Ne faites pas fonctionner la cuisinière si le dispositif anti-renversement n'est pas en place et enclenché. • Le non-respect de ces instructions peut causer des blessures fatales ou de graves brûlures aux enfants et aux adultes. Pour une installation adéquate du dispositif anti-renversement - Frigidaire FGMC3066UF | Installation Instructions - Page 22
INSTRUCTIONS D'INSTALLATION DE LA COMBINAISON DE FOURS À MICRO-ONDES ET ENCASTRÉ 8. Installation de la garniture inférieure La moulure inférieure doit être installée pour que - Frigidaire FGMC3066UF | Installation Instructions - Page 23
supérieur du four devrait rougir. Avant de faire appel au service après-vente Lisez la section de vérification « Avant de faire appel au service après-vente », ainsi que les instructions d'utilisation de votre Guide d'utilisation et d'entretien. Cela pourrait vous faire économiser temps et argent - Frigidaire FGMC3066UF | Installation Instructions - Page 24
NOTES 24
-
 1
1 -
 2
2 -
 3
3 -
 4
4 -
 5
5 -
 6
6 -
 7
7 -
8
-
9
-
10
-
11
-
12
-
13
-
14
-
15
-
16
-
17
-
18
-
19
-
20
-
21
-
22
-
23
-
24
 |
 |
1
MICROWAVE/ WALL OVEN COMBINATION
INSTALLATION INSTRUCTIONS
B
A
D
F
I
H
G
11½”
(29.2 cm)
1¼”
(3.2 cm)
Min.
3” (7.6 cm)
Max.
1” (2.5 cm)
Min.
(104 cm)
C
INSTALLATION AND SERVICE MUST BE PERFORMED BY A QUALIFIED INSTALLER.
IMPORTANT: SAVE FOR LOCAL ELECTRICAL INSPECTOR'S USE.
READ AND SAVE THESE INSTRUCTIONS FOR FUTURE REFERENCE.
FOR YOUR SAFETY:
Do not store or use gasoline or other flammable vapors
and liquids in the vicinity of this or any other appliance.
P/N 807611004 (1903) Rev. B
English – pages 1-8
Español – páginas 9-16
Français - pages 17-24
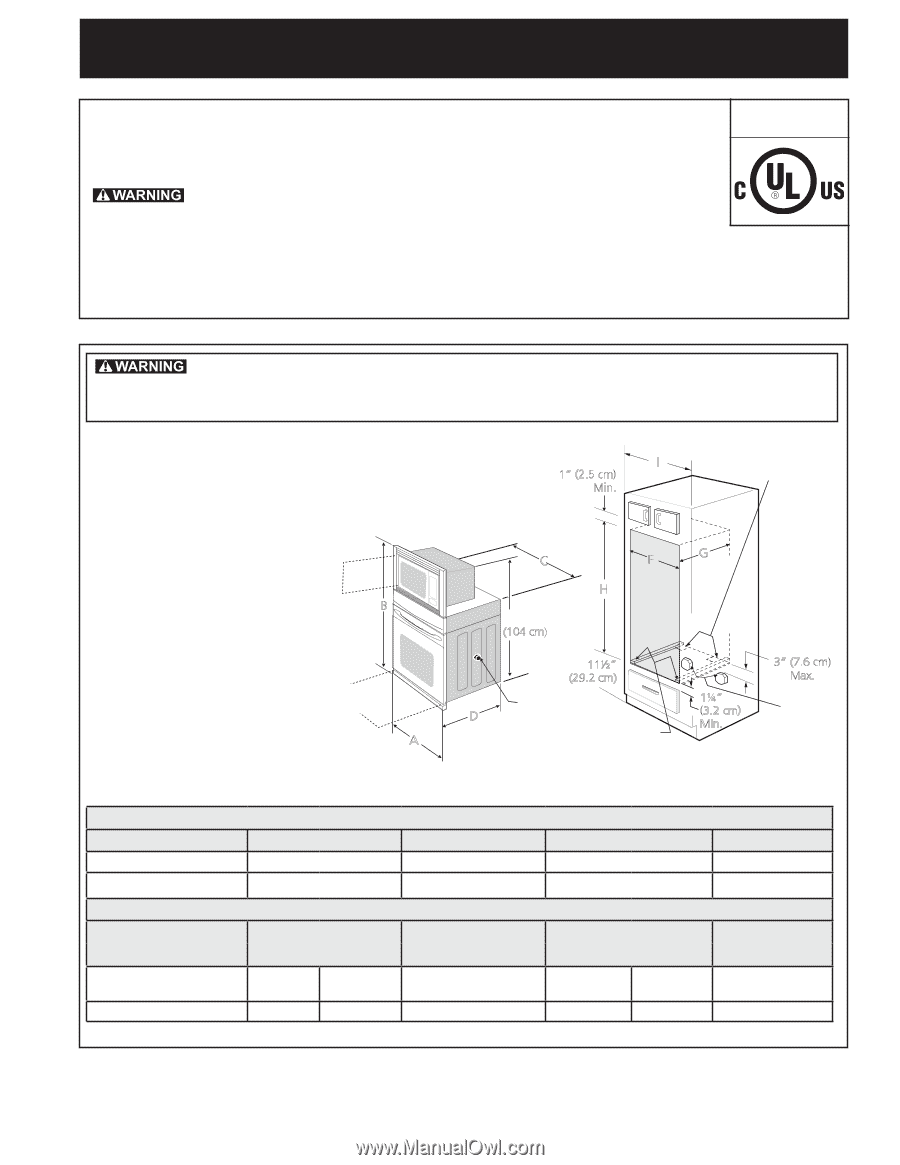
All dimensions are stated in inches and (cm).
Do not remove spacers (if equipped) on the side walls and/or on the back of the built-in oven.
These spacers center the oven in the space provided. The oven must be centered to prevent excess heat
buildup that may result in heat damage or fire.
2" (5 cm) Wide Wood
Spacer if Needed
NOTES:
1. Base must be capable of supporting 225 pounds (102 kg).
2. Allow at least 21" (53.3cm) clearance in front of oven for door
depth when it is open.
3. Dimension G (cutout depth) is
critical to the proper installation
of the built-in oven. If the
oven decorative trim does not
butt against the cabinet verify
dimension G to assure it is the
required depth.
Door Open
(see note 2)
Spacer
Electrical
Junction Box
(right or left side)
Hole for
Cable
(right or
left side
depending
on model)
* Suggested distance from floor
is 11½" (29.2 cm).
Minimum required distance is
4 ½" (11.4 cm)
Figure 1
Printed in USA
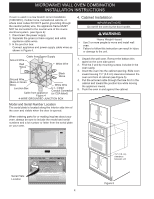
PRODUCT DIMENSIONS
MODEL
A
B
C
D
27" (68.8cm) Wall Oven
27 (68.6)
42±²³ (108.8)
24´²µ (62.5)
24¶²· (62.9)
30" (76.2cm) Wall Oven
30 (76.2)
42¼ (107.7)
28¸²· (71.8)
24¶²· (62.9)
CUTOUT DIMENSIONS AND CABINET WIDTH
MODEL
F
G. Min.
H
I
Min.
Max.
Min.
Max.
27" (68.8cm) Wall Oven
24
7
/
8
(63.2)
25¼ (64.1)
23¾ (60.3)
41
1
/
8
(104.5)
41¼ (104.8)
27
1
/
8
(68.9) Min
30" (76.2cm) Wall Oven
28½ (72.4)
29 (73.7)
23¾ (60.3)
41
1
/
8
(104.5)
41¼ (104.8)
30
1
/
8
(76.5) Min
United States
and Canada
Your new wall oven has been designed to fit a limited variety of cutout sizes to make the job of installing easier. The
first step of your installation should be to measure your current cutout dimensions and compare them to the cutout
dimensions chart below for your model. You may find little or no cabinet work is necessary.
40-±²³"