Frigidaire FRQG7000LW Installation Instructions (All Languages) - Page 19
bosses through holes in lens and transition ring
 |
UPC - 012505383168
View all Frigidaire FRQG7000LW manuals
Add to My Manuals
Save this manual to your list of manuals |
Page 19 highlights
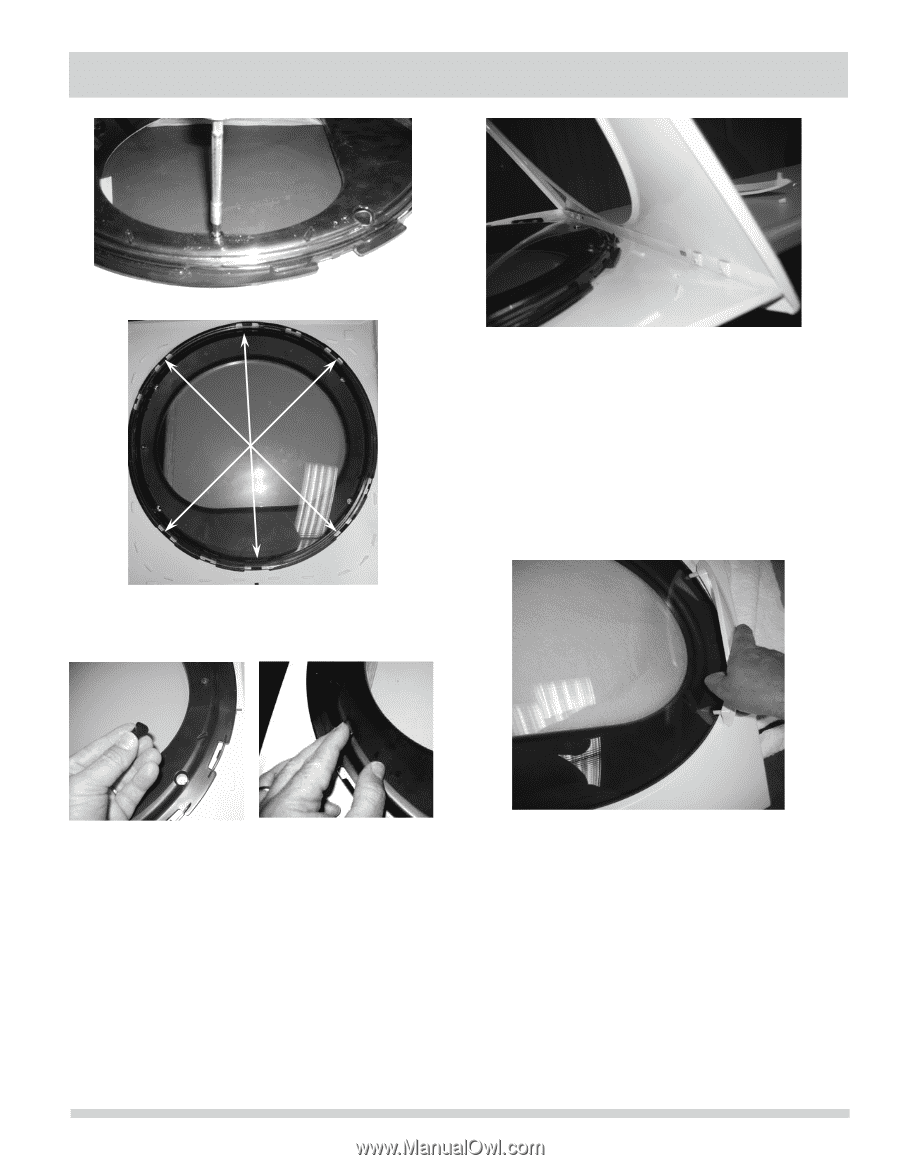
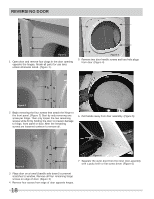
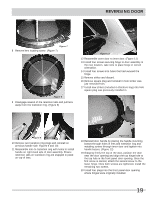
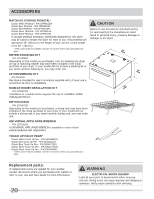
REVERSING DOOR Figure 7 8 Remove lens locating screw. (Figure 7) Figure 8 9 Disengage several of the retention tabs and pull lens away from the transition ring. (Figure 8) Figure 11 12 Reassemble outer door to inner door. (Figure 11) 13 Install four screws securing hinge to door assembly in the new location, take note to place hinge in correct orientation. 14 Install four screws into holes that had secured the hinge. 15 Remove striker and discard. 16 Remove square plug and reinstall in hole striker was just removed from. 17 Install new striker (included in literature bag) into hole square plug was previously installed in. Figure 9 Figure 10 10 Remove two transition ring plugs and reinstall on previous handle side. Figures 9 and 10) 11 Reassemble lens to transition ring with holes to install handle on right-hand side of door assembly. Ensure retention tabs on transition ring are snapped in place on top of lens. Figure 12 18 Reinstall door handle by placing the handle mounting bosses through holes in lens and transition ring and installing screws through inner door and tighten into handle bosses. (Figure 12) 19 Grasping firmly the top of the door, position the door near the door opening and align the top hinge hole to the top hole in the front panel door opening. Once the first screw is started, attach the second screw to the lower hinge. Once both screws are tightened, install the remaining two screws. 20 Install four plugs into the front panel door opening where hinges were originally installed. 19
-
 1
1 -
2
-
3
-
4
-
5
-
6
-
7
-
8
-
9
-
10
-
11
-
12
-
13
-
 14
14 -
 15
15 -
 16
16 -
 17
17 -
 18
18 -
 19
19 -
 20
20 -
 21
21 -
 22
22 -
 23
23 -
 24
24 -
25
-
26
-
27
-
28
-
29
-
30
-
31
-
32
-
33
-
34
-
35
-
36
-
37
-
38
-
39
-
40
-
41
-
42
-
43
-
44
-
45
-
46
-
47
-
48
-
49
-
50
-
51
-
52
-
53
-
54
-
55
-
56
-
57
-
58
-
59
-
60
-
61
-
62
-
63
-
64
 |
 |