Garmin Alpha T 20 Dog Collar Owners Manual - Page 6
Charging the Dog Collar Device, Acquiring Satellite Signals
 |
View all Garmin Alpha T 20 Dog Collar manuals
Add to My Manuals
Save this manual to your list of manuals |
Page 6 highlights
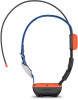
Charging the Dog Collar Device NOTICE To prevent corrosion, thoroughly dry the contacts on the dog collar device and the surrounding area before connecting the charging clip. You should fully charge the battery before you use the dog collar device for the first time. Charging a fully depleted battery takes about five hours. 1 Snap the charging clip onto the dog collar device . 2 Plug the small end of the power cable into the USB port on the charging clip. 3 Plug the power cable into a power source. The status LED is solid red when the collar is charging. 4 After the status LED turns solid green, remove the charging clip from the collar. Acquiring Satellite Signals Both the dog collar device and navigator must acquire satellite signals before you put the dog collar device on your dog. Acquiring satellites can take a few minutes. 1 Go outdoors to an open area. 2 Turn on both devices. in the status bar shows the GPS signal strength. When the dog collar device has acquired satellite signals, the status LED flashes green. Adding a Dog to the Alpha® Navigator Using Wireless Pairing To pair wirelessly, the dog collar device must be within range of the Alpha navigator. 1 Hold the power button on the dog collar device until the device emits two series of beeps (about 2 seconds), and then release the power button. The status LED flashes blue. The dog collar device is now ready to be paired with a navigator. 2 On the navigator, select Dog List > Add Dog. 3 Select Pair Collar, and follow the on-screen instructions. 4 After successfully adding the dog collar device, enter the name of the dog, and select . 5 Select a beacon color for this dog collar device, and select . 2 Getting Started
-
 1
1 -
 2
2 -
 3
3 -
 4
4 -
 5
5 -
 6
6 -
 7
7 -
 8
8 -
 9
9 -
 10
10 -
 11
11 -
 12
12 -
13
-
14
 |
 |
