Garmin Forerunner 201 Quick Start Guide - Page 2
Starting Up the Forerunner 201 - manual
 |
UPC - 753759043278
View all Garmin Forerunner 201 manuals
Add to My Manuals
Save this manual to your list of manuals |
Page 2 highlights
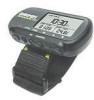
Forerunner 201 Setup Forerunner 201 Setup Forerunner 201 Setup Forerunner 201 Setup Forerunner 201 Buttons 1 Charging the Forerunner 201 The Forerunner operates on a built-in battery. Before using the Forerunner, you must charge the internal battery. To charge the Forerunner 201: 1. Snap the Forerunner into the charging bracket as shown in the image above. 2. Plug the charging cord into a 120 Volt outlet. The message "Battery Charging in Progress" appears on the Forerunner's screen when it is charging. 3. Leave the Forerunner until it is completely charged. When the message "Battery Charging Completed" appears on the screen, the unit is fully charged and ready for use. Forerunner 201 Battery Life When the Forerunner is fully charged, you should get about 15 hours out of the battery before it needs to be charged again. The Forerunner charges in about one to three hours. 2 Starting Up the Forerunner 201 After the Forerunner is completely charged, it is ready for use. Welcome Page To turn on the Forerunner 201: 1. Press and hold the POWER button until the Welcome Page is displayed. 2. Allow the Forerunner time to track satellites the first time you use it. Leave the Forerunner outside with a clear view of the sky for 15-30 minutes. After the first use, it should take less than one (1) minute to acquire satellites. 3. When the Forerunner acquires enough satellite signals to determine your location, the satellite dish icon in the upper left corner of the screen stops flashing. Forerunner 201 Icons Three icons in the upper left-hand corner provide at-a-glancestatus of the Forerunner: battery icon, timer icon, and satellite dish icon. Battery icon: The battery icon indicates how much battery power is left before the unit must be charged. A full battery icon indicates a fully-charged battery. Timer icon: When the stop watch feature of the Forerunner is being used, the timer icon displays just below the battery icon. Satellite Dish icon: When the Forerunner has acquired enough satellites to establish your GPS location fix, this icon displays just below the timer icon. 3 Changing the Mode Press the MODE button to cycle through the various modes of the Forerunner. The two default modes, the Timer Mode and the Menu Mode, are shown below. Timer Mode Menu Mode Timer Mode: The Timer Mode allows you to start or stop the timer, split a lap, and reset the timer. It also provides access to three data pages or screens: The Timer Screen displays the length of time, pace/speed, and distance of your workout. The Lap Screen displays information on the current lap. You can change the Custom Screen to display the fields you want to view, such as calories and average pace/speed. Menu Mode: The Menu Mode provides access to features and settings. Map Mode: The Map Mode, when enabled through the Navigation menu, displays where you are going and where you have been on a graphic map. Refer to the Forerunner Owner's Manual for complete information on all of the Forerunner's modes and screens. 4 Setting the Time Zone When the Forerunner is ready for use, you may need to check the Time Zone selection. To change the Time Zone: 1. Press the MODE button to display the Menu Mode. 2. The current date and time is displayed on the top of the screen. When the Forerunner has established a GPS fix, U.S. Central Time is selected as the default Time Zone. 3. To change the Time Zone, Use the UP/DOWN buttons to select 'SETTINGS' and press ENTER. Settings Menu 4. Use the UP/DOWN buttons to select 'SET TIME' and press ENTER. 5. Use the UP/DOWN buttons to select the 'TIME ZONE' field and press ENTER. 6. Use the UP/DOWN buttons to select the correct time zone and press ENTER. 5 Adjusting the Strap The Forerunner has been designed to comfortably fit your wrist. A strap extension provides additional length and easily attaches to the existing strap. To add the strap extension: 1. Slide the end of the existing strap through the connector on the extension. 2. Place on your wrist or arm. 3. Slide the end of the extension through the existing connector. 4. Adjust to fit comfortably and secure the strap. Refer to the Owner's Manual for complete instructions. Using the Forerunner 201 Buttons mode reset enter lap start/stop POWER MODE RESET ENTER DOWN UP LAP START/STOP The Red POWER button: • Press and hold to turn the unit on or off • Press and release, with the unit on, to turn the backlight on or off • Press and hold RESET, then simultaneously press POWER to reset the unit if it is hung up or frozen The MODE button: • Press to switch between the Timer and Menu Modes • Press to back out or escape out of the present page or screen • Press and hold to change between PACE and SPEED (This setting impacts calorie calculation. See owner's manaual.) The RESET/LAP button: • Press to split a lap when the timer is running • When the timer is stopped, press and hold for 3 seconds to reset the timer and start a new run • Press and hold, then simultaneously press POWER to reset the unit if it is hung up or frozen The ENTER/(START/STOP) button: • In Timer Mode and Map Mode (if enabled), press to start or stop the Timer • Press to confirm data entry or menu selection The UP/DOWN buttons: • Press to cycle through the different screens of the Timer Mode • Press to highlight options on pages and menus • Press to adjust display contrast on the initial welcome screen • Press to Zoom out and Zoom in on the Map Mode (if enabled) • Press to cycle through the different screens in the Virtual Partner™ Mode (if enabled)
-
 1
1 -
 2
2
 |
 |
