Garmin eTrex H Owner's Manual - Page 20
Tracks Editing a Route - reviews
 |
UPC - 753759072858
View all Garmin eTrex H manuals
Add to My Manuals
Save this manual to your list of manuals |
Page 20 highlights
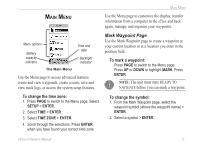
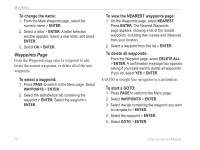
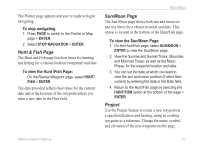
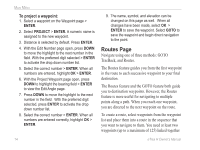
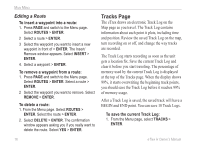
Main Menu Editing a Route To insert a waypoint into a route: 1. Press PAGE and switch to the Menu page. Select ROUTES > ENTER. 2 Select a route > ENTER. 3 Select the waypoint you want to insert a new waypoint in front of > ENTER. The Insert/ Remove window appears. Select INSERT > ENTER. 4. Select a waypoint > ENTER. To remove a waypoint from a route: 1. Press PAGE and switch to the Menu page. Select ROUTES > ENTER. Select a route > ENTER. 2 Select the waypoint you want to remove. Select REMOVE > ENTER. To delete a route: 1. From the Menu page. Select ROUTES > ENTER. Select the route > ENTER. 2. Select DELETE > ENTER. The confirmation window appears asking you if you really want to delete the route. Select YES > ENTER. Tracks Page The eTrex draws an electronic Track Log on the Map page as you travel. The Track Log contains information about each point it plots, including time and position. Review the saved Track Log on the map, turn recording on or off, and change the way tracks are recorded. The Track Log starts recording as soon as the unit gets a location fix. Save the current Track Log and clear it before you start traveling. The percentage of memory used by the current Track Log is displayed at the top of the Tracks page. When the display shows 99%, it starts overwriting the beginning track points, you should save the Track Log before it reaches 99% of memory usage. After a Track Log is saved, the saved track will have a BEGIN and END point. You can save 10 Track Logs. To save the current Track Log: 1. From the Menu page, select TRACKS > ENTER. 16 eTrex H Owner's Manual
-
 1
1 -
2
-
3
-
4
-
5
-
6
-
7
-
8
-
9
-
10
-
11
-
12
-
13
-
14
-
 15
15 -
 16
16 -
 17
17 -
 18
18 -
 19
19 -
 20
20 -
 21
21 -
 22
22 -
 23
23 -
 24
24 -
 25
25 -
26
-
27
-
28
-
29
-
30
-
31
-
32
 |
 |