Garmin eTrex Summit Quick Start Guide - Page 2
Quick Start Guide - review
 |
View all Garmin eTrex Summit manuals
Add to My Manuals
Save this manual to your list of manuals |
Page 2 highlights
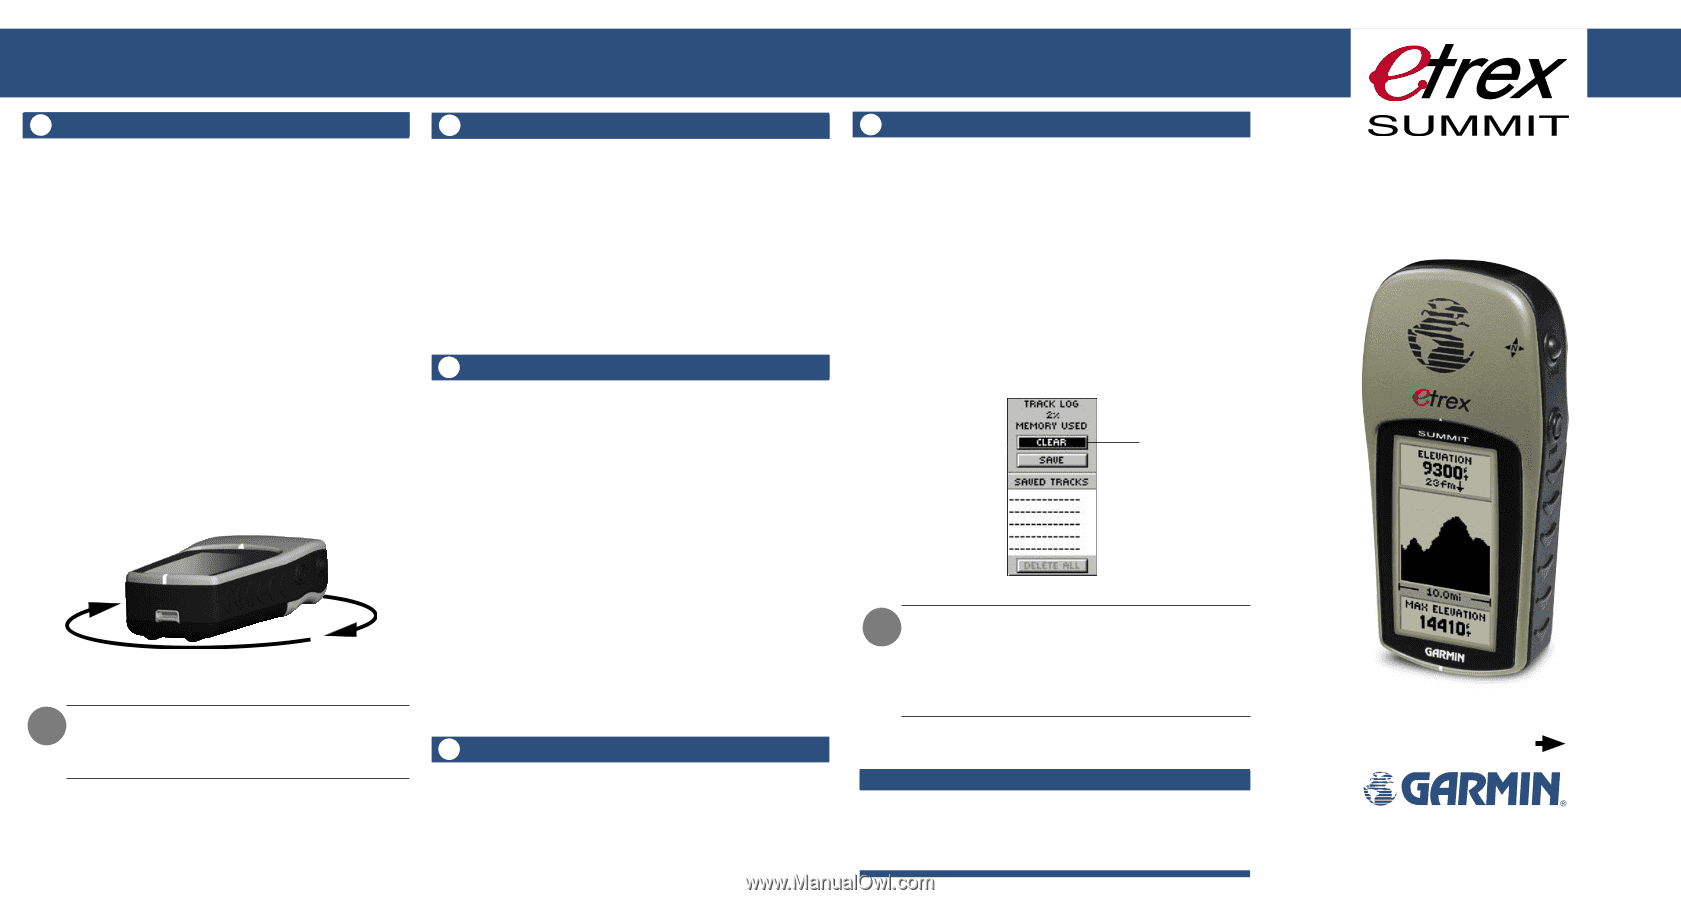
eTrex Summit Setup eTrex Summit Features eTrex Summit Features 7 Calibrating the Compass The eTrex Summit's Electronic Compass needs to be calibrated outdoors after the batteries have been changed, before using the unit for navigation. Failure to calibrate the Electronic Compass can result in gross inaccuracy of the compass feature. To calibrate the compass: 1. Press the PAGE button until the Menu Page is displayed. 2. Press the UP or DOWN button to highlight 'CALIBRATE', then press the ENTER button. 3. Press the UP or DOWN button to highlight 'COMPASS', then press the ENTER button. 4. With 'START' highlighted, press the ENTER button to begin the calibration. 5. Making sure that the unit is level, rotate the eTrex Summit slowly two turns in the same direction. A speed scale on the display indicates whether you are rotating the unit 'Too Fast', 'Too Slow' or 'Just Right'. A message is displayed when the compass has been successfully calibrated. NOTE: The eTrex Summit needs to be level during compass calibration and use. If the unit is tilted on either axis the compass feature will become less accurate. 8 Marking a Waypoint Waypoints are locations that you can mark (save in memory) as destinations to navigate to later. To mark a waypoint: 1. Press and hold the ENTER button. The 'MARK WAYPOINT' page appears. 2. The eTrex Summit automatically assigns a numeric name to the new waypoint. With 'OK?' highlighted, press ENTER. The waypoint is now stored in the eTrex Summit's memory. 9 Going To A Waypoint The eTrex Summit guides you to a waypoint using a GOTO (GOTO means GOing TO a destination in a direct line). To start a GOTO: 1. Press the PAGE button to switch to the MENU Page. Press the the UP or DOWN button to highlight 'WAYPOINTS' and press ENTER. The REVIEW WAYPOINT Page appears. 2. Press the UP or DOWN button to select the tab containing the desired waypoint name, then press ENTER. Press the UP or DOWN button to select the desired waypoint name, then press ENTER. The Review Waypoint page for that waypoint appears. 3. Press the UP or DOWN button to highlight 'GOTO', then press ENTER. The POINTER Page appears. 4. Follow the 'POINTER'. When the 'POINTER' is facing the top of the display you are on course. As you reach your destination, the message "ARRIVING DESTINATION" is displayed. 10 Stopping a GOTO To stop a GOTO: 1. Press the PAGE button and switch to the POINTER Page. Press ENTER. 2. Highlight 'STOP NAVIGATION' on the OPTIONS Page and press ENTER. 11 Clearing The Track Log After you have used the eTrex Summit for a few trips, the map display can become a bit crowded from keeping track of your every move. You can clean up the screen by clearing the track log (the lines left on the Map Page): To clear the track log: 1. Press the PAGE button to switch to the MENU Page. 2. Press the UP or DOWN button to highlight 'TRACKS'. 3. Press ENTER. You are now on the TRACKS Page. Press the UP button to highlight 'CLEAR'. Press ENTER. 4. Press the DOWN button to highlight 'YES'. Press ENTER. Press the PAGE button to select any page. Highlight CLEAR and press ENTER Track Log Page NOTE: The track log contains the elevation data that is displayed on the ELEVATION Page. Clearing the track log will clear the Elevation Profile also. To save the Elevation Profile you will need to save the track log. Refer to the Owner's Manual for information on saving the track log. Important Note More Information: Visit the Garmin Web site for current updates and details about eTrex Summit operation and accessories. www.garmin.com QUICK START GUIDE Step-by-Step Instructions to Get You Started (Turn this page and begin with Step 1) © 2004 Garmin Ltd. or its subsidiaries Garmin International, Inc. 1200 E. 151st St., Olathe, KS 66062 USA Part Number 190-00396-01 Rev. A
-
 1
1 -
 2
2
 |
 |