Garmin nuvi 2597LMT Owner's Manual - Page 10
Using Suggested Routes, Viewing Current Location Information, Avoiding Road Features, About Custom - help
 |
View all Garmin nuvi 2597LMT manuals
Add to My Manuals
Save this manual to your list of manuals |
Page 10 highlights
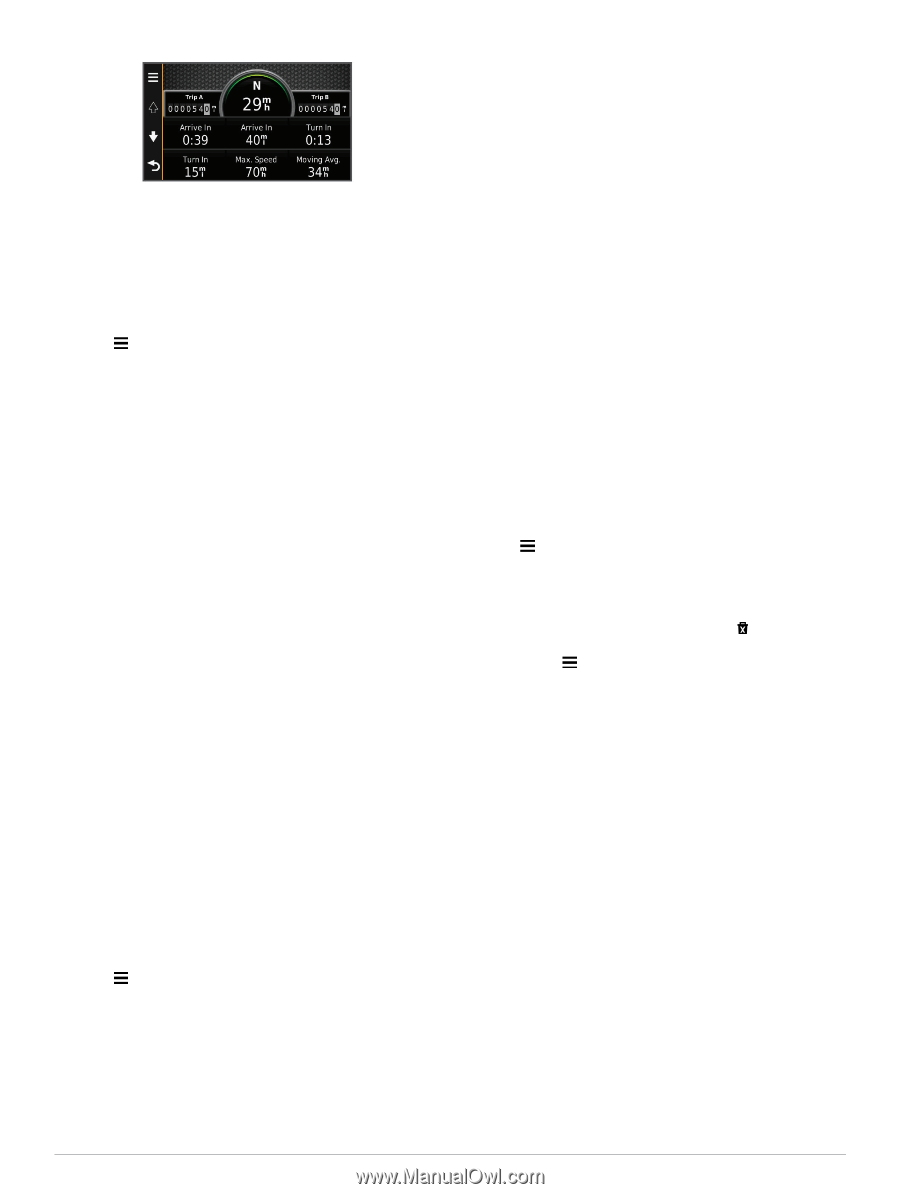
Viewing the Trip Log Your device keeps a trip log, which is a record of the path you have traveled. 1 Select Settings > Map & Vehicle > Map Layers. 2 Select the Trip Log check box. Resetting Trip Information 1 From the map, select Speed . 2 Select > Reset Field(s). 3 Select an option: • When not navigating a route, select Select All to reset every data field except the speedometer, on the first page. • Select Reset Trip Data to reset the information on the trip computer. • Select Reset Max. Speed to reset the maximum speed. • Select Reset Trip B to reset the odometer. Using Suggested Routes Before you can use this feature, you must save at least one location and enable the travel history feature (page 13). Using the myTrends™ feature, your device predicts your destination based on your travel history, the day of the week, and the time of day. After you have driven to a saved location several times, the location may appear in the navigation bar on the map, along with the estimated time of travel, and traffic information. Select the navigation bar to view a suggested route to the location. Viewing Current Location Information You can use the Where Am I? page to view information about your current location. This feature is helpful if you need to tell emergency personnel your location. From the map, select the vehicle. Finding Nearby Services You can use the Where Am I? page to find nearby services, such as fuel, hospitals or police stations. 1 From the map, select the vehicle. 2 Select a category. Getting Directions to Your Current Location If you need to tell another person how to get to your current location, your device can give you a list of directions. 1 From the map, select the vehicle. 2 Select > Directions to Me. 3 Select a starting location. 4 Select Select. Avoiding Road Features 1 Select Settings > Navigation > Avoidances. 2 Select the road features to avoid on your routes, and select Save. About Custom Avoidances Custom avoidances allow you to avoid specific areas and sections of road. You can enable and disable custom avoidances as needed. Avoiding an Area 1 Select Settings > Navigation > Custom Avoidances. 2 If necessary, select Add Avoidances. 3 Select Add Avoid Area. 4 Select the upper-left corner of the area to avoid, and select Next. 5 Select the lower-right corner of the area to avoid, and select Next. The selected area is shaded on the map. 6 Select Done. Avoiding a Road 1 Select Settings > Navigation > Custom Avoidances. 2 Select Add Avoid Road. 3 Select the starting point of the section of road to avoid, and select Next. 4 Select the ending point of the road section, and select Next. 5 Select Done. Disabling a Custom Avoidance You can disable a custom avoidance without deleting it. 1 Select Settings > Navigation > Custom Avoidances. 2 Select an avoidance. 3 Select > Disable. Deleting Custom Avoidances 1 Select Settings > Navigation > Custom Avoidances. 2 Select an option: • To delete all custom avoidances, select . • To delete one custom avoidance, select the avoidance, and select > Delete. Customizing the Map Customizing the Map Tools You can select the shortcuts that appear in the map tools menu. 1 Select Settings > Map & Vehicle > Map Tools. 2 Select the map tools to include in the menu. 3 Select Save. Customizing the Map Layers You can customize which data appear on the map, such as icons for points of interest and road conditions. 1 Select Settings > Map & Vehicle > Map Layers. 2 Select the layers to include on the map, and select Save. Changing the Map Data Field 1 From the map, select a data field. NOTE: You cannot customize Speed. 2 Select a type of data to display. 3 Select Save. Changing the Map Perspective 1 Select Settings > Map & Vehicle > Driving Map View. 2 Select an option: • Select Track Up to display the map in two dimensions (2D), with your direction of travel at the top. • Select North Up to display the map in 2-D with north at the top. 6 Navigation
-
 1
1 -
2
-
3
-
4
-
 5
5 -
 6
6 -
 7
7 -
 8
8 -
 9
9 -
 10
10 -
 11
11 -
 12
12 -
 13
13 -
 14
14 -
 15
15 -
16
-
17
-
18
-
19
-
20
-
21
-
22
 |
 |