Gateway MX6922b 8511418 - Component Replacement Manual - Page 6
Operating System Recovery CD/DVD - new hard drive
 |
View all Gateway MX6922b manuals
Add to My Manuals
Save this manual to your list of manuals |
Page 6 highlights
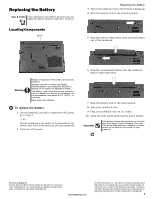
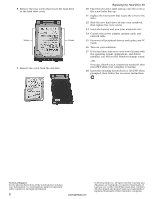
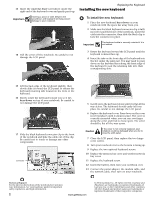
8 Remove the four screws that secure the hard drive to the hard drive cover. Screws Screws 9 Remove the cover from the old drive. Replacing the Hard Drive Kit 10 Place the new drive, label side up, onto the cover so the screw holes line up. 11 Replace the four screws that secure the cover to the drive. 12 Slide the new hard drive kit into your notebook, then replace the cover screws. 13 Insert the battery and turn your notebook over. 14 Connect the power adapter, modem cable, and network cable. 15 Reconnect all peripheral devices and replace any PC Cards. 16 Turn on your notebook. 17 If the hard drive was sent to you from Gateway with the operating system, applications, and drivers installed, you will see the Windows startup screen. -ORIf you see a blank screen, restart your notebook, then press F11 while your computer is starting. 18 Insert the Operating System Recovery CD/DVD when prompted, then follow the on-screen instructions. Technical Support See the label on the bottom of the notebook for Customer Care Information. See your hardware guide for important safety, regulatory, and legal information. 2 www.gateway.com © 2006 Gateway, Inc. All rights reserved. Gateway and eMachines are trademarks or registered trademarks of Gateway, Inc. in the United States and other countries. All other brands and product names are trademarks or registered trademarks of their respective companies.
-
 1
1 -
 2
2 -
 3
3 -
 4
4 -
 5
5 -
 6
6 -
 7
7 -
 8
8 -
 9
9 -
 10
10 -
 11
11 -
 12
12
 |
 |
