Gateway T-6340u 8513064 - Gateway Notebook Setup Poster - Page 2
your new Gateway, notebook
 |
View all Gateway T-6340u manuals
Add to My Manuals
Save this manual to your list of manuals |
Page 2 highlights
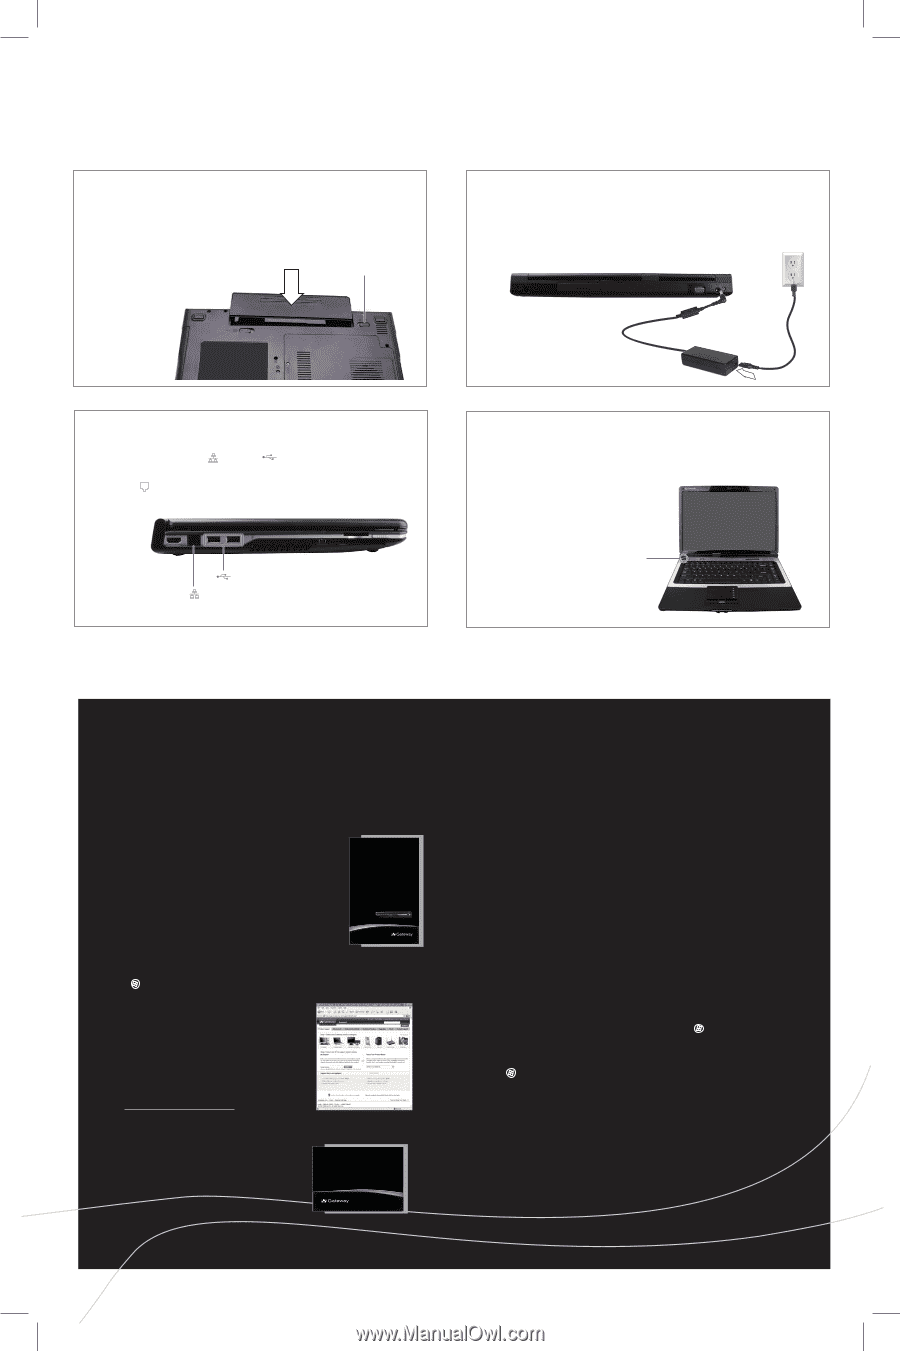
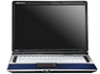
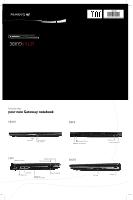
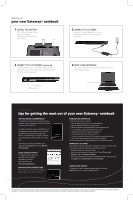
Setting up: your new Gateway® notebook 1 INSTALL THE BATTERY With the label side down, slide the battery into the battery compartment until it clicks. Then lock it in place. Lock 2 CONNECT TO AC POWER Leave the AC adapter plugged in for at least three hours the first time, so the battery will fully charge. 3 CONNECT TO THE INTERNET (optional) Connect an Ethernet ( ) or USB ( ) cable if using high speed Internet access or connect a phone cable to the modem jack ( ) if using dialup access. USB ports Ethernet jack 4 START YOUR NOTEBOOK Press the power button, then follow the on-screen instructions to complete Windows setup. Power button Getting help: tips for getting the most out of your new Gateway® notebook SEE YOUR ONLINE DOCUMENTATION For detailed information about using your Gateway notebook, see your Reference Guide that has been included on your hard drive. For general information about using Windows and the programs that are installed on your notebook, connecting your notebook to the Internet or a network, and protecting your computer, see your User Guide that has been included on your hard drive. To access your online documentation, click (Start), All Programs, then click Gateway Documentation. USER GUIDE ® CHECK GATEWAY SUPPORT For frequently-asked questions, setup help, and immediate information on common technical issues, go to www.support.gateway.com. SEE YOUR GETTING STARTED GUIDE After setting up your computer, read the Starter Guide guide for tips on using your notebook. STARTER GUIDE ® MANAGE YOUR BATTERY LIFE To get the most out of your battery: • Dim the display as low as you can comfortably see. • Remove Express Cards when not using them. • Modify the power management settings to reduce power use. • Turn off wireless devices when they are not in use. • Use sleep mode when not using your notebook. • Use the optical drive only when you need to. • Travel with an extra battery and fully charge batteries before traveling. • Use your AC power adapter whenever power is available. For more information, see "Managing Power" in your Reference Guide. WORK SAFELY & SECURELY Your Gateway notebook comes with the software you need to connect safely and securely. To ensure a high level of security, you should: • Regularly update your antivirus software. • Install all critical updates for Windows VistaTM (click (Start), All Programs, then click Windows Update). • Use the security features provided in the Windows VistaTM Security Center (click (Start), Control Panel, then click Security). CONTACT TECH SUPPORT To speak with a technical support representative, call toll-free 866-539-3901 (U.S.) or 800-297-5980 (Canada) Actual product may vary from image shown. Product specifications subject to change without notice. © 2008 Gateway, Inc. All rights reserved. Trademarks used herein are trademarks or registered trademarks of Gateway, Inc. in the United States and other countries. All other brands and product names are trademarks or registered trademarks of their respective companies.
-
 1
1 -
 2
2
 |
 |