Gateway T-6340u 8513206 - Gateway Notebook Reference Guide with eRecovery R0 - Page 114
the screw holes line up., Replace the screws that secure the bracket to the drive.
 |
View all Gateway T-6340u manuals
Add to My Manuals
Save this manual to your list of manuals |
Page 114 highlights
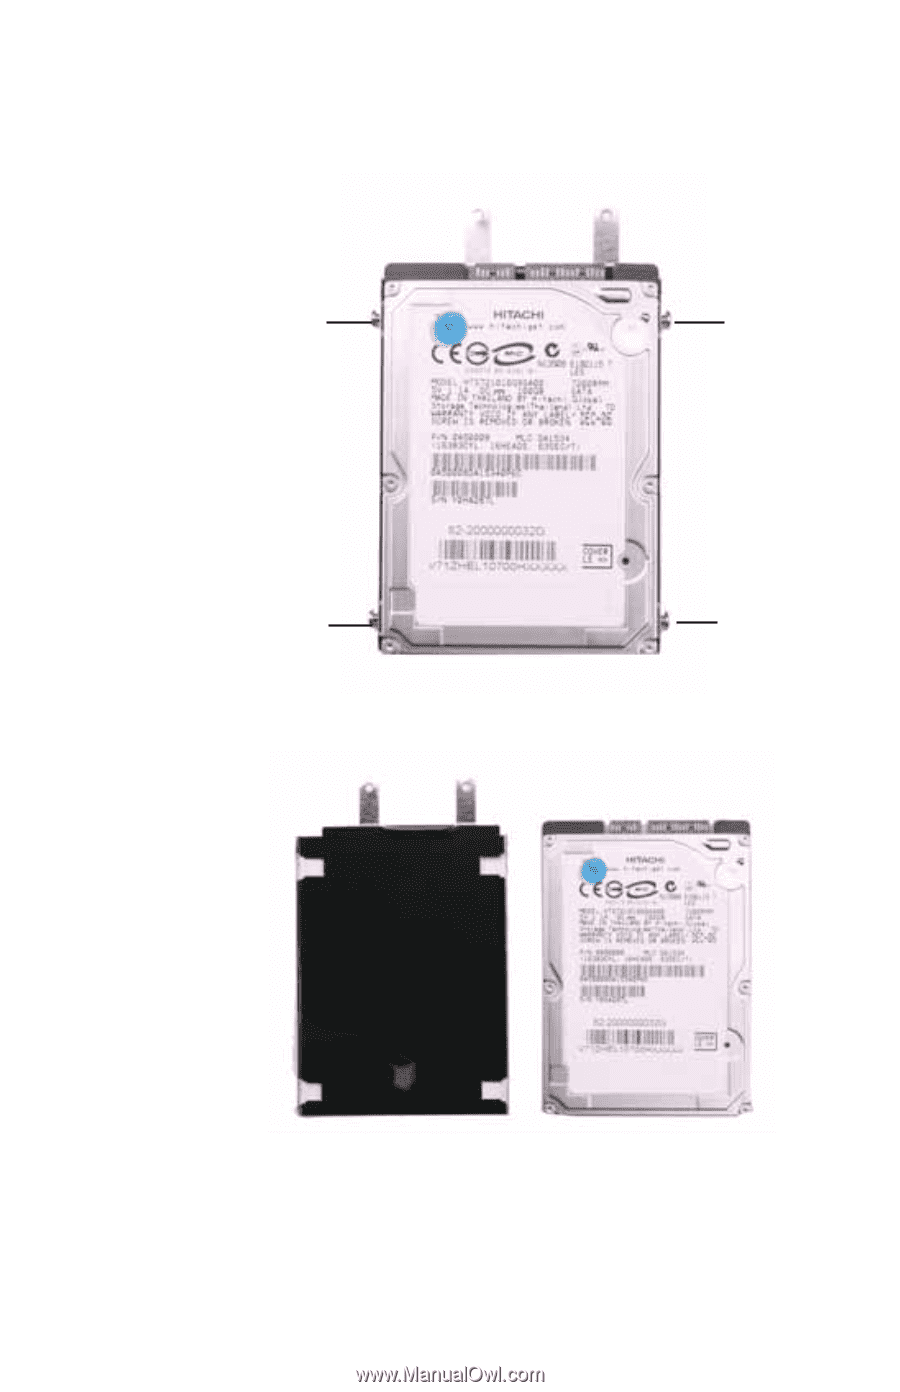
CHAPTER 8: Upgrading Your Notebook 13 Remove the four screws that secure the hard drive to the hard drive bracket. Screw Screw Screw Screw 14 Remove the bracket from the old drive. 15 Place the new drive, label side up, onto the bracket so the screw holes line up. 16 Replace the screws that secure the bracket to the drive. 106
-
 1
1 -
2
-
3
-
4
-
5
-
6
-
7
-
8
-
9
-
10
-
11
-
12
-
13
-
14
-
15
-
16
-
17
-
18
-
19
-
20
-
21
-
22
-
23
-
24
-
25
-
26
-
27
-
28
-
29
-
30
-
31
-
32
-
33
-
34
-
35
-
36
-
37
-
38
-
39
-
40
-
41
-
42
-
43
-
44
-
45
-
46
-
47
-
48
-
49
-
50
-
51
-
52
-
53
-
54
-
55
-
56
-
57
-
58
-
59
-
60
-
61
-
62
-
63
-
64
-
65
-
66
-
67
-
68
-
69
-
70
-
71
-
72
-
73
-
74
-
75
-
76
-
77
-
78
-
79
-
80
-
81
-
82
-
83
-
84
-
85
-
86
-
87
-
88
-
89
-
90
-
91
-
92
-
93
-
94
-
95
-
96
-
97
-
98
-
99
-
100
-
101
-
102
-
103
-
104
-
105
-
106
-
107
-
108
-
 109
109 -
 110
110 -
 111
111 -
 112
112 -
 113
113 -
 114
114 -
 115
115 -
 116
116 -
 117
117 -
 118
118 -
 119
119 -
120
-
121
-
122
-
123
-
124
-
125
-
126
-
127
-
128
-
129
-
130
-
131
-
132
-
133
-
134
-
135
-
136
-
137
-
138
-
139
-
140
-
141
-
142
-
143
-
144
-
145
-
146
-
147
-
148
-
149
-
150
-
151
-
152
-
153
-
154
-
155
-
156
-
157
-
158
-
159
-
160
-
161
-
162
-
163
-
164
-
165
-
166
 |
 |
CHAPTER 8: Upgrading Your Notebook
106
13
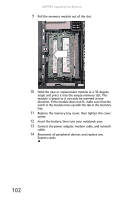
Remove the four screws that secure the hard drive to the
hard drive bracket.
14
Remove the bracket from the old drive.
15
Place the new drive, label side up, onto the bracket so
the screw holes line up.
16
Replace the screws that secure the bracket to the drive.
Screw
Screw
Screw
Screw