GE 98548 Instruction Manual - Page 2
TABLE OF CONTENTS, Package Contents, System Requirements, Battery Installation - mouse
 |
UPC - 030878985482
View all GE 98548 manuals
Add to My Manuals
Save this manual to your list of manuals |
Page 2 highlights
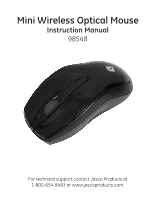
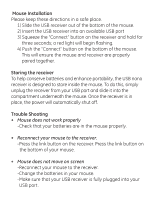
TABLE OF CONTENTS PACKAGE CONTENTS 3 SYSTEM REQUIREMENTS 3 BATTERY INSTALLATION 3 MOUSE INSTALLATION 4 TROUBLE SHOOTING 4 TWO YEAR LIMITED WARRANTY 5 FCC STATEMENT 5 Package Contents • Mini Wireless Optical Mouse • 2 AAA Energizer® Batteries • Mini Instruction Manual • USB Nano Receiver System Requirements • Windows® 2000 or higher • Mac OS 10.1 and higher • Available USB Port Battery Installation 1) Using your thumb, gently pry open the battery compartment door on the bottom of the mouse. 2) Remove the old batteries. 3) Insert 2 AAA batteries, being sure to match the polarity of the battery with the polarity marking inside the battery compartment . 4) Re-attach the battery door.
-
 1
1 -
 2
2 -
 3
3 -
 4
4 -
 5
5
 |
 |

TABLE OF CONTENTS
PACKAGE CONTENTS
.........................................................................................
3
SYSTEM REQUIREMENTS
..................................................................................
3
BATTERY INSTALLATION
...................................................................................
3
MOUSE INSTALLATION
......................................................................................
4
TROUBLE SHOOTING
.........................................................................................
4
TWO YEAR LIMITED WARRANTY
...................................................................
5
FCC STATEMENT
...................................................................................................
5
Package Contents
• Mini Wireless Optical Mouse
• 2 AAA Energizer
®
Batteries
• Mini Instruction Manual
• USB Nano Receiver
System Requirements
• Windows
®
2000 or higher
• Mac OS 10.1 and higher
• Available USB Port
Battery Installation
1) Using your thumb, gently pry open the battery
compartment door on the bottom of the mouse.
2) Remove the old batteries.
3) Insert 2 AAA batteries, being sure to match the polarity
of the battery with the polarity marking inside the battery
compartment.
4) Re-attach the battery door.