GE GTS18FBSWW Use and Care Manual
GE GTS18FBSWW - 18.2 cu. Ft. Top-Freezer Refrigerator Manual
 |
UPC - 084691124009
View all GE GTS18FBSWW manuals
Add to My Manuals
Save this manual to your list of manuals |
GE GTS18FBSWW manual content summary:
- GE GTS18FBSWW | Use and Care Manual - Page 1
Controls 5 Installation Instructions Preparing to Install the Refrigerator 9 Reversing the Door Swing . . .13-16 Water Line Installation . . . . . .10-12 Troubleshooting Tips Before You Call For Service . . 17, 18 Normal Operating Sounds . . . . . .17 Consumer Support Consumer Support . . . . Back - GE GTS18FBSWW | Use and Care Manual - Page 2
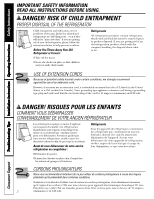
Support Troubleshooting Tips Installation Instructions Operating Instructions Safety Instructions IMPORTANT SAFETY INFORMATION. READ ALL INSTRUCTIONS BEFORE USING. DANGER! RISK OF CHILD ENTRAPMENT PROPER DISPOSAL OF THE REFRIGERATOR Child entrapment and suffocation are not problems electrical ège - GE GTS18FBSWW | Use and Care Manual - Page 3
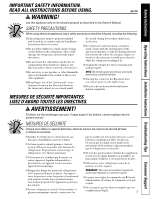
Instructions Installation Instructions Troubleshooting Tips Consumer Support IMPORTANT SAFETY INFORMATION. READ ALL INSTRUCTIONS BEFORE USING. ge.com WARNING! Use this appliance only for its intended purpose as described in this Owner's Manual. SAFETY PRECAUTIONS When using electrical - GE GTS18FBSWW | Use and Care Manual - Page 4
Consumer Support Troubleshooting Tips Installation Instructions Operating Instructions Safety Instructions IMPORTANT SAFETY INFORMATION. READ ALL INSTRUCTIONS BEFORE USING. WARNING! HOW TO CONNECT ELECTRICITY Do not, under any circumstances, cut or remove the third (ground) prong from the power - GE GTS18FBSWW | Use and Care Manual - Page 5
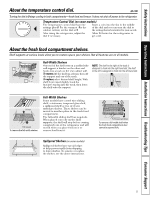
Instructions Installation Instructions Troubleshooting Tips Consumer Support About the temperature control dial. ge.com Turning the dial to 0 stops cooling in both compartments-fresh food and freezer. It does not shut off power to the refrigerator. Temperature Control Dial (on some models - GE GTS18FBSWW | Use and Care Manual - Page 6
Consumer Support Troubleshooting Tips Installation Instructions Operating Instructions Safety Instructions About the freezer compartment shelf into place. About the storage drawers. Not all features are on all models. Fruit and Vegetable Drawers Excess water that may accumulate in the bottom of - GE GTS18FBSWW | Use and Care Manual - Page 7
multiple times when making one batch of ice. Icemaker Accessory Kit If your refrigerator did not already come equipped with an automatic icemaker, an icemaker accessory kit is available at extra cost. Check the back of the refrigerator for the specific icemaker kit needed for your model. 7 - GE GTS18FBSWW | Use and Care Manual - Page 8
power cord or icemaker supply line (on some models). After rolling the refrigerator back into place, turn the legs clockwise until the legs again bear the weight of the refrigerator. Light Bulb Replacement To replace a burned-out bulb, unplug the refrigerator from its electrical outlet, unscrew the - GE GTS18FBSWW | Use and Care Manual - Page 9
installation is not covered under the Warranty. WATER SUPPLY TO THE ICEMAKER (on some models) If the refrigerator has an icemaker, it will have to be connected to a cold water line. A water supply kit (containing copper tubing, shutoff valve, fittings and instructions) is available at extra cost - GE GTS18FBSWW | Use and Care Manual - Page 10
installation is not warranted by the refrigerator or icemaker manufacturer. Follow these instructions carefully to minimize the risk of expensive water damage. Water hammer (water banging in the pipes) in house plumbing can cause damage to refrigerator parts and lead to water leakage or flooding - GE GTS18FBSWW | Use and Care Manual - Page 11
Instructions Install the shutoff valve on the nearest frequently used drinking water line. 1 SHUT OFF THE MAIN WATER SUPPLY AND UNPLUG REFRIGERATOR ice production or smaller cubes. 4 ROUTE THE TUBING Route the tubing between the cold water line and the refrigerator GE SmartConnect™ Refrigerator - GE GTS18FBSWW | Use and Care Manual - Page 12
refrigerator or against the wall. Push the refrigerator back to the wall. 10 START THE ICEMAKER On power switch models, set the icemaker power switch to the l (on) position. On feeler arm models the fitting. For plastic tubing from a GE SmartConnect™ Refrigerator Tubing kit, insert the molded end of - GE GTS18FBSWW | Use and Care Manual - Page 13
T25 Torxdriver (needed for some models) 2.4 Remove the tape and tilt the door away from the cabinet. Lift it off the center hinge pin. Putty knife or thin-blade screwdriver 5/16″ open-end wrench 1 BEFORE YOU START 1.1 Unplug the refrigerator from its electrical outlet. 1.2 Empty all door shelves - GE GTS18FBSWW | Use and Care Manual - Page 14
Installation Instructions 2 REVERSING THE DOOR SWING (CONT.) 3 REMOVE THE FRESH FOOD DOOR 3.1 Tape of the cabinet to the screw holes vacated by the center hinge removal. 3.6 Transfer the washer (if your model has one) to the opposite side. 3.2 Using a 5/16″ hex-head socket screwdriver and a 5/16″ - GE GTS18FBSWW | Use and Care Manual - Page 15
Installation Instructions 4 REVERSING THE HARDWARE (CONT.) 4.2 Interchange hinge and screws at top right with screws at top left of cabinet. Do not tighten screws on hinge side - GE GTS18FBSWW | Use and Care Manual - Page 16
Installation Instructions 2 REVERSING THE DOOR SWING (CONT.) 5 REVERSING THE DOOR HANDLES is brought into position, slide the hinge under the head of the screw which earlier had been partly driven into the outermost hole. Insert the remaining screw, then tighten both screws securely. 5.4.3 Remove - GE GTS18FBSWW | Use and Care Manual - Page 17
operating sounds, see the About the automatic icemaker section. Before you call for service... Troubleshooting Tips Save time and money! Review the charts on the following pages first and you may not need to call for service. Problem Refrigerator does not operate Vibration or rattling (slight - GE GTS18FBSWW | Use and Care Manual - Page 18
Consumer Support Troubleshooting Tips Installation Instructions Operating Instructions Safety Instructions Before you call for service... Troubleshooting Tips Problem Motor operates for long periods or cycles on and off frequently. (Modern refrigerators with more storage space and a larger space - GE GTS18FBSWW | Use and Care Manual - Page 19
GE and All Other Brands: One (1) Year One (1) Year TERMS AND CONDITIONS: This warranty applies only for single family domestic use in Canada when the Refrigerator has been properly installed according to the instructions supplied by Mabe and is connected to an adequate and proper utility service - GE GTS18FBSWW | Use and Care Manual - Page 20
strive to provide you with excellent service in a professional and timely manner. Place your confidence in GE and call us in the U.S. toll-free at 1.800.626.2224 for more information. *Most brands covered up to 15 years old in the continental U.S. SPP is a trademark of General Electric Company. 20 - GE GTS18FBSWW | Use and Care Manual - Page 21
installed in the U.S. ✁ Cut here Please place in envelope and mail to: General Electric Company Warranty Registration Department P.O. Box 32150 Louisville, KY 40232-2150 For refrigerators installed in Canada Please place in envelope and mail to: Veuillez mettre dans une enveloppe et envoyez - GE GTS18FBSWW | Use and Care Manual - Page 22
! Model Number Serial Number First Name Mr. ■ Ms. ■ Mrs. ■ Miss ■ Street Address Last Name Apt. # E-mail Address* Zip City State Code Date Placed In Use Month Day Year Phone _ _ Number GE Consumer & Industrial Appliances General Electric Company Louisville, KY 40225 ge.com - GE GTS18FBSWW | Use and Care Manual - Page 23
Instructions Troubleshooting Tips Consumer Support Refrigerator Warranty. (For customers in the United States) All warranty service provided by our Factory Service Centers, or an authorized Customer Care® technician. To schedule service, on-line, 24 hours a day, visit us at ge.com, or call 800.GE - GE GTS18FBSWW | Use and Care Manual - Page 24
, or call 1.888.261.2133 during normal business hours. GE Consumer Home Services will still be there after your warranty expires. Parts and Accessories ge.com In the U.S.: www.Hotpoint.com Individuals qualified to service their own appliances can have parts or accessories sent directly to their
-
 1
1 -
 2
2 -
 3
3 -
 4
4 -
 5
5 -
 6
6 -
 7
7 -
8
-
9
-
10
-
11
-
12
-
13
-
14
-
15
-
16
-
17
-
18
-
19
-
20
-
21
-
22
-
23
-
24
 |
 |

ge.com
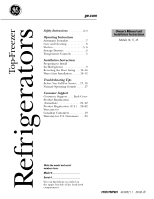
Refrigerators
Top-Freezer
197D7799P001
49-60521-1
08-08 JR
Safety Instructions
. . . . . . . . . .2–4
Operating Instructions
Automatic Icemaker . . . . . . . . . . . .7
Care and Cleaning . . . . . . . . . . . . .8
Shelves . . . . . . . . . . . . . . . . . . . . .5, 6
Storage Drawers
. . . . . . . . . . . . . . .6
Temperature Controls
. . . . . . . . . .5
Installation Instructions
Preparing to Install
the Refrigerator
. . . . . . . . . . . . . . .9
Reversing the Door Swing . . .13–16
Water Line Installation . . . . . .10–12
Troubleshooting Tips
Before You Call For Service . .17, 18
Normal Operating Sounds . . . . . .17
Consumer Support
Consumer Support . . . . Back Cover
Product Registration
(Canadian) . . . . . . . . . . . . . . . 21, 22
Product Registration (U.S.)
. 20–22
Warranty for
Canadian Customers . . . . . . . . . . 19
Warranty for U.S. Customers
. . . 23
Write the model and serial
numbers here:
Model #______________________
Serial # ______________________
You can find them on a label on
the upper left side of the fresh food
compartment.
Models 16, 17, 18
Owner’s Manual and
Installation Instructions