GE RVM1535DMWW Owners Manual
GE RVM1535DMWW - HotpointR 1.5 cu. Ft. Microwave Oven Manual
 |
UPC - 084691156307
View all GE RVM1535DMWW manuals
Add to My Manuals
Save this manual to your list of manuals |
GE RVM1535DMWW manual content summary:
- GE RVM1535DMWW | Owners Manual - Page 1
RVM1535 Over the Range Microwave Oven Owner's Manual Important Safety Information 2 Precautions to Avoid Possible Exposure to Excessive Microwave Energy 2 Special Notes About Microwaving 5 Operating Instructions 10 Features of Your Microwave 10 The Controls on Your Microwave 11 Time - GE RVM1535DMWW | Owners Manual - Page 2
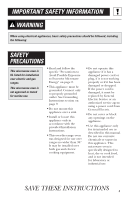
YOUR SAFETY WARNING! To reduce the risk of burns, electric shock, fire, injury to persons, or exposure to excessive microwave energy: PRECAUTIONS TO AVOID POSSIBLE EXPOSURE TO EXCESSIVE MICROWAVE ENERGY For your safety, the information in this manual must be followed to minimize the risk of fire - GE RVM1535DMWW | Owners Manual - Page 3
Electric Service or an authorized service agent using a power cord from General Electric. • Do not cover or block any openings on the appliance. • Use this appliance only for its intended use as described in this manual. Do not use corrosive chemicals or vapors in this appliance. This microwave oven - GE RVM1535DMWW | Owners Manual - Page 4
Contact nearest authorized service facility for examination, repair or adjustment. • As with any appliance, close supervision is necessary when used by children. • Do not store anything directly on top of the microwave oven surface when the microwave oven is in operation. SAVE THESE INSTRUCTIONS 4 - GE RVM1535DMWW | Owners Manual - Page 5
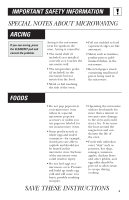
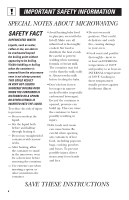
problem. Arcing is the microwave term for sparks in the oven. Arcing is caused by: • The metal shelf (if included) not installed correctly so it touches the microwave wall. • The temperature probe (if included) in the microwave the oven. • Foods with unbroken outer "skin" such as potatoes, hot dogs - GE RVM1535DMWW | Owners Manual - Page 6
or tea, are able to be overheated beyond the boiling point without appearing to be boiling. Visible bubbling or boiling when the container is removed from the microwave oven is not always present. THIS COULD RESULT IN VERY HOT LIQUIDS SUDDENLY BOILING OVER WHEN THE CONTAINER IS DISTURBED OR A SPOON - GE RVM1535DMWW | Owners Manual - Page 7
microwave ovens. Check the package for proper use. • Paper towels, waxed paper and plastic wrap can be used to cover dishes in order to retain moisture and prevent spattering. Be sure to vent plastic wrap so steam can escape. • Cookware may become hot from hands and face. SAVE THESE INSTRUCTIONS 7 - GE RVM1535DMWW | Owners Manual - Page 8
while the vent fan is in use. • Clean the underside of the microwave often. Do not allow grease to build up on the microwave or the fan filters. • In the event of a grease fire on the surface units below the microwave oven, smother a flaming pan on the surface unit by covering the pan completely - GE RVM1535DMWW | Owners Manual - Page 9
not for end-of-cabinet installation. Each kit contains two 3″-wide filler panels. JX81J-Recirculating Charcoal Filter Kit Filter kits are used when the microwave oven cannot be vented to the outside. Available at extra cost from your GE supplier, or see the Hotpoint Service numbers. JX81J JX40 - GE RVM1535DMWW | Owners Manual - Page 10
cooking to be viewed while keeping microwaves confined in the oven. 4 Touch Control Panel. 5 Cooktop Light. 6 Grease Filter. 7 Removable Turntable. Turntable and support must be in place when using the oven. The turntable may be removed for cleaning. 8 Convenience Guide. NOTE: The rating plate and - GE RVM1535DMWW | Owners Manual - Page 11
Quick Start The Controls on Your Microwave Oven (Throughout this manual, features and appearance may vary from your model.) You can microwave by time, temperature or with the convenience features. 1 Time Features Time Cooking Press TIME COOK I & II (Press once or twice) TIME DEFROST MINUTE COOK ( - GE RVM1535DMWW | Owners Manual - Page 12
GUIDE ON MICROWAVE Before you begin, check the guide located on the inside front of the oven when you open the door. GUIDES IN BOOK • Cooking • Time Defrost • Reheat 2 Convenience Features Press POPCORN BEVERAGE REHEAT AUTO DEFROST Enter Starts immediately! Starts immediately! (See Reheat Guide - GE RVM1535DMWW | Owners Manual - Page 13
Instructions power levels add flexibility to microwave cooking. The power levels on the microwave oven can be compared to the surface units on a range. High (power level 10) tenderizing such as stews and less tender cuts of meat. Low 2 or 3 Defrosting without cooking; simmering; delicate sauces. - GE RVM1535DMWW | Owners Manual - Page 14
Operating Instructions Time Features Time Cook 1 Press TIME COOK. 2 Enter cooking time. 3 Change power level if you don't want full power. (Press POWER LEVEL. Select a desired power level 1-10.) 4 Press START. Time Cook I Allows you to microwave for any time up to 99 minutes and 99 seconds. Power - GE RVM1535DMWW | Owners Manual - Page 15
Cooking Guide for Time Cook I & II NOTE: Use power level High (10) unless otherwise noted. Vegetable Amount Time Comments Asparagus (fresh spears) 1 lb. 6 to 9 min., In 11⁄2- - GE RVM1535DMWW | Owners Manual - Page 16
Instructions Cooking Guide for Time Cook I & II Vegetable Amount Time Comments Corn (frozen kernel) Corn on the cob (fresh) (frozen) Mixed vegetables (frozen) Peas (fresh, shelled) (frozen) Potatoes (fresh, cubed, white) (fresh, whole, sweet or white in center of the oven. Let stand 5 minutes - GE RVM1535DMWW | Owners Manual - Page 17
of time you select. See the Defrosting Guide for suggested times. Power level 3 is automatically during defrosting. This sound is normal when the oven is not operating at High power. Defrosting Tips defrosted and microwaved. If the food is in a foil container, transfer it to a microwave-safe dish. - GE RVM1535DMWW | Owners Manual - Page 18
Operating Instructions Defrosting Guide Food Time Comments Breads, Cakes Bread, buns or rolls (1 piece) break up after half the time. Place unopened package in oven. Let stand 5 minutes after defrosting. Place unopened package in oven. Microwave just until franks can be separated. Let stand 5 - GE RVM1535DMWW | Owners Manual - Page 19
Time Features Minute Cook This is a quick way to set cooking time for 1-6 minutes. Press one of the Minute Cook pads (from 1 to 6) for 1 to 6 minutes of cooking at power level 10. For example, press the 2 pad for 2 minutes of cooking time. The power level can be changed as time is counting down. - GE RVM1535DMWW | Owners Manual - Page 20
ounces. How to Use the Popcorn Feature 1 Follow package instructions, using Time Cook if the package is less than 3.0 ounces or larger than 3.5 ounces. Place the package of popcorn in the center of the microwave. 2 Press POPCORN. The oven starts immediately. Tap POPCORN to select the bag size you - GE RVM1535DMWW | Owners Manual - Page 21
3 to change the serving size. NOTE: The serving size may be changed or added after the oven starts. Press number pad 2 or 3. The serving size for food type 7 cannot be changed. Reheat Guide Food Type 1 Pasta 2 Meats and casseroles 3 Fruits and vegetables 4 Beverages (8-10 oz.) 5 Sauces and gravies - GE RVM1535DMWW | Owners Manual - Page 22
Operating Instructions Convenience Features Beverage The Beverage feature heats 4 ounce, 8 ounce or 12 ounce servings of any beverage. Press BEVERAGE. The oven starts immediately. The serving size is automatically set at 4 ounces, but can be changed by tapping BEVERAGE to select 8 or 12 ounces. - GE RVM1535DMWW | Owners Manual - Page 23
to six pounds. There is a handy guide located on the inside front of the oven. Guide Conversion Guide If the weight of food is stated 14-15 .9 • Remove meat from package and place on microwave-safe dish. • Twice during defrost, the oven signals TURN. At each TURN signal, turn the food over. - GE RVM1535DMWW | Owners Manual - Page 24
Operating Instructions Other Features Your Model May Have Cooking Complete Reminder To remind you that you have food in the oven, the oven will display "END" and beep once a minute until you either open the oven door or press CLEAR/OFF. Clock Press to enter the time of day or to check the time - GE RVM1535DMWW | Owners Manual - Page 25
. To redisplay the clock, repeat. Delay Start Delay Start allows you to set the microwave to delay cooking up to 24 hours. 1 Press DELAY START. 2 Enter the time you want the oven to start. (Be sure the microwave clock shows the correct time of day.) 3 Select any combination of Auto or Time - GE RVM1535DMWW | Owners Manual - Page 26
Operating Instructions Other Features Your Model May Have Timer On/Off Timer On/Off operates as a minute timer and can be used at any time, even when the oven is operating. To use the timer as a minute timer when the oven is not operating: 1 Press TIMER ON/OFF. 2 Enter the time you want to count - GE RVM1535DMWW | Owners Manual - Page 27
Child Lock-Out You may lock the control panel to prevent the microwave from being accidentally started or used by children. To lock or unlock the controls, press and hold CLEAR/OFF for about three seconds. When the control panel is locked, "LOC" will be displayed. 27 - GE RVM1535DMWW | Owners Manual - Page 28
Operating Instructions Other Features Your Model May Have Surface Light Press to turn the surface light on or off. Vent Fan The vent fan removes steam and other vapors from surface cooking and cools internal parts in the microwave oven. 28 When the microwave oven is off, you may operate the - GE RVM1535DMWW | Owners Manual - Page 29
plastic wrap or covering with wax paper allows excess steam to escape. In a regular oven, you shield chicken breasts or baked foods to prevent over-browning. When microwaving, you use small strips of foil to shield thin parts, such as the tips of wings and legs on poultry, which would cook before - GE RVM1535DMWW | Owners Manual - Page 30
walls. Nev er use a commercial oven cleaner on any part of your microwave. Shelf (if included) Clean with mild soap and water or in the dishwasher. Do not clean in a selfcleaning oven. Removable Turntable and Turntable Support To prevent breakage, do not place the turntable into water just after - GE RVM1535DMWW | Owners Manual - Page 31
with ammonia or alcohol, as they can damage the appearance of the microwave oven. If you choose to use a common household cleaner, first apply eighth digit of the model number. "S" is metallic, "G" is graphite, "L" is CleanSteel and "B", "W" or "C" are plastic colors. Stainless Steel The stainless - GE RVM1535DMWW | Owners Manual - Page 32
bulb (WB36X10003), available from your GE supplier. 1 To replace the bulb Install the replacement bulb. Reinstall the compartment cover and charcoal filter, if present, Reinstall the front grille panel with the 3 original screws. Interior Light Housing 5 Connect electrical power to the oven - GE RVM1535DMWW | Owners Manual - Page 33
grease filter. Models that recirculate air back into the room also use a charcoal filter. Reusable Grease Filter Reusable Grease Filter The metal filter traps grease released by foods on the cooktop. It also prevents flames from foods on the cooktop from damaging the inside of the microwave - GE RVM1535DMWW | Owners Manual - Page 34
Helpful Information The Exhaust Feature Charcoal Filter (on some models) The charcoal filter cannot be cleaned. It must be replaced. Order Part No. WB02X11124 from your GE supplier. To Remove Charcoal Filter Remove 3 grille screws at the top of the oven. If the model is not vented to the outside, - GE RVM1535DMWW | Owners Manual - Page 35
If Something Goes Wrong Before You Call For Service Problem Possible Cause What to Do Oven will not start A fuse in your home • Replace fuse or reset circuit breaker. may be blown or the circuit breaker tripped. Power surge. • Unplug the microwave oven, then plug it back in. Plug not fully - GE RVM1535DMWW | Owners Manual - Page 36
. Similar to the interference caused by other small appliances, it does not indicate a problem with the microwave. Plug the microwave into a different electrical circuit, move the radio or TV as far away from the microwave as possible or check the position and signal of the TV/radio antenna. 36 - GE RVM1535DMWW | Owners Manual - Page 37
products and take advantage of all of our on-line support services designed for your convenience. Schedule Service Hotpoint.com 800.GE.CARES (800.432.2737) Real Life Design Studio ge.com 800.TDD.GEAC (800.833.4322) Expert Hotpoint repair service is only one step away from your door. Get on - GE RVM1535DMWW | Owners Manual - Page 38
hours. Instructions contained in this manual cover procedures to be performed by any user. Other servicing generally should be referred to qualified service personnel. Caution must be exercised, since improper servicing may cause unsafe operation. Register Your Appliance Hotpoint.com Register - GE RVM1535DMWW | Owners Manual - Page 39
39 - GE RVM1535DMWW | Owners Manual - Page 40
and model numbers available when calling for service. • Service trips to your home to teach you how to use the product. • Improper installation, delivery or maintenance. If you have an installation problem, contact your dealer or installer. You are responsible for providing adequate electrical
-
 1
1 -
 2
2 -
 3
3 -
 4
4 -
 5
5 -
 6
6 -
 7
7 -
8
-
9
-
10
-
11
-
12
-
13
-
14
-
15
-
16
-
17
-
18
-
19
-
20
-
21
-
22
-
23
-
24
-
25
-
26
-
27
-
28
-
29
-
30
-
31
-
32
-
33
-
34
-
35
-
36
-
37
-
38
-
39
-
40
 |
 |
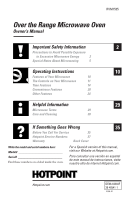
Over the Range Microwave Oven
Owner’s Manual
2
29
Helpful Information
Microwave Terms
29
Care and Cleaning
30
35
If Something Goes Wrong
Before You Call For Service
35
Hotpoint Service Numbers
37
Warranty
Back Cover
10
Important Safety Information
Precautions to Avoid Possible Exposure
to Excessive Microwave Energy
2
Special Notes About Microwaving
5
Operating Instructions
Features of Your Microwave
10
The Controls on Your Microwave
11
Time Features
14
Convenience Features
20
Other Features
24
Hotpoint.com
RVM1535
DE68-62382F
39-40541-1
10-08 JR
For a Spanish version of this manual,
visit our Website at Hotpoint.com.
Para consultar una versión en español
de este manual de instrucciones, visite
nuestro sitio de internet Hotpoint.com.
Write the model and serial numbers here:
Model#
______________________________
Serial#
______________________________
Find these numbers on a label inside the oven.