GE WSSH300GWW Owners Manual
GE WSSH300GWW - 3.5 cu. Ft. Front-Load Washer Manual
 |
UPC - 084691158936
View all GE WSSH300GWW manuals
Add to My Manuals
Save this manual to your list of manuals |
GE WSSH300GWW manual content summary:
- GE WSSH300GWW | Owners Manual - Page 1
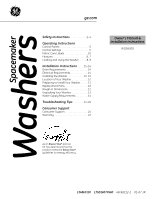
Your Washer . . . . . .11 Replacement Parts 16 Rough-In Dimensions 12 Unpacking Your Washer 13 Water Supply Requirements 14 Troubleshooting Tips 17-20 Consumer Support Consumer Support 24 Warranty 23 Owner's Manual & Installation Instructions WSSH300 As an ENERGY STAR® partner, GE has - GE WSSH300GWW | Owners Manual - Page 2
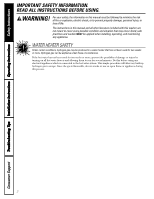
Troubleshooting Tips Installation Instructions Operating Instructions Safety Instructions IMPORTANT SAFETY INFORMATION. READ ALL INSTRUCTIONS BEFORE USING. WARNING! For your safety, the information in this manual must be followed to minimize the risk of fire or explosion, electric shock, or to - GE WSSH300GWW | Owners Manual - Page 3
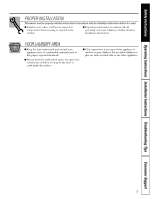
Safety Instructions Operating Instructions Installation Instructions Troubleshooting Tips Consumer Support PROPER INSTALLATION This washer must be properly installed and located in accordance with the Installation Instructions before it is used. I Install or store where it will not be exposed to - GE WSSH300GWW | Owners Manual - Page 4
, or removing it from service, remove the washer door to prevent children from hiding inside. I Do not attempt to repair or replace any part of this appliance unless specifically recommended in this Owner's Manual, or in published userrepair instructions that you understand and have the skills - GE WSSH300GWW | Owners Manual - Page 5
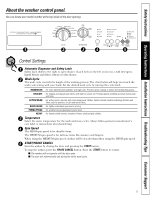
Safety Instructions Operating Instructions Installation Instructions Troubleshooting Tips Consumer Support About the washer control panel. You can locate your model number at the top inside of the door opening. 1 2 3 4 5 Control Settings 1 Automatic Dispenser and Safety Latch Safety latch - GE WSSH300GWW | Owners Manual - Page 6
button is pressed. The light turns OFF at the end of the cycle. Control Lock To prevent accidentally starting or stopping the washer, press OPTIONS and SELECT at the same time until the Control Lock indicator is lighted. To unlock the controls, press OPTIONS and SELECT again. 6 Consumer Support - GE WSSH300GWW | Owners Manual - Page 7
Safety Instructions Operating Instructions Installation Instructions Troubleshooting Tips Consumer Support The Dispenser Drawer Slowly open the dispenser drawer by first sliding the safety latch to the right, then pulling the drawer out until it stops. After adding laundry products, slowly close - GE WSSH300GWW | Owners Manual - Page 8
Installation Instructions in this book. If these parts are not available, they can be ordered by visiting our Website at ge.com or by calling 800.GE.CARES. Long Vacations: Be sure water supply is shut off at faucets. Drain all water from hoses if weather will be below freezing. Consumer Support 8 - GE WSSH300GWW | Owners Manual - Page 9
Instructions Operating Instructions Installation Instructions Troubleshooting Tips Consumer Support Dispenser Drawer Area: Detergent and fabric softener may build up in the dispenser drawer. Residue should be removed once or twice a month. I Remove the drawer by first sliding the safety latch - GE WSSH300GWW | Owners Manual - Page 10
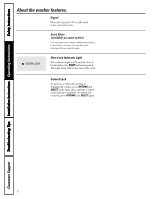
Troubleshooting Tips Installation Instructions Operating Instructions Safety Instructions About the washer features. Fabric Care Labels Below are fabric care label "symbols" that affect the clothing you will be laundering. WASH LABELS Machine wash cycle Normal Permanent Press/ wrinkle resistant - GE WSSH300GWW | Owners Manual - Page 11
in these Installation Instructions. • Do not install or store appliance in an area where it will be exposed to water/weather. See Location of Your Washer section. • NOTE: This appliance must be properly grounded, and electrical service to the washer must conform with local codes and ordinances and - GE WSSH300GWW | Owners Manual - Page 12
washer/dryer installation is desired, you MUST use Stacking Kit WE25X10020. This kit is available through your GE retailer. ROUGH-IN DIMENSIONS 33⁄4″ (9.5 cm) 273⁄4″ (70.5 cm) 24″ (61 cm) 60″ (152.4 cm) Power Cord 333⁄8″ (84.8 cm) SIDE 81⁄2″ (21.6 cm) 36″ (91.3 cm) 23⁄4″ (7 cm) Drain - GE WSSH300GWW | Owners Manual - Page 13
and shipping plug. Base Shipping Plug 4. Carefully return the washer to an upright position. 5. Carefully move the washer to within 4 feet (122 cm) of the final location. 6. Remove the following from the back panel of the washer: 4 shipping bolts 4 spacers 1 metal "P" clamp 7. Remove the 4 plugs - GE WSSH300GWW | Owners Manual - Page 14
codes and ordinances or in the absence of local codes, with the National Electrical Codes, drain hose attached to the washer can reach a 90″ (229 cm) high standpipe. For a higher standpipe, contact an authorized parts distributor. If the drain is less than 24″ (61 cm), install a siphon break kit - GE WSSH300GWW | Owners Manual - Page 15
to prevent excessive vibration. The farther out the legs are extended, the more the washer will vibrate. If the floor is not level or is damaged, you may have to extend the rear leveling legs. For undercounter installations, you can adjust the rear legs by removing the front service panel. 15 - GE WSSH300GWW | Owners Manual - Page 16
review the Before You Call For Service section before calling for service. 14. Place these instructions in a location near the washer for future reference. REPLACEMENT PARTS If replacement parts are needed for your washer, they can be ordered by visiting our Website at ge.com or by calling 800.GE - GE WSSH300GWW | Owners Manual - Page 17
Operating Instructions Installation Instructions Troubleshooting Tips Consumer Support Before you call for service... Troubleshooting Tips Save time and money! Review the charts on the following pages first and you may not need to call for service. WATER Water leaks Too many suds Water won't drain - GE WSSH300GWW | Owners Manual - Page 18
Safety Instructions Before you call for service... OPERATION Washer pauses in cycle Washer won't operate Possible Causes The washer normally pauses between washing steps Washer is unplugged Water supply is turned off Circuit breaker/fuse is tripped/blown Controls are not set properly Door is - GE WSSH300GWW | Owners Manual - Page 19
Safety Instructions Operating Instructions Installation Instructions Troubleshooting Tips Consumer Support PERFORMANCE (cont.) Clothes too wet Pilling Grayed or yellowed clothes Possible Causes Load is too small Load is out of balance Result of normal wear on poly-cotton blends and fuzzy fabrics - GE WSSH300GWW | Owners Manual - Page 20
Instructions Before you call for service... Error Codes If the washer stops, an error code flashes and the signal beeps periodically, press PAUSE/CANCEL. Consult the Error Code Chart below for the possible cause and solution. If Control Lock is on when an Error Code occurs, the controls will - GE WSSH300GWW | Owners Manual - Page 21
Safety Instructions Operating Instructions Installation Instructions Troubleshooting Tips Consumer Support Notes. 21 - GE WSSH300GWW | Owners Manual - Page 22
Notes. 22 Consumer Support Troubleshooting Tips Installation Instructions Operating Instructions Safety Instructions - GE WSSH300GWW | Owners Manual - Page 23
Safety Instructions Operating Instructions Installation Instructions Troubleshooting Tips Consumer Support GE Washer Warranty. All warranty service provided by our Factory Service Centers, or an authorized Customer Care® technician. To schedule service, on-line, 24 hours a day, visit us at ge.com, - GE WSSH300GWW | Owners Manual - Page 24
anytime, or call 800.626.2224 during normal business hours. GE Consumer Home Services will still be there after your warranty expires. Parts and Accessories ge.com Individuals qualified to service their own appliances can have parts or accessories sent directly to their homes (VISA, MasterCard - GE WSSH300GWW | Owners Manual - Page 25
Spacemaker Lavadoras ge.com Instrucciones de seguridad . . . 2-4 Instrucciones de operación Ajustes de control 5 Cómo cargar y usar la lavadora . . . . .8, 9 Etiquetas del cuidado de la tela . . . . . .10 Funciones 6, 7 Panel de control 5 Instrucciones de instalación 11-16 Desembalaje de la - GE WSSH300GWW | Owners Manual - Page 26
el riesgo de incendio, explosión o descarga eléctrica, así como para evitar daños materiales, lesiones o la muerte. Las instrucciones de este manual, así como el resto de la documentación que se incluye con la lavadora, no cubren todas las situaciones o estados posibles que pueden producirse. El - GE WSSH300GWW | Owners Manual - Page 27
Seguridad INSTALACIÓN CORRECTA La lavadora se debe instalar y colocar correctamente de acuerdo con las instrucciones de instalación, antes de utilizarla. I Instale o almacene la lavadora en un lugar donde no esté expuesta a temperaturas por debajo del punto de congelación o expuesta a la - GE WSSH300GWW | Owners Manual - Page 28
para abrirla cuando esté bloqueada (el indicador DOOR LOCK está ENCENDIDO). Puede dañar la la lavadora en el panel de distribución de recomiende de manera explícita en el manual del propietario o en instrucciones publicadas de controles. LEA DETENIDAMENTE Y SIGA LA INFORMACIÓN DE SEGURIDAD. GUARDE - GE WSSH300GWW | Owners Manual - Page 29
El panel de control de la lavadora. Puede ubicar el número de modelo en la parte superior del interior de la abertura de la puerta. Seguridad Operación Instrucciones de instalación 1 2 3 4 5 Ajustes de control 1 Despachador automático y pestillo de seguridad El pestillo de seguridad se - GE WSSH300GWW | Owners Manual - Page 30
cierre de puerta La luz indicadora está ENCIENDA y la puerta se cierra cuando se presiona el botón START. La luz se apaga (OFF) al final del ciclo. Seguro de control Para evitar iniciar o detener accidentalmente la operación de la lavadora, presione OPTIONS (Opciones) y SELECT (Seleccionar) al mismo - GE WSSH300GWW | Owners Manual - Page 31
el resultado de la acción de trasvase y forma parte del funcionamiento normal de la lavadora. Si abre el La luz indicadora del SEGURO DE LA PUERTA (DOOR LOCK) se apagará y el seguro de la á. Cierre lentamente el cajón dispensador y presione START para continuar con el ciclo. Compartimento para lej - GE WSSH300GWW | Owners Manual - Page 32
. Añada las prendas, cierre la puerta y presione el botón START. Cuidado y limpieza Exterior: Limpie inmediatamente cualquier vertido. Utilice un trapo ón en este manual. Si estas piezas no están disponibles, se pueden solicitar a través del sitio Web www.ge.com o llamando al 800.GE.CARES. Largas - GE WSSH300GWW | Owners Manual - Page 33
cepillo pequeño a fin de limpiar los huecos. Retire todos los restos de las partes superior e inferior del hueco. NOTA: Una gran cantidad de residuos de suavizante Vuelva a colocar el cajón dispensador y ejecute el ciclo QUICK WASH (lavado rápido) sin ninguna carga en el tambor. Instrucciones de - GE WSSH300GWW | Owners Manual - Page 34
Do not tumble dry / (used with No use secado do not wash) / con giro No secar (No lavar) Heat setting / Temperatura High / Alto de secado Medium / Mediana Low / Baja No heat/air / Sin calor/Con aire Special instructions / Instrucciones especiales Line dry/ hang to dry / Cuelgue para secar Drip - GE WSSH300GWW | Owners Manual - Page 35
Instrucciones Lavadora Spacemaker de instalación Modelo WSSH300 Si tiene alguna pregunta, llame a 800.GE.CARES (1.800.432.2737) o visite nuestro sitio Web en: ge.com ANTES DE COMENZAR Lea detenidamente todas las instrucciones. • IMPORTANTE - Guarde estas instrucciones para uso del inspector - GE WSSH300GWW | Owners Manual - Page 36
pulgadas cuadradas (387 cm2), situados a 3″ (7.6 cm) de las partes superior e inferior de la puerta Instalación debajo de un mostrador Si se ón apilada WE25X10020. Este equipo está disponible a través de su distribuidor de GE. DIMENSIONES APROXIMADAS 33⁄4″ (9.5 cm) 273⁄4″ (70.5 cm) 24″ (61 - GE WSSH300GWW | Owners Manual - Page 37
del empaque a lo largo de la línea punteada en la parte inferior. Retire la caja. 2. Con una alfombra, manta o pedazo de cartón a una distancia de 4 pies (122 cm) de su ubicación final. 6. Retire lo siguiente del panel posterior de la lavadora: 4 pernos de empaque 4 espaciadores 1 broche - GE WSSH300GWW | Owners Manual - Page 38
Instrucciones de instalación REQUISITOS ELÉCTRICOS Lea detenidamente todas las instrucciones. CIRCUITO - circuito derivado de 15 amperios individual, correctamente polarizado y conectado a tierra, con interruptor o fusible de retardo de 15 amperios. ALIMENTACIÓN ELÉCTRICA - corriente alterna de 60 - GE WSSH300GWW | Owners Manual - Page 39
la puerta para levantar la lavadora. 6. Una vez situada la lavadora en su posición final, coloque un nivel en la parte superior de la misma (si está instalada debajo de un mostrador, la lavadora no deber de mostradores, debe ajustar las patas traseras retirando el panel frontal de servicio. 15 - GE WSSH300GWW | Owners Manual - Page 40
ón a un interruptor/caja de fusibles. 10. Lea el resto del Manual del propietario. Contiene información valiosa y útil que supondrá un ahorro , se pueden solicitar en Estados Unidos a través del sitio Web ge.com o llamando a 800.GE.CARES. 8. Enchufe el cable de alimentación en una toma de corriente - GE WSSH300GWW | Owners Manual - Page 41
necesario llamar a un plomero. La temperatura del agua no está correcta El control no se ha fijado de manera correcta El suministro de agua no está llave de paso y quite las tuberías de conexión de agua de la parte trasera superior de la lavadora. Utilice un cepillo o un palillo de dientes para - GE WSSH300GWW | Owners Manual - Page 42
. Cambie los fusibles o restablezca el interruptor. La lavadora debe tener una toma individual. Los controles no se han establecido correctamente • Verifique los controles y asegúrese de haber presionado los botones START o DELAY START. La puerta está abierta • Cierre la puerta y presione el bot - GE WSSH300GWW | Owners Manual - Page 43
Seguridad Operación Instrucciones de instalación RENDIMIENTO (cont.) Las prendas están demasiado mojadas Formación de bolitas Prendas oscurecidas o amarillentas Manchas de color Arrugas Enganchones, agujeros, rotos, rasgaduras o deterioro excesivo Causas posibles Qué hacer La carga es muy - GE WSSH300GWW | Owners Manual - Page 44
abajo para la causa y la solución posible. Si el Bloqueo de control está activado cuando se produce un Código de error, los controles se desbloquearán. Haga la corrección, seleccione un ciclo y presione START. Si el código de error destella otra vez y la señal continúa, contacte el servicio para la - GE WSSH300GWW | Owners Manual - Page 45
Notas. 21 Seguridad Operación Instrucciones de instalación Solucionar problemas Soporte al consumidor - GE WSSH300GWW | Owners Manual - Page 46
Notas. 22 Soporte al consumidor Solucionar problemas Instrucciones de instalación Operación Seguridad - GE WSSH300GWW | Owners Manual - Page 47
está situado en un área que no dispone de servicio por parte de un proveedor de servicio autorizado de GE, podría tener que hacerse cargo de los costes de envío o la oficina del Prucurador (Attorney General) en su localidad. Garante: General Electric Company. Louisville, KY 40225 Instrucciones de - GE WSSH300GWW | Owners Manual - Page 48
durante horas normales de oficina. GE Consumer Home Services estará aún ahí cuando su garantía termine. Piezas y accesorios ge.com Aquellos individuos con la en este manual cubren los procedimientos a seguir por cualquier usuario. Cualquier otra reparación debería, por regla general, referirse a
-
 1
1 -
 2
2 -
 3
3 -
 4
4 -
 5
5 -
 6
6 -
 7
7 -
8
-
9
-
10
-
11
-
12
-
13
-
14
-
15
-
16
-
17
-
18
-
19
-
20
-
21
-
22
-
23
-
24
-
25
-
26
-
27
-
28
-
29
-
30
-
31
-
32
-
33
-
34
-
35
-
36
-
37
-
38
-
39
-
40
-
41
-
42
-
43
-
44
-
45
-
46
-
47
-
48
 |
 |
ge.com
134867100
175D1807P580
49-90312-1
01-07 JR
Washers
Safety Instructions
. . . . . . . . . . . . 2–4
Operating Instructions
Control Panels . . . . . . . . . . . . . . . . . . . . . . . 5
Control Settings . . . . . . . . . . . . . . . . . . . . . .5
Fabric Care Labels
. . . . . . . . . . . . . . . . . .10
Features . . . . . . . . . . . . . . . . . . . . . . . . . . .6, 7
Loading and Using the Washer . . . . . .8, 9
Installation Instructions
. . . . .11–16
Drain Requirements . . . . . . . . . . . . . . . . .14
Electrical Requirements . . . . . . . . . . . . . .14
Installing the Washer . . . . . . . . . . . . .15, 16
Location of Your Washer . . . . . . . . . . . . .12
Preparing to Install Your Washer . . . . . .11
Replacement Parts . . . . . . . . . . . . . . . . . .16
Rough-In Dimensions . . . . . . . . . . . . . . . .12
Unpacking Your Washer . . . . . . . . . . . . .13
Water Supply Requirements . . . . . . . . . .14
Troubleshooting Tips
. . . . . . . .17–20
Consumer Support
Consumer Support . . . . . . . . . . . . . . . . . . 24
Warranty . . . . . . . . . . . . . . . . . . . . . . . . . . 23
Spacemaker
WSSH300
Owner’s Manual &
Installation Instructions
As an
E
NERGY
S
TAR
®
partner,
GE has determined that this
product meets the
E
NERGY
S
TAR
®
guidelines for energy efficiency.