Genie PowerMax 1500 Owner's Manual - Page 12
Optional Programming - reset
 |
View all Genie PowerMax 1500 manuals
Add to My Manuals
Save this manual to your list of manuals |
Page 12 highlights
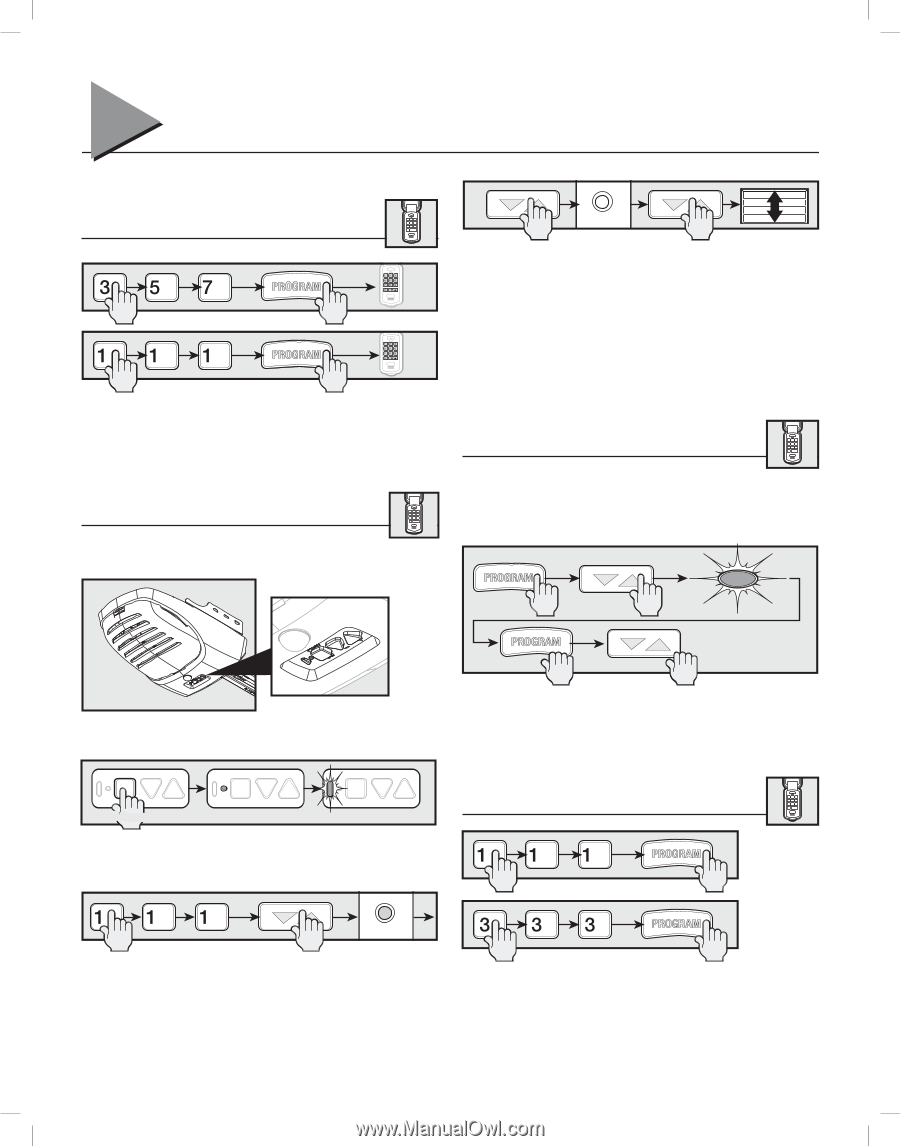
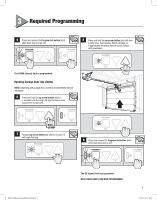
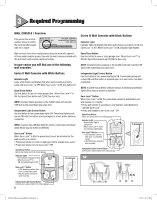
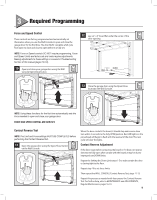
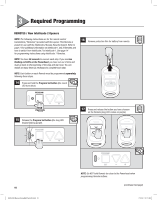
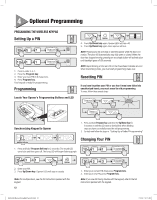
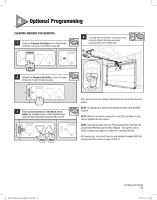
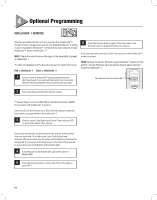
4 Optional Programming PROGAMMING THE WIRELESS KEYPAD Setting Up a PIN 1. Press in order 3-5-7. 2. Press the Program key . 3. Enter your new PIN (3-8 characters). 4. Press Program key . Your keypad is ready for programming. Programming Locate Your Opener's Programming Buttons and LED Opener 4. Press Up/Down key again. Opener LEDs will turn o . 5. Press Up/Down key again. Door opener will run. NOTE: Pressing any key will stop or start the opener while the door is in motion. The door will automatically stop fully open or closed. When the door has stopped moving, pressing on any single button will activate door until backlight goes off (30 seconds) NOTE: Rapid blinking of the red LED on the Powerhead indicates an error. When the blinking stops, you must start programming steps over. Resetting PIN If you have forgotten your PIN or you fear it may have fallen into unauthorized hands, you must erase the old programming. To erase, follow these simple steps: HOLD HOLD Synchronizing Keypad to Opener PROGRAM - + HOLD 2 seconds PROGRAM SET - + PROGRAM SET - + 1. Press and hold Program key and then the Up/Down key for 5 seconds or until the LED starts to slowly blink. When blinking stops you have successfully erased the old programming. 2. Go back and follow the steps in "Setting Up a Pina"nd"Programming. " Changing Your PIN 1. Press and hold Program Set key for 2 seconds. (The round LED turns blue and then goes o . The long LED will begin ashing purple Opener 2. Enter your PIN. 3. Press Up/Down key . Opener LEDs will stay on steady. Note: For multiple doors, see the full instructions packed with the keypad. 12 1. Enter your current PIN, then press Program key . 2. Enter your new PIN, press Program key . Note: If you are still having trouble with the keypad, refer to the full instructions packed with the keypad. G999-393 Manual-ScrewBeltChain-EN indd 12 7/13/12 10 17 AM
-
 1
1 -
2
-
3
-
4
-
5
-
6
-
 7
7 -
 8
8 -
 9
9 -
 10
10 -
 11
11 -
 12
12 -
 13
13 -
 14
14 -
 15
15 -
 16
16 -
 17
17 -
18
-
19
-
20
-
21
-
22
-
23
-
24
 |
 |