Gigabyte GA-8I945GMBX Manual - Page 13
Installation of the Fan Heatsink
 |
View all Gigabyte GA-8I945GMBX manuals
Add to My Manuals
Save this manual to your list of manuals |
Page 13 highlights
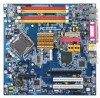
English 1-3-2 Installation of the Fan Heatsink Fig.1 Apply an even layer of thermal paste on the surface of the installed CPU. Fig.2 Install the motherboard in the chassis. Align the fan heatsink with the screw holes and place it onto the motherboard. Fig.3 Fasten the fan heatsink with screws. Assure that the fan heatsink is securely attached to the motherboard and chassis. (For detailed installation instructions, please refer to the user's manual for your fan heatsink.) Fig.4 Finally, please attach the power connector of the fan heatsink to the CPU fan header located on the motherboard. The fan heatsink may adhere to the CPU as a result of hardening of the thermal paste. To prevent such an occurrence, it is suggested that either thermal tape rather than thermal paste be used for heat dissipation or using extreme care when removing the fan heatsink. - 13 - Hardware Installation
-
 1
1 -
2
-
3
-
4
-
5
-
6
-
7
-
 8
8 -
 9
9 -
 10
10 -
 11
11 -
 12
12 -
 13
13 -
 14
14 -
 15
15 -
 16
16 -
 17
17 -
 18
18 -
19
-
20
-
21
-
22
-
23
-
24
-
25
-
26
-
27
-
28
-
29
-
30
-
31
-
32
-
33
-
34
-
35
-
36
-
37
-
38
-
39
-
40
-
41
-
42
-
43
-
44
-
45
-
46
-
47
-
48
-
49
-
50
-
51
-
52
-
53
-
54
-
55
-
56
-
57
-
58
-
59
-
60
-
61
-
62
-
63
-
64
-
65
-
66
-
67
-
68
-
69
-
70
-
71
-
72
-
73
-
74
-
75
-
76
-
77
-
78
-
79
-
80
 |
 |
