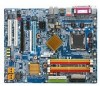
Gigabyte GA-8N-SLI Manual - Page 10
nVIDIA C19 Series Raid, nVIDIA C19 Series Raid 2K - raid driver
 |
UPC - 818313002792
View all Gigabyte GA-8N-SLI manuals
Add to My Manuals
Save this manual to your list of manuals |
Page 10 highlights
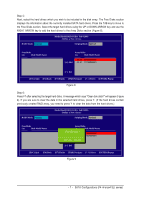
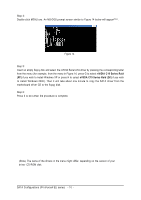
Ác Step 4: Åé Double-click MENU.exe. An MS-DOS prompt screen similar to Figure 14 below will appear(Note). ¤¤ ¤å Figure 14 Step 5: Insert an empty floppy disk and select the nVIDIA Serial ATA driver by pressing the corresponding letter from the menu (for example, from the menu in Figure 14, press G to select nVIDIA C19 Series Raid (XP) if you wish to install Windows XP or press H to select nVIDIA C19 Series Raid (2K) if you wish to install Windows 2000). Then it will take about one minute to copy the SATA driver from the motherboard driver CD to the floppy disk. Step 6: Press 0 to exit when the procedure is complete. (Note): The name of the drivers in the menu might differ, depending on the version of your driver CD-ROM disk. SATA Configurations (P4 nForce4 SLI series) - 10 -
-
 1
1 -
2
-
3
-
4
-
 5
5 -
 6
6 -
 7
7 -
 8
8 -
 9
9 -
 10
10 -
 11
11 -
 12
12 -
 13
13 -
 14
14 -
 15
15 -
16
 |
 |
