Gigabyte GA-P35-DQ6 Manual - Page 16
Removing the Crazy Cool Heatsink from the Back of the Motherboard - silent pipe
 |
View all Gigabyte GA-P35-DQ6 manuals
Add to My Manuals
Save this manual to your list of manuals |
Page 16 highlights
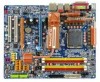
English 1-3-3 Removing the Crazy Cool Heatsink from the Back of the Motherboard To install a non-Intel CPU cooler that requires extra mounting holes, follow the steps below to remove the Crazy Cool heatsink from the back of the motherboard. Tools needed: 1. A Philip's screwdriver 2. A long nose plier 3. Screw nuts included with the motherboard The Crazy Cool Heatsink Step 1: Use a Philip's screwdriver to unfasten the three screws as shown in the picture to the left and remove the screws. Step 3: Before unfastening the spring screw as circled in the picture to the left, first remove the copper fin marked with "SILENT-PIPE." Step 2: Unfasten the two spring screws around the heatsink on the North Bridge (as shown in the picture to the left). Do not remove the spring screws. Step 4: After removing/unfastening the screws, you may easily remove the Crazy Cool heatsink. Step 5: Push down on one of the two spring screws and put the nut on the bottom of the spring screw on the back of the motherboard by a couple of turns. Do not fasten it to the full. Step 6: Do the same for the other spring screw. Step 7: Finally, you can fully tighten the nuts and complete the steps to remove the Crazy Cool heatsink. (Remember to replace the copper fin.) Refer to your CPU cooler installation manual for instructions on installing the cooler. (Note) The components received may vary in appearance from the products illustrated. GA-P35-DQ6 Motherboard - 16 -
-
 1
1 -
2
-
3
-
4
-
5
-
6
-
7
-
8
-
9
-
10
-
 11
11 -
 12
12 -
 13
13 -
 14
14 -
 15
15 -
 16
16 -
 17
17 -
 18
18 -
 19
19 -
 20
20 -
 21
21 -
22
-
23
-
24
-
25
-
26
-
27
-
28
-
29
-
30
-
31
-
32
-
33
-
34
-
35
-
36
-
37
-
38
-
39
-
40
-
41
-
42
-
43
-
44
-
45
-
46
-
47
-
48
-
49
-
50
-
51
-
52
-
53
-
54
-
55
-
56
-
57
-
58
-
59
-
60
-
61
-
62
-
63
-
64
-
65
-
66
-
67
-
68
-
69
-
70
-
71
-
72
-
73
-
74
-
75
-
76
-
77
-
78
-
79
-
80
-
81
-
82
-
83
-
84
-
85
-
86
-
87
-
88
-
89
-
90
-
91
-
92
-
93
-
94
-
95
-
96
-
97
-
98
-
99
-
100
-
101
-
102
-
103
-
104
-
105
-
106
-
107
-
108
-
109
-
110
-
111
-
112
 |
 |
