Graco 1751929 Owners Manual
Graco 1751929 - Cozy Cline Toddler Booster Car Seat Manual
 |
UPC - 047406103775
View all Graco 1751929 manuals
Add to My Manuals
Save this manual to your list of manuals |
Graco 1751929 manual content summary:
- Graco 1751929 | Owners Manual - Page 1
CozyCline Forward Facing Child Restraint Owner's Manual Read this manual KEEP INSTRUCTIONS FOR FUTURE USE. Even if using this child restraint seems easy to figure out on your own, it is very important to READ, UNDERSTAND AND FOLLOW THE OWNER'S MANUAL. Failure to properly use this child restraint - Graco 1751929 | Owners Manual - Page 2
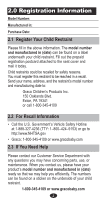
2.0 Registration Information 4 2.1 Register Your Child Restraint 4 2.2 Recall Information 4 2.3 If You Need Help 4 3.0 Important Information Vehicle Seat Requirements 17 6.2 Vehicle Seat Belt Requirements 18 6.2.1 UNSAFE Vehicle Belt Systems . . . . .18 6.2.2 SAFE Vehicle Belt Systems 20 - Graco 1751929 | Owners Manual - Page 3
owner's manual. Your child's safety depends on: 1. Inserting the harness straps in the proper slots for your child. 2. Properly securing your child in the child restraint. 3. Selecting a suitable location for the child restraint in your vehicle. 4. Properly routing and securing the vehicle seat belt - Graco 1751929 | Owners Manual - Page 4
seat cover and mail it today. Child restraints could be recalled for safety reasons. You must register this restraint to be reached in a recall http://www.NHTSA.gov • Graco: 1-800-345-4109 or www.gracobaby.com 2.3 If You Need Help Please contact our Customer Service Department with any questions you - Graco 1751929 | Owners Manual - Page 5
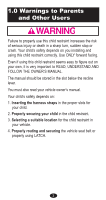
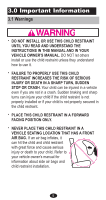
CHILD RESTRAINT UNTIL YOU READ AND UNDERSTAND THE INSTRUCTIONS IN THIS MANUAL AND IN YOUR VEHICLE OWNER'S MANUAL. DO NOT let others install or use the A FORWARD FACING POSITION ONLY. • NEVER PLACE THIS CHILD RESTRAINT IN A VEHICLE SEATING LOCATION THAT HAS A FRONT AIR BAG. If an air bag inflates, it - Graco 1751929 | Owners Manual - Page 6
SEATING POSITIONS RATHER THAN FRONT SEATING POSITIONS. For a vehicle with a front passenger air bag, refer to your vehicle owner's manual as well as these instructions into the bottom of the child restraint. "DO NOT use this car seat after December (Year)" • DO NOT MODIFY YOUR CHILD RESTRAINT or - Graco 1751929 | Owners Manual - Page 7
• THE CHILD RESTRAINT CAN BECOME VERY HOT IF LEFT IN THE SUN. Contact with these parts can burn your child's skin. Always touch the surface of any metal or plastic parts before putting your child in the child restraint. • THIS CHILD RESTRAINT CONFORMS to all applicable Federal Motor Vehicle Safety - Graco 1751929 | Owners Manual - Page 8
3.2 Height and Weight Limits TO AVOID SERIOUS INJURY OR DEATH DO NOT USE THE CHILD RESTRAINT FOR A CHILD LARGER OR SMALLER THEN THE WEIGHT AND HEIGHT RANGE LISTED BELOW. Your child MUST meet ALL requirements: • WEIGHT: 20 to 40 lbs (9 to 18 kg) • HEIGHT: 43 inches (109 cm) or less • At least one - Graco 1751929 | Owners Manual - Page 9
slots Harness buckle Crotch strap Harness release lever Harness clip Harness strap Shoulder belt Lock-off Harness adjustment strap Recline lever LATCH Belt (stored) Owner's manual storage compartment Vehicle belt path (red) Accessories (on certain models) Deluxe Cup Holder Storage Console 9 - Graco 1751929 | Owners Manual - Page 10
vehicle. When used properly with the vehicle seat belt or LATCH, a tether helps reduce injury in a sudden stop or crash. ***United States Federal Motor Vehicle Safety Standards have defined a new system for installing child restraints in vehicles. The system is called LATCH. LATCH may ONLY be used - Graco 1751929 | Owners Manual - Page 11
flesh or push the child's body into an unnatural position. 1. Loosen the harness straps by lifting the adjustment lever on – the front of the seat and pulling the straps out as far as they will come at the shoulders –. — 2. Open harness clip —. 3. Unbuckle harness straps ˜. Lay the harness - Graco 1751929 | Owners Manual - Page 12
release lever on the front of the seat while pulling the straps out at the shoulders. a) Recline the seat by squeezing the recline lever up and pulling the seat forward, so you will have access to the back of the seat —. ˜ b) From the side of the seat, pull the harness and metal junction plate - Graco 1751929 | Owners Manual - Page 13
c) Pull strap ends through slots ™ and reinsert them in ™ the correct slots š as determined in step 4, page 12. Check that the straps are not twisted. š d) Reassemble straps onto metal junction plate exactly as shown ›. Check that › straps are completely within the slots and that they are - Graco 1751929 | Owners Manual - Page 14
while pulling the straps out at the shoulders as shown –. — Tighten the harness straps by pulling the adjustment strap on the front of the seat —. (See also Section 5.2, Securing Your Child in the Child Restraint, page 15.) REMEMBER to check the shoulder straps as your child grows and move them - Graco 1751929 | Owners Manual - Page 15
are properly secured. Follow these instructions carefully to properly secure your child. • ADJUST THE HARNESS SYSTEM SNUGLY EVERY TIME you place your use the child restraint if the buckle tongues do not latch in place. Call Graco at 1-800-345-4109 ˜. CHECK that straps are not twisted. CHECK that - Graco 1751929 | Owners Manual - Page 16
3. Pull the adjustment strap to securely tighten the – harness –. 4. Fasten harness clip —. — Position harness clip at middle of child's chest, level with armpits. 5. Make sure straps are ˜ flat and tight against child's shoulders. You should not be able to pinch the harness straps. A - Graco 1751929 | Owners Manual - Page 17
where to place the child restraint in your vehicle, consult your vehicle owner's manual or call Graco Children's Products Inc., 1-800-345-4109. • Children are safer when properly restrained in rear vehicle seating positions. Whenever possible secure the child restraint in the center position of the - Graco 1751929 | Owners Manual - Page 18
TIGHTLY AT ALL TIMES. Pay careful attention to these systems; some of the seat belts that are not safe to use look very much like seat belts that are safe to use. If you are unsure, consult your vehicle owner's manual or call Graco Children's Products Inc., 1-800-345-4109. 6.2.1 UNSAFE Vehicle Belt - Graco 1751929 | Owners Manual - Page 19
to the door in any way or that move along a track to automatically surround the passenger when the door is closed. • Lap Belts Forward of Seat Crease 19 - Graco 1751929 | Owners Manual - Page 20
CAN BE USED WITH YOUR CHILD RESTRAINT, IF the seat location meets all other requirements of these instructions and those in your vehicle owner's manual. LATCH can be used in place of the following vehicle belt systems if your vehicle is equipped with LATCH anchor points. Please refer to vehicle - Graco 1751929 | Owners Manual - Page 21
• Combination Lap/Shoulder Belt with Locking Latch Plate Once it is buckled, this type of belt has a latch plate that will not allow the lap portion of the belt to loosen. Belt is tightened by pulling hard on the shoulder portion of the vehicle belt while pushing down on the child restraint. • - Graco 1751929 | Owners Manual - Page 22
SHARP TURN, SUDDEN STOP OR CRASH. Carefully follow these instructions and those in your vehicle owner's manual to be sure your child restraint is properly located, the child restraint firmly against the back of a forward-facing vehicle seat. 2. NEVER place the vehicle – belt over the armrest of - Graco 1751929 | Owners Manual - Page 23
lap belt. For more information on how to tighten the belt for your seat belt system, see Section 6.2 Vehicle Seat Belt Requirements, pp. 18-21, or your vehicle owner's manual. 5. If you are using tether to hold seat in place, secure it now. See Section 7.4 Using the Tether, page 30. 6. Safety - Graco 1751929 | Owners Manual - Page 24
the storage bar, otherwise make sure that the tether is stored. 1. Place the child restraint firmly against the back of – a forward-facing vehicle seat. 2. NEVER place the vehicle belt over the top of the child restraint. Recline the child restraint and thread the vehicle belt through the belt - Graco 1751929 | Owners Manual - Page 25
of the lap/shoulder belt. For more information on how to tighten the belt for your seat belt system, see Section 6.2 Vehicle Seat Belt Requirements, pp. 18-21, or your vehicle owner's manual. 5. While pulling the shoulder portion of the lap/shoulder belt, lay the shoulder belt inside the - Graco 1751929 | Owners Manual - Page 26
now. See Section 7.4 Using the Tether, page 30. When not using the tether, hook it on the tether storage bar on the back of the seat. 7. Safety Check for Secure Installation Perform this test every time you drive with your child. Holding the child restraint near the vehicle belt path, TWIST - Graco 1751929 | Owners Manual - Page 27
defined as anchorages 280mm (11 inches) between anchor points. Graco does not recommend using the LATCH system in the center position if the spacing is greater than 280 mm (11 inches) unless recommended in your vehicle owner's manual. Typical seat in a passenger vehicle. Other vehicle types may have - Graco 1751929 | Owners Manual - Page 28
bars and extend LATCH to its maximum length for ease of installation. 2. Place the child restraint firmly against the back of a forward-facing vehicle seat – with LATCH lower anchors. 3. Hook LATCH Connectors to vehicle lower anchors –. Pull firmly on Connectors to be sure they are attached - Graco 1751929 | Owners Manual - Page 29
7.4 Using the Tether, page 30. If you choose not to use the tether, hook it on the tether storage bar on the back of the seat. See Section 8.1, Storing LATCH and Tether, page 32. 7. Safety Check for Secure Installation Perform this test every time you drive with your child. Holding the - Graco 1751929 | Owners Manual - Page 30
vehicle owner's manual for the location(s). If your vehicle is not equipped with a tether anchor, it may be possible to install one. Contact your vehicle dealership for the proper anchor location and installation. You may purchase a tether anchor parts kit by calling Graco Customer Service at 1-800 - Graco 1751929 | Owners Manual - Page 31
is in the desired position, release the handle and push on the seat until you hear the seat lock into position. 2. To put seat back into one of the upright positions, squeeze the recline handle and push the seat back ™. When the seat is in the desired position, release the handle and push on - Graco 1751929 | Owners Manual - Page 32
is installed in an automobile with a lap belt using recline position 2. (see Section 7.1, With a Vehicle Lap Only Belt, pp. 22-23). 3. Check that the airplane seat belt holds the child restraint securely in place at all times. 32 - Graco 1751929 | Owners Manual - Page 33
. 1. Insert the two prongs of the cupholder through the — fabric slots and into the two slots on either the left or right side of the seat —. ˜ 2. Push cupholder down until the clip snaps onto the bottom of seat ˜. CHECK that cupholder is secure by pulling on it. Clip 33 - Graco 1751929 | Owners Manual - Page 34
or crash: • Always make sure shoulder straps are threaded through slots and properly positioned on shoulders. • Never allow body support to bunch or fold behind child. • Use body support with bottom harness slots only. • Make sure that harness covers do not interfere with placement of the chest clip - Graco 1751929 | Owners Manual - Page 35
with the buckle securely locked, do not use this child restraint. Call Graco at 1-800-345-4109 to purchase a replacement harness or buckle. • NEVER HAND CHILD RESTRAINT or a child restraint whose history you do not know. • SEAT COVER may be cleaned with a damp sponge using mild soap and cool water. - Graco 1751929 | Owners Manual - Page 36
Pad DO NOT USE child restraint without the seat cover. – 1. To remove seat pad: a) Recline the seat by squeezing the recline lever up and pulling the seat forward, so you will have access to the back of the seat –. b) Loosen the harness — straps by lifting the adjustment lever on the front - Graco 1751929 | Owners Manual - Page 37
™ d) Open harness clip ™. e) Unbuckle harness straps š. š f) Pull strap ends through slots ›. › g) Push crotch strap through slot œ. œ 37 - Graco 1751929 | Owners Manual - Page 38
models may have elastic straps that will need to be removed before the seat pad can be lifted off the seat. Unhook elastic straps from underside of seat as shown . i) Remove seat pad by ž pulling away from seat ž. 2. Machine wash cover in cold water on delicate cycle and drip-dry. DO - Graco 1751929 | Owners Manual - Page 39
Notes 39 - Graco 1751929 | Owners Manual - Page 40
10.0 Replacement Parts To purchase parts or accessories or for warranty information in the United States, please contact us at the following: www.gracobaby.com or 1-800-345-4109 Keep this manual in the storage slot on the front of the child restraint just below the recline handle. 40 - Graco 1751929 | Owners Manual - Page 41
. A pesar de que el uso de este sistema de seguridad para niños parezca fácil de descifrar, es muy importante LEER, ENTENDER Y SEGUIR EL MANUAL DEL PROPIETARIO. No usar debidamente este sistema de seguridad para niños aumenta el riesgo de lesiones serias o muerte en una parada repentina o accidente - Graco 1751929 | Owners Manual - Page 42
Índice de materias 1.0 Advertencias a padres y otros usuarios 3 2.0 Información sobre el registro 4-5 2.1 Registro de su sistema de seguridad para niños 4 2.2 Información sobre el retiro de productos del mercado 4 2.3 Si necesita ayuda 5 3.0 Información importante 5-8 3.1 Advertencias 5 3.2 - Graco 1751929 | Owners Manual - Page 43
para niños parezca fácil de descifrar, es muy importante LEER, ENTENDER Y SEGUIR EL MANUAL DEL PROPIETARIO. El manual deberá guardarse en la ranura debajo de la palanca de reclinación. También debe leer el manual del propietario de su vehículo. La seguridad de su niño depende de que: 1. Introduzca - Graco 1751929 | Owners Manual - Page 44
para que lo podamos contactar en dicho caso. Envíe su nombre, dirección , y el número de modelo del sistema de seguridad y fecha de fabricación a: Graco Children's Products Inc. 150 Oaklands Blvd. Exton, PA 19341 o llame al 1-800-345-4109 2.2 Para información sobre el retiro de productos del mercado - Graco 1751929 | Owners Manual - Page 45
ón importante 3.1 Advertencias • NO INSTALE NI USE ESTE SISTEMA DE SEGURIDAD PARA NIÑOS HASTA QUE HAYA LEÍDO Y ENTIENDA LAS INSTRUCCIONES EN ESTE MANUAL Y EN EL MANUAL DEL PROPIETARIO DE SU VEHÍCULO. NO deje que otros instalen o usen el sistema de seguridad para niños a menos que entiendan cómo - Graco 1751929 | Owners Manual - Page 46
fuerza y causar lesiones serias o la muerte de su niño. Consulte el manual del propietario del vehículo para obtener información sobre las bolsas de aire ículo con una bolsa de aire para el pasajero delantero, consulte el manual del propietario de su vehículo así como estas instrucciones para la - Graco 1751929 | Owners Manual - Page 47
• CAMBIE EL SISTEMA DE SEGURIDAD PARA NIÑOS DESPUÉS DE UN ACCIDENTE DE CUALQUIER TIPO. Un accidente puede causar daño invisible al sistema de seguridad para niños. • DEJE DE USAR EL SISTEMA DE SEGURIDAD PARA NIÑOS Y TÍRELO luego de la fecha indicada en la parte de abajo del sistema de seguridad. "NO - Graco 1751929 | Owners Manual - Page 48
3.2 Limitaciones de peso y altura PARA EVITAR SERIAS LESIONES O LA MUERTE NO USE EL SISTEMA DE SEGURIDAD PARA NIÑOS EN UN NIÑO MÁS GRANDE O MÁS ALTO QUE LA ALTURA Y PESO QUE SE LISTAN A CONTINUACIÓN. Su niño DEBE cumplir TODOS los requisitos: • PESO: de 20 a 40 libras (de 9 a 18 kg) • ALTURA: 43 - Graco 1751929 | Owners Manual - Page 49
cinturón del hombro Cinturón del LATCH (guardado) Correa de ajuste del arnés Palanca de reclinación Vía del cinturón del vehículo (rojo) Compartimiento de almacenamiento del manual del propietario Accesorios (en ciertos modelos) Apoyavasos de lujo Consola de almacenamiento 9 - Graco 1751929 | Owners Manual - Page 50
debe usarse SOLAMENTE EN LUGAR del cinturón del vehículo si el vehículo está equipado con puntos de anclaje LATCH. Por favor, consulte el manual del propietario del vehículo para identificar las ubicaciones del LATCH en su vehículo. 10 - Graco 1751929 | Owners Manual - Page 51
5.0 Uso del arnés del sistema de seguridad para niños 5.1 Colocación de las correas del arnés NO AJUSTAR DEBIDAMENTE LAS CORREAS DEL ARNÉS DEL NIÑO AUMENTA EL RIESGO DE SUFRIR LESIONES SERIAS O LA MUERTE EN CASO DE UNA CURVA CERRADA, PARADA REPENTINA O ACCIDENTE. Ajuste apretadamente los cinturones - Graco 1751929 | Owners Manual - Page 52
4. Coloque al niño en el asiento. – Las correas del arnés deben pasar por las ranuras a la altura o apenas por encima de los hombros –. Si las correas están en las ranuras correctas, vaya al paso 1 de la página 15. 5. Para ajustar las correas — del arnés: Afloje las correas del arnés - Graco 1751929 | Owners Manual - Page 53
c) Tire los extremos de las correas a través de las ™ ranuras ™ y vuelva a insertarlos en las ranuras correctas š como se determina en el paso 4, página 12. Verifique que las correas no estén dobladas. š d) Vuelva a armar las correas sobre la placa de unión de metal exactamente › como - Graco 1751929 | Owners Manual - Page 54
6. Ajuste del arnés – Afloje las correas del arnés levantando la palanca de liberación del arnés de ade- lante del asiento mientras tira las correas hacia afuera en los hombros como se indica –. — Tense las correas del arnés tirando de la correa de ajuste adelante del asiento —. (Vea tambi - Graco 1751929 | Owners Manual - Page 55
en la hebilla. NO use el sistema de seguridad para niños si el lenguas de la hebilla no se traba en su lugar. Llame a Graco al 1-800-345-4109. ˜. VERIFIQUE que las correas no estén dobladas. VERIFIQUE que el arnés esté debidamente apretado tirando de las correas. NO use el - Graco 1751929 | Owners Manual - Page 56
3. Tire la correa de ajuste para tensionar el arnés – con seguridad –. 4. Trabe la traba del arnés —. Ponga la traba del arnés en el medio del — pecho del niño, a la altura de las axilas. 5. Asegúrese que las correas estén planas y ˜ ajustadas contra los hombros del niño. No debería - Graco 1751929 | Owners Manual - Page 57
para niños. Si no está seguro dónde colocar el sistema de seguridad para niños en su vehículo, consulte el manual del propietario del vehículo o llame a Graco Children's Products, Inc., al 1-800-345-4109. • Los niños están más seguros cuando están debidamente sujetados en las posiciones de sentado - Graco 1751929 | Owners Manual - Page 58
cinturones de seguridad que no son seguros se parecen mucho a los que no presentan peligro. Si no está seguro, consulte su manual del dueño del vehículo o llame a Graco al 1-800-345-4109. 6.2.1 Sistemas PELIGROSOS de cinturones de vehículos NO USE NINGUNO DE LOS SIGUIENTES SISTEMAS PARA SUJETAR EL - Graco 1751929 | Owners Manual - Page 59
• Cinturón de seguridad de la falda con retractor de traba de emergencia (Emergency Locking Retractor, ELR) Este cinturón de seguridad para la falda se mantiene flojo y puede moverse hasta que se trabe en un accidente o parada repentina. • Combinación de cinturón para la falda y el hombro con - Graco 1751929 | Owners Manual - Page 60
asiento cumple todos los otros requisitos de estas instrucciones y las del manual del propietario del vehículo. El LATCH puede usarse en lugar de culo está equipado con puntos de anclaje LATCH. Por favor, consulte el manual del propietario del vehículo para determinar las ubicaciones del LATCH y la - Graco 1751929 | Owners Manual - Page 61
• Combinación cinturón para la falda y el hombro con placa de cierre con traba Una vez que esté trabado en la hebilla, este tipo de cinturón tiene una placa de seguridad que no permitirá que la parte del cinturón de seguridad para la falda se afloje. El cinturón se ajusta tirando con fuerza de la - Graco 1751929 | Owners Manual - Page 62
EL RIESGO DE SUFRIR LESIONES SERIAS O LA MUERTE EN CASO DE UNA CURVA CERRADA, PARADA REPENTINA O ACCIDENTE. Cumpla detenidamente estas instrucciones y las del manual del propietario de su vehículo para asegurarse que el sistema de seguridad para niños esté debidamente ubicado, colocado y asegurado - Graco 1751929 | Owners Manual - Page 63
ajustar el cinturón de su sistema del cinturón de seguridad, vea la Sección 6.2, Requisitos del cinturón de seguridad del vehículo, páginas 18 a 21, o el manual del propietario de su vehículo. 5. Si desea usar la correa del anclaje para mantener el asiento en su lugar, asegúrela ahora mismo. Vea - Graco 1751929 | Owners Manual - Page 64
7.2 Con un cinturón del vehículo para la falda/hombro Cuando usa un cinturón combinado aprobado para falda/hombro, este sistema de seguridad para niños está equipado con una traba que se usa para asegurar la parte del hombro del cinturón para que no se afloje ni mueva durante el uso. Usted debe - Graco 1751929 | Owners Manual - Page 65
cinturón de su sistema del cinturón de seguridad, vea la Sección 6.2, Requisitos del cinturón de seguridad del vehículo, páginas 18 a 21, o el — manual del propietario de su vehículo. 5. Mientras tira la parte del hombro del cinturón para el hombro y la falda, ponga el cinturón del hombro - Graco 1751929 | Owners Manual - Page 66
6. Si desea usar la correa del anclaje para mantener el asiento en su lugar, asegúrela ahora mismo. Vea la Sección 7.4 Uso del anclaje, página 30. Cuando no se usa el anclaje, engánchelo en la barra de almacenamiento del anclaje ubicada atrás del asiento. 7. Verificación de seguridad para una - Graco 1751929 | Owners Manual - Page 67
se define como anclajes de 280 mm (11 pulgadas) entre los puntos de anclaje. Graco no recomienda usar el sistema LATCH en la posición central si el espacio es más de 280 mm (11 pulgadas) a menos que se lo recomiende en su manual del dueño del vehículo. Un asiento típico de un vehículo de pasajeros - Graco 1751929 | Owners Manual - Page 68
1. Saque ambas conexiones del LATCH y la conexión del anclaje de las barras de almacenamiento y extienda el LATCH hasta alcanzar la longitud máxima para facilitar la instalación. 2. Coloque el sistema de seguridad para niños firmemente contra el – respaldo del asiento del vehículo que mire - Graco 1751929 | Owners Manual - Page 69
6. Todas las posiciones del asiento LATCH tienen puntos de anclaje. Asegure la parte de arriba del asiento usando la correa de anclaje. Vea la Sección 7.4 Uso del anclaje en la página 30. Si decide no usar el anclaje, engánchelo en la barra de almacenamiento del anclaje ubicado en la parte de atrás - Graco 1751929 | Owners Manual - Page 70
LATCH tienen puntos de anclaje. Si desea usar el anclaje, consulte el manual del propietario de su vehículo para determinar los lugares. Si su un juego de piezas para sujetar el anclaje llamando a Servicio al Cliente de Graco al 1-800-345-4109. 1. Verifique que el anclaje esté apretadamente – - Graco 1751929 | Owners Manual - Page 71
7.5 Uso de la reclinación 1. Para usar el asiento reclinado: apriete la manija ™ de reclinación al frente del asiento y tire el asiento hacia adelante hacia una de las posiciones de reclinación. ™. Cuando el asiento esté en la posición deseada, libere la manija y empuje el asiento hasta - Graco 1751929 | Owners Manual - Page 72
8.0 Información adicional 8.1 Cómo guardar el LATCH y anclaje 1. Facilitar el almacenamiento, extienda el LATCH hasta el máximo. 2. Ubique la barra de Barra del almacenamiento – almacenamiento en la parte trasera del sistema de seguridad para niños –. 3. Sujete las conexiones del LATCH a la - Graco 1751929 | Owners Manual - Page 73
8.3 Accesorios (en ciertos modelos) Nunca ponga objetos filosos o con punta en el apoyavasos. En un accidente, estos objetos podrían golpear a su niño y causar serias heridas. 1. Inserte las dos clavijas del apoyavasos a través de — las ranuras de tela y en las dos ranuras del costado izquierdo - Graco 1751929 | Owners Manual - Page 74
Su modelo podría incluir uno o más de los siguientes accesorios. Para prevenir la eyección en un accidente o parada repentina: • Asegúrese siempre que las correas del hombro pasan por las ranuras y están debidamente instaladas en los hombros. • Nunca deje que el soporte del cuerpo se apile o se - Graco 1751929 | Owners Manual - Page 75
no puede lograr que el arnés se mantenga apretado con la hebilla trabada con seguridad, no use este sistema de seguridad para niños. Llame a Graco al 1-800-345-4109 para comprar un arnés o hebilla de repuesto. • NUNCA USE UN SISTEMA DE SEGURIDAD PARA NIÑOS USADO o un sistema de seguridad - Graco 1751929 | Owners Manual - Page 76
Para lavar la almohadilla del asiento NO use el sistema de seguridad para niños sin la funda del asiento. – 1. Para sacar la almohadilla del asiento: a) Recline el asiento moviendo la palanca de reclinación hacia arriba y tirando el asiento hacia adelante para lograr el acceso a la parte - Graco 1751929 | Owners Manual - Page 77
™ d) Abra la traba del arnés ™. e) Destrabe las correas del š arnés š. f) Tire los extremos de las correas a través de las › ranuras ›. g) Pase la correa de la œ entrepierna por la ranura œ. 37 - Graco 1751929 | Owners Manual - Page 78
h) Algunos modelos podrían tener correas elásticas que deben sacarse antes de que se pueda levantar la almohadilla del asiento. Desenganche las correas elásticas de la parte de abajo del asiento como se indica . i) Saque la almohadilla tirándola del asiento ž. 2. Lave la funda a máquina en agua fr - Graco 1751929 | Owners Manual - Page 79
Notas 39 - Graco 1751929 | Owners Manual - Page 80
o para obtener información sobre la garantía en los Estados Unidos, por favor comuníquese con nosotros en: www.gracobaby.com o 1-800-345-4109 Guarde este manual en el compartimiento de almacenamiento en el frente del sistema de seguridad para niños apenas debajo de la palanca de reclinación. 40
-
 1
1 -
 2
2 -
 3
3 -
 4
4 -
 5
5 -
 6
6 -
 7
7 -
8
-
9
-
10
-
11
-
12
-
13
-
14
-
15
-
16
-
17
-
18
-
19
-
20
-
21
-
22
-
23
-
24
-
25
-
26
-
27
-
28
-
29
-
30
-
31
-
32
-
33
-
34
-
35
-
36
-
37
-
38
-
39
-
40
-
41
-
42
-
43
-
44
-
45
-
46
-
47
-
48
-
49
-
50
-
51
-
52
-
53
-
54
-
55
-
56
-
57
-
58
-
59
-
60
-
61
-
62
-
63
-
64
-
65
-
66
-
67
-
68
-
69
-
70
-
71
-
72
-
73
-
74
-
75
-
76
-
77
-
78
-
79
-
80
 |
 |

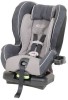
Forward Facing Child Restraint
Owner’s Manual
Read this manual
KEEP INSTRUCTIONS FOR FUTURE USE.
Even if using this child restraint seems easy to
figure out on your own, it is very important to READ,
UNDERSTAND AND FOLLOW THE OWNER’S MANUAL.
Failure to properly use this child restraint increases
the risk of serious injury or death in a sudden stop
or crash.
© 2008 Graco
1752289 / PD103697A
9/08
US
BAR CODE
CozyCline