Graco 1753334 Owners Manual - Page 29
Harness Removal
 |
UPC - 047406104192
View all Graco 1753334 manuals
Add to My Manuals
Save this manual to your list of manuals |
Page 29 highlights
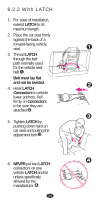
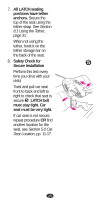
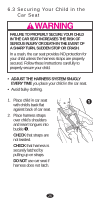
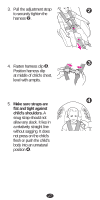
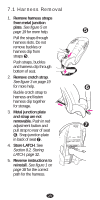
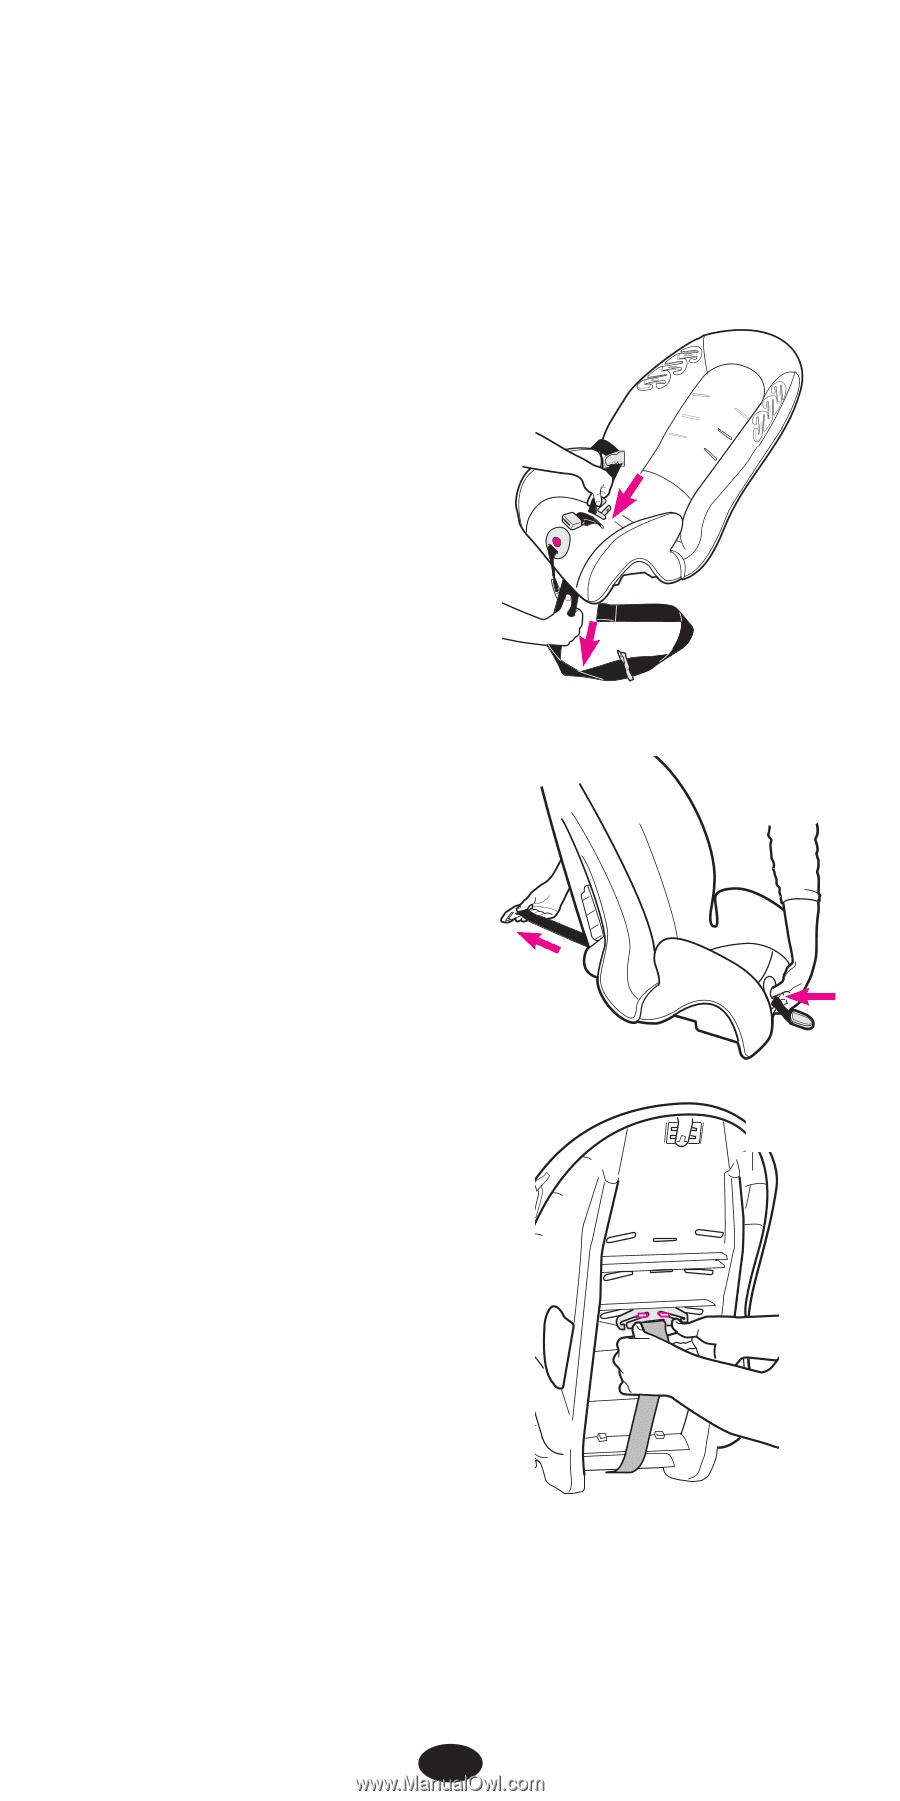
7.1 Harness Removal 1. Remove harness straps from metal junction plate. See figure 5 on page 19 for more help. Î Pull the straps through harness slots. Do not remove buckles or harness clip from straps Î. Push straps, buckles and harness clip through bottom of seat. 2. Remove crotch strap. See figure 3 on page 19 for more help. Ï Buckle crotch strap to harness and fasten harness clip together for storage. 3. Metal junction plate and strap are not removable. Push in red adjustment button and Ð pull strap to rear of seat Ï. Snap junction plate in back of seat Ð. 4. Store LATCH. See Section 8.2, Storing LATCH, page 32. 5. Reverse instructions to reinstall. See figure 1 on page 38 for the correct path for the harness. 29
-
 1
1 -
2
-
3
-
4
-
5
-
6
-
7
-
8
-
9
-
10
-
11
-
12
-
13
-
14
-
15
-
16
-
17
-
18
-
19
-
20
-
21
-
22
-
23
-
 24
24 -
 25
25 -
 26
26 -
 27
27 -
 28
28 -
 29
29 -
 30
30 -
 31
31 -
 32
32 -
 33
33 -
 34
34 -
35
-
36
-
37
-
38
-
39
-
40
-
41
-
42
-
43
-
44
-
45
-
46
-
47
-
48
-
49
-
50
-
51
-
52
-
53
-
54
-
55
-
56
-
57
-
58
-
59
-
60
-
61
-
62
-
63
-
64
-
65
-
66
-
67
-
68
-
69
-
70
-
71
-
72
-
73
-
74
-
75
-
76
-
77
-
78
-
79
-
80
-
81
-
82
-
83
-
84
 |
 |
29
7.1 Harness Removal
1.
Remove harness straps
from metal junction
plate
.
See figure 5 on
page 19
for more help.
Pull the straps through
harness slots. Do not
remove buckles or
harness clip from
straps
˛
.
Push straps, buckles
and harness clip through
bottom of seat.
2.
Remove crotch strap
.
See figure 3 on page 19
for more help.
Buckle crotch strap to
harness and fasten
harness clip together
for storage.
3.
Metal junction plate
and strap are not
removable.
Push in red
adjustment button and
pull strap to rear of seat
ˇ
. Snap junction plate
in back of seat
—
.
4.
Store LATCH
. See
Section 8.2, Storing
LATCH, page 32
.
5.
Reverse instructions to
reinstall.
See figure 1 on
page 38
for the correct
path for the harness.
˛
ˇ
—