Hamilton Beach 48571 User Guide - Page 3
Warning
 |
UPC - 022333485712
View all Hamilton Beach 48571 manuals
Add to My Manuals
Save this manual to your list of manuals |
Page 3 highlights
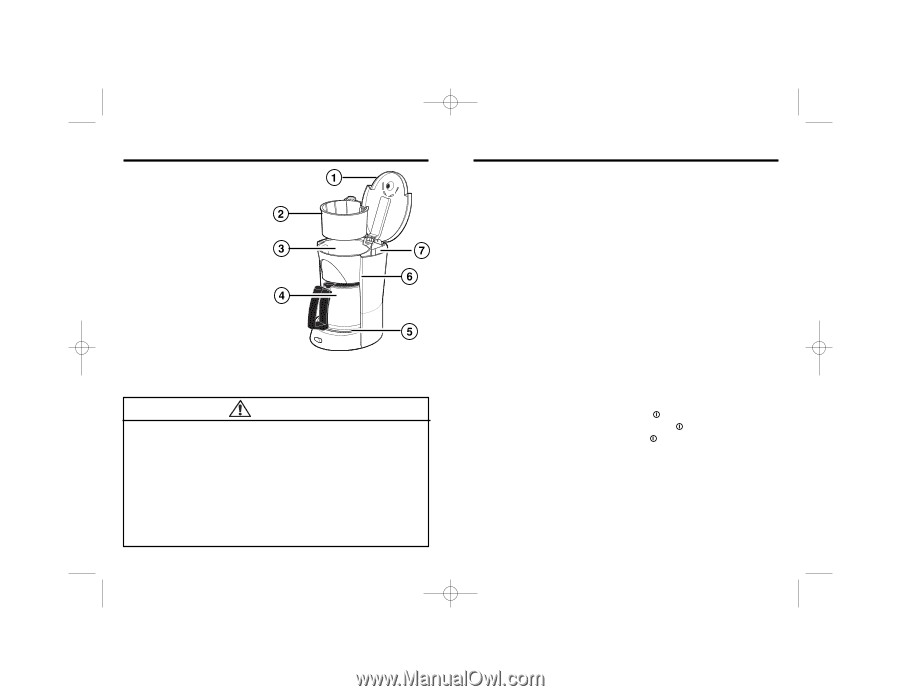
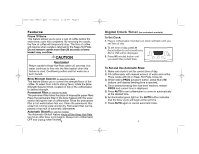
840132600 ENv01.qxd 11/29/04 4:38 PM Page 4 Parts and Features 1. Lid 2. Brew Basket 3. Brew Basket Well 4. Carafe 5. Keep-Hot Plate 6. Water Window 7. Reservoir NOTE: Picture references major components for all coffeemakers covered by these instructions. WARNING Burn Hazard To avoid hot coffee overflowing from the filter basket: • When using decaffinated coffee, do not exceed the coffee manufacturer's recommended serving amount. • Press firmly on lid to ensure the lid is completely closed. If a filter basket overflow occurs, unplug the coffeemaker and allow the coffee in the filter basket to cool before removing the filter basket. 4 To Make Coffee 1. Before first use, clean coffeemaker by following steps listed in "To Clean the Inside of the Coffeemaker." Use either clear water or vinegar. If clock model, read Digital Clock Timer section. 2. Place brew basket in brew basket well. Insert thumb handle in the left opening. Ensure brew basket is fully seated. 3. Place a cupcake style paper filter in brew basket. A permanent filter may also be used. 4. For each cup of coffee being made, place one level scoop (provided with coffeemaker) or one level tablespoon of coffee into filter. 5. Fill carafe with the desired amount of cold tap water. 6. Lift lid and pour water from carafe into reservoir. NOTE: Do not fill past the 12 cup mark (54 ounces). 7. Place carafe, with carafe lid attached, on Keep-Hot Plate. 8. Close lid. Press firmly on lid to ensure that it is completely closed. 9. For switch models: Turn switch to ON. A lighted switch indicates coffeemaker is on. Turn switch to OFF and unplug when finished. For clock models: press ON/OFF button to start. An illuminated red light on the ON/OFF button indicates coffeemaker is on. Press ON/OFF again to turn off and unplug when finished. NOTE: For clock models, see "To Set and Use Automatic Brew" on page 7. For non-clock models with automatic shutoff: Press and release ON/OFF switch. Red light illuminates to indicate the coffeemaker is on. Press and release switch again to turn coffeemaker off and unplug with finished. 5
-
 1
1 -
 2
2 -
 3
3 -
 4
4 -
 5
5 -
 6
6 -
 7
7 -
 8
8 -
 9
9 -
10
-
11
-
12
-
13
-
14
-
15
-
16
-
17
-
18
-
19
-
20
 |
 |