Hamilton Beach 74250 Use & Care - Page 3
How To Clean and Store, Hints For Best Results - electric knife
 |
UPC - 040094742509
View all Hamilton Beach 74250 manuals
Add to My Manuals
Save this manual to your list of manuals |
Page 3 highlights
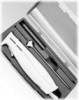
840080100 Ev02.qxd 2/21/01 2:25 PM Page 4 How to Assemble and Use This electric knife is perfect for slicing cooked meats and poultry and many bakery items. CAUTION: Be sure cord is not connected to electric outlet when removing or inserting blades and when knife is not in use. The blades are extremely sharp. Always handle by the side opposite the cutting edge, as illustrated, or by the plastic guards. 1. If blades are separated, pick up by the plastic guard. Slide the rivet on one blade into the keyhole slot in the other blade until they are locked together. 2. Holding blades together at the base of the blade with cutting edge down, slide onto motor housing until both blades click into place. 3. Plug cord into outlet. 4. Hold knife by handle. Pull On/Off button like a trigger to operate. You must hold the button "On" for the knife to operate. 5. To stop, release the button. 4 How To Clean and Store WARNING: To reduce risk of personal injury, always disconnect cord from electric outlet before inserting, removing or cleaning blades. Blades are sharp; handle carefully. 1. Unplug cord from electric outlet. 2. Firmly pull back blade release button. Grasp plastic guard and carefully pull until blades release. 3. Carefully separate blades by sliding apart to disengage rivet from keyhole. 4. Wash blades in hot, soapy water. Rinse and dry thoroughly. 5. After washing and drying, immediately place blades into the protective sleeve for storage. 6. To clean motor housing and cord, wipe with a damp cloth and then dry thoroughly. Hints For Best Results • Move knife through the food. Do not use a back and forth sawing motion. • Let meats stand about 15 minutes after cooking and before slicing. • Slice down to and around bone. Do not attempt to slice through bone. • Do not cut through frozen foods. • Do not attempt to sharpen the serrated blades at home. Replacement blades may be purchased from Hamilton Beach/Proctor-Silex, Inc. See "Customer Service" for more information. 5
-
 1
1 -
 2
2 -
 3
3 -
 4
4 -
 5
5 -
 6
6 -
 7
7 -
 8
8
 |
 |
