Hannspree HF259HPB User Manual - Page 11
CONNECTING TO A A/V DEVICE, Connecting A/V Devices
 |
View all Hannspree HF259HPB manuals
Add to My Manuals
Save this manual to your list of manuals |
Page 11 highlights
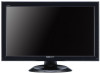
CONNECTING TO A A/V DEVICE: Connect A/V devices via the D-sub and Audio Line in connectors at the back of the monitor. 1. Connect one end of the D-Sub cable to the back of the monitor and connect the other end to the D-sub to YPbPr adapter cable. 2. Connect the Y (green) connector on the D-sub to YPbPr adapter cable to the Y output connector on the A/V device. 3. Connect the Pb (blue) connector on the D-sub to YPbPr adapter cable to the Pb/Cb output connector on the A/V device. 4. Connect the Pr (red) connector on the D-sub to YPbPr adapter cable to the Pr/Cr output on the A/V device. 5. Connect the 3.5mm mini jack to R/L adapter cable to the audio output connector of the A/V device and the other end to the audio input connector at the back of the monitor. 6. Turn on your monitor and A/V device. Figure.3. Connecting A/V Devices 11
-
 1
1 -
2
-
3
-
4
-
5
-
 6
6 -
 7
7 -
 8
8 -
 9
9 -
 10
10 -
 11
11 -
 12
12 -
 13
13 -
 14
14 -
 15
15 -
 16
16 -
17
-
18
-
19
-
20
-
21
-
22
-
23
 |
 |
