Harman Kardon AVR 745 Owners Manual - Page 33
Manual Setup - user manual
 |
View all Harman Kardon AVR 745 manuals
Add to My Manuals
Save this manual to your list of manuals |
Page 33 highlights
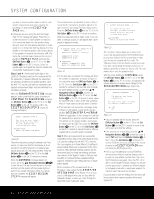
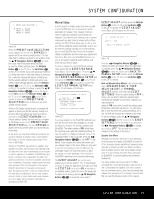
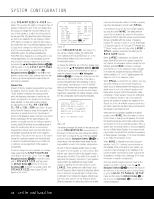
SYSTEM CONFIGURATION * PRESET SAVE SELECTION * → PRESET 1: DESIGN PRESET 2: BYPASS PRESET 3: BYPASS Figure 24 When the PRESET SAVE SELECTION screen appears for the first time, BYPASS will appear next to all memory preset position. This indicates that no settings are stored in any position. Press the ⁄/¤ Navigation Buttons D© to move the cursor next to the preset where you wish to save the settings and then press the OK/Enter Button E on the TC 30 or the Set Button œ on the ZR 10 remote. If you have previously stored an EQ Design and wish to enter new settings to that position, a warning message will appear, reminding you that the existing settings for that preset will be overwritten. If that message appears, press the OK/Enter Button E on the TC 30 or the Set Button œ on the ZR 10 remote to continue, or press the ⁄/¤ Navigation Buttons D© to move the cursor next to NO and then the OK/Enter Button E on the TC 30 or the Set Button œ on the ZR 10 remote to return to the PRESET SAVE SELECTION screen so that you may select another memory preset. While an EQ Design is being stored, a message will appear to remind you that the memory storage is in process. When the settings are stored, you will be returned to the EZSET/EQ MAIN menu. Once a setting is stored, the next time you complete an EQ Design and are at the PRESET SAVE SELECTION page, the word DESIGN will appear next to any preset where you have previously stored data. At this point, you may either follow the prompts in the menu to exit back to another menu, create another EQ Design, or use the manual setup menus to finetune an EQ Design. Thanks to EzSet/EQII, the settings for speaker "size," speaker crossover, channel output and individual channel delay time have been automatically set and require no further adjustment. In addition, EzSet/EQII also performs a complete room equalization that tailors the system's performance for the best possible sound with your combination of speakers, speaker placement and room acoustics. The next few pages in this manual detail the procedure for manually entering system data, but unless you want to view the setting information and make an adjustment, you are now ready to enjoy the finest in home theater and music reproduction. Go to page 39 for complete information on operating your AVR 745. Manual Setup In most cases it is simpler, easier and more accurate to let EzSet/EQII take care of entering the system parameters for speaker "size", speaker crossover, channel output and individual channel delay time. However, if you feel that your listening room or system components are best suited to manual entry of these settings, the AVR 745 also allows you to enter or trim any of these traditional system parameters. Even if you do make the settings manually, we recommend that you run the EzSet/EQII tests first so that a baseline setting is established, and then make your adjustments from there. Note that once EzSet/EQII has been run, you do not need to adjust all system settings, only those that you want to adjust. To view or change the current EQ Design settings, make certain that the EZSET/EQ MAIN menu (Figure 12) is on the screen. Press the ⁄/¤ Navigation Buttons D© to move the cursor next to EZSET/EQ MANUAL SETUP and then press the OK/Enter Button E on the TC 30 or the Set Button œ on the ZR 10 remote. The EZSET/EQ MANUAL SETUP menu (Figure 25) will appear on the screen. * EZSET/EQ MANUAL SETUP * EZSET/EQ: OFF ON → EZSET ADJUST SPEAKER SIZE/X-OVER DELAY ADJUST CHANNEL ADJUST BACK TO EZSET/EQ MAIN Figure 25 If you have already run the EzSet/EQII calibration system, the first line of the menu enables you to hear the difference between the settings established by EzSet/EQII. The default setting is ON, which plays the incoming source with the EzSet/EQII settings. To hear the system in a Bypass mode, with none of the equalization filters in the circuit path, press the ‹/› Navigation Buttons D© so that OFF is highlighted. Once changed, this setting will remain until you change it again in this menu. While you may want to use this menu option to hear the difference that EzSet/EQII makes, we recommend that you leave the setting on to take advantage of the benefits of EzSet/EQII's advanced room correction technology. The EZSET ADJUST line on the menu enables you to set the system's "Filt," or high-frequency boost. To make this adjustment, first make sure that the EZSET EQ line is set to ON, as this item is not available when EzSet/EQII is not in the signal path. To adjust the tilt setting, press the ⁄/¤ Navigation Buttons D© to move the cursor next to EZSET ADJUST and then press the OK/Enter Button E on the TC 30 or the Set Button œ on the ZR 10 remote. The EZSET ADJUST menu (Figure 26) will appear on the screen. * EZSET ADJUST * → TILT: 0dB BACK TO MANUAL SETUP Figure 26 Press the ‹/› Navigation Buttons D© to change the setting as needed. When the adjustment is complete, press the ⁄/¤ Navigation Buttons D© to move the cursor next to BACK TO MANUAL SETUP and then press the OK/Enter Button E on the TC 30 or the Set Button œ on the ZR 10 remote. Note on Manual Setup Menus: Each manual setup menu (SPEAKER SIZE/X-OVER, DELAY ADJUST and CHANNEL ADJUST) includes a line that reads EZSET SETTINGS. When the default setting of OFF is shown, you are able to make any required adjustments that are available on that menu. However, you may change the setting to ON at any time to recall the settings established when EzSet/EQII was last run. It is also important to note that when the EzSet/EQII settings are in use, the AVR will not allow any changes to be made. To trim the settings, press the ⁄/¤ Navigation Buttons D© until the cursor is in the EZSET SETTINGS line on the menu in use and press the ‹/› Navigation Buttons D© to change the setting to OFF. This will allow you to make changes to the settings in that menu. Speaker Size Menu Although most listeners will prefer to take advantage of the accuracy and speed of EzSet/EQII to make all of the necessary speaker adjustments, advanced users may wish to experiment with how different combinations of settings sound in their home theater environment or to use settings other than those calculated by EzSet/EQII, to accommodate personal listening preferences. The menu system used in your AVR 745 differs somewhat from conventional speaker setup menus in that it consolidates the speaker "size" and crossover into one convenient menu. Even if you are familiar with making these adjustments, it is strongly recommended that you read the following section of this manual. SYSTEM CONFIGURATION 33
-
 1
1 -
2
-
3
-
4
-
5
-
6
-
7
-
8
-
9
-
10
-
11
-
12
-
13
-
14
-
15
-
16
-
17
-
18
-
19
-
20
-
21
-
22
-
23
-
24
-
25
-
26
-
27
-
 28
28 -
 29
29 -
 30
30 -
 31
31 -
 32
32 -
 33
33 -
 34
34 -
 35
35 -
 36
36 -
 37
37 -
 38
38 -
39
-
40
-
41
-
42
-
43
-
44
-
45
-
46
-
47
-
48
-
49
-
50
-
51
-
52
-
53
-
54
-
55
-
56
-
57
-
58
-
59
-
60
 |
 |
