Harman Kardon CDR 20 Owners Manual - Page 2
CDR 20 - how to recorder
 |
View all Harman Kardon CDR 20 manuals
Add to My Manuals
Save this manual to your list of manuals |
Page 2 highlights
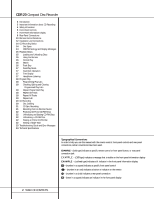
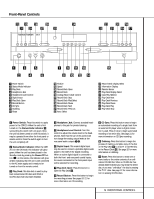
CDR 20 Compact Disc Recorder 3 Introduction 3 Important Information about CD Recording 4 Safety Information 5 Front-Panel Controls 7 Front-Panel Information Display 9 Rear-Panel Connections 10 Remote Control Functions 12 Installation and Connections 14 CD Recording Basics 14 Disc Types 14 CDR Terminology and Display Messages 15 Playback Basics 15 Loading and Unloading Discs 15 Using the Remote 16 Normal Play 16 Search 16 Track Skip 17 Dual-Play Mode 17 Dual-Deck Operation 17 Time Display 17 Headphone Listening 18 Program Play 18 Programming Play Lists 18 Checking, Editing and Clearing Programmed Play Lists 18 Repeat Programmed Play 18 Repeat One Track 18 Repeat All Tracks 19 Repeat A-B 20 CD Recording 20 Disc Dubbing 21 CD Sync Recording 21 Recording from an External Source 22 Finalizing CD-R and CD-RW Discs 22 Unfinalizing and Erasing CD-RW Discs 22 Unfinalizing a CD-RW Disc 22 Erasing an Entire CD-RW Disc 22 Erasing a Single Track 23 Troubleshooting Guide and Error Messages 24 Technical Specifications Typographical Conventions In order to help you use this manual with the remote control, front-panel controls and rear-panel connections, certain conventions have been used. EXAMPLE - (bold type) indicates a specific remote control or front-panel button, or rear-panel connection jack EXAMPLE - (OCR type) indicates a message that is visible on the front-panel information display EXAMPLE - (outlined type) indicates a lit indicator in the front-panel information display 1 - (number in a square) indicates a specific front-panel control a - (number in an oval) indicates a button or indicator on the remote ¡ - (number in a circle) indicates a rear-panel connection A - (letter in a square) indicates an indicator in the front-panel display 2 TABLE OF CONTENTS
-
 1
1 -
 2
2 -
 3
3 -
 4
4 -
 5
5 -
 6
6 -
 7
7 -
 8
8 -
9
-
10
-
11
-
12
-
13
-
14
-
15
-
16
-
17
-
18
-
19
-
20
-
21
-
22
-
23
-
24
 |
 |
