Harman Kardon HK620 Owners Manual - Page 4
Connections
 |
View all Harman Kardon HK620 manuals
Add to My Manuals
Save this manual to your list of manuals |
Page 4 highlights
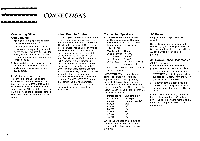
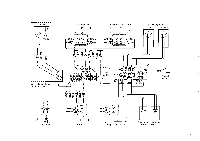
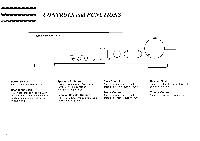
CONNECTIONS Connecting Other Components 1. Make sure your amplifier and other components are turned off. 2. Connect each component's Output jacks to the corresponding Input jacks on the back of your amplifier. Use the white, black or gray plugs to connect Left channel jacks; use the red plugs for Right jacks. 3. To use a 3-head tape deck that allows monitoring of the actual recording while it is in process, connect it to TAPE 2 jacks. For Customers with a Turntable: To connect a turntable, an optional Phono board must be installed. This board can be set to MM or MC. With the Phono board installed, however, you cannot use the AUX input. If you want to have the Phono board installed, consult your authorized Harman Kardon service center. 3 Wired Remote Control To control your amplifier with an external infrared remote sensor, connect the wire from the remote sensor to the REMOTE IN jack on the back panel. Or, if another stereo component has a built-in infrared remote sensor and a Remote Output jack, it may be possible to connect this jack to the REMOTE IN jack of your amplifier. All Harman Kardon products with "Remote In" and "Remote Out" jacks are compatible with one another, except for the Citation 22, 24 and 25. Other manufacturers' remote sensors and components may not be compatible, but it will not hurt to experiment. A second wire may be used to connect your amplifier's REMOTE OUT jack to the Remote Input of another stereo component. Continue this process to include additional components (if compatible). Connecting Speakers 1. For best performance, use high quality speaker cables. However, ordinary copper wire can be used if the gauge meets the following requirements: Wire Length Up to 2.5 meter Up to 4 meter Up to 6 meter Over 6 meter Gauge 18 AWG 16 AWG 14 AWG 10-12 AWG custom speaker cable 2. Avoid coiling excess wire with or near line level hook-up cords. IMPORTANT: When connecting two pairs of speakers, determine the impedance of each pair by looking on the back of the speakers, or in your owner's manual, or by contacting your dealer or manufacturer. Then refer to the following chart to see if both sets may be played simultaneously. If impedance of the two pairs is: 852/852 852/652 852/452 652/652 61-2/411 452/452 Can both pairs be played simultaneously? YES NO NO NO NO NO WARNING: Do not play both sets of speakers simultaneously except as recommended above. Amplifier may overheat. AC Power Plug the cord into a polarized wall socket. NOTE: The power does not shut off completely by just turning the power off. So power cord should be removed from AC outlet when not in use for a prolonged time. AC Convenience Receptacles (120 Volt units only) Other stereo components may be plugged into the back of your amplifier. 1. If a component is plugged into the SWITCHED receptacle, power will be supplied to that component only when your amplifier is turned on. 2. If a component is plugged into the UNSWITCHED receptacle, power will be supplied whether your amplifier is on or off. NOTE: Do not connect any component that requires more than 180 watts of power. Check the owner's manual or the back of the component to find its power requirement.
-
 1
1 -
 2
2 -
 3
3 -
 4
4 -
 5
5 -
 6
6 -
 7
7 -
 8
8 -
 9
9 -
 10
10
 |
 |
