Harman Kardon TD420 Owners Manual - Page 8
Installation
 |
View all Harman Kardon TD420 manuals
Add to My Manuals
Save this manual to your list of manuals |
Page 8 highlights
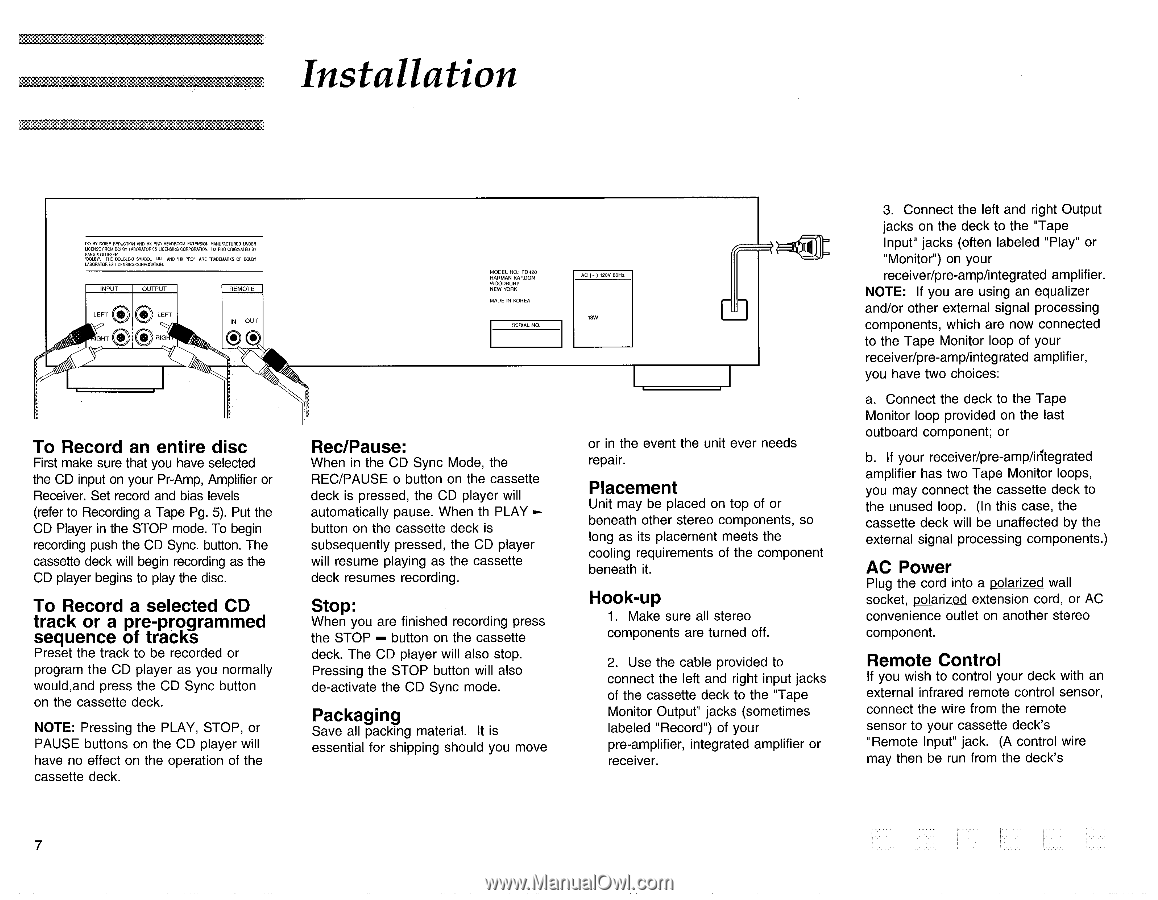
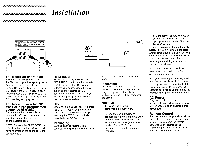
, {...441.....,V•f•ST•.•:X 14-'•:•:. Installation DOUR TIORP RPOUCTRIII ARO IN PRO NWORCCIA RIM= RANIATACRIPRO BORER DOER. FROM COHN I TAMPON,' MARROW CORPORATION. NI PRO ONONATRI SY &WOW. OLUFSEN UMW. THE DOUBLE-0 SYMBOL ', MID la PRO' ARE 'mama; OP DIXBY TABORATORIES LICENSING CORPORATION INPUT OUTPUT REMOTE LEFT 0 LEFT RIG IN OUT ® ® To Record an entire disc First make sure that you have selected the CD input on your Pr-Amp, Amplifier or Receiver. Set record and bias levels (refer to Recording a Tape Pg. 5). Put the CD Player in the STOP mode. To begin recording push the CD Sync. button. The cassette deck will begin recording as the CD player begins to play the disc. To Record a selected CD track or a pre-programmed sequence of tracks Preset the track to be recorded or program the CD player as you normally would,and press the CD Sync button on the cassette deck. NOTE: Pressing the PLAY, STOP, or PAUSE buttons on the CD player will have no effect on the operation of the cassette deck. MODEL : TD•20 HARMAN R OAMON WOODBURY NEW 'CORR MADE IN KOREA SERIAL NO AC (- I 12.0V 60Hz leW Rec/Pause: When in the CD Sync Mode, the REC/PAUSE o button on the cassette deck is pressed, the CD player will automatically pause. When th PLAY ...button on the cassette deck is subsequently pressed, the CD player will resume playing as the cassette deck resumes recording. Stop: When you are finished recording press the STOP - button on the cassette deck. The CD player will also stop. Pressing the STOP button will also de-activate the CD Sync mode. Packaging Save all packing material. It is essential for shipping should you move or in the event the unit ever needs repair. Placement Unit may be placed on top of or beneath other stereo components, so long as its placement meets the cooling requirements of the component beneath it. Hook-up 1. Make sure all stereo components are turned off. 2. Use the cable provided to connect the left and right input jacks of the cassette deck to the "Tape Monitor Output" jacks (sometimes labeled "Record") of your pre-amplifier, integrated amplifier or receiver. 3. Connect the left and right Output jacks on the deck to the "Tape Input" jacks (often labeled "Play" or "Monitor") on your receiver/pre-amp/integrated amplifier. NOTE: If you are using an equalizer and/or other external signal processing components, which are now connected to the Tape Monitor loop of your receiver/pre-amp/integrated amplifier, you have two choices: a. Connect the deck to the Tape Monitor loop provided on the last outboard component; or b. If your receiver/pre-amp/irtegrated amplifier has two Tape Monitor loops, you may connect the cassette deck to the unused loop. (In this case, the cassette deck will be unaffected by the external signal processing components.) AC Power Plug the cord into a polarized wall socket, polarized extension cord, or AC convenience outlet on another stereo component. Remote Control If you wish to control your deck with an external infrared remote control sensor, connect the wire from the remote sensor to your cassette deck's "Remote Input" jack. (A control wire may then be run from the deck's 7
-
 1
1 -
2
-
 3
3 -
 4
4 -
 5
5 -
 6
6 -
 7
7 -
 8
8 -
 9
9 -
 10
10 -
 11
11
 |
 |