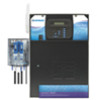
Hayward Aqua Plus Model: PL-PLUS-16V Operation - Page 14
Gallons, Liters - productions
 |
View all Hayward Aqua Plus manuals
Add to My Manuals
Save this manual to your list of manuals |
Page 14 highlights
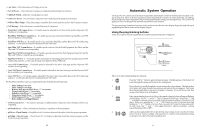
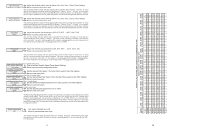
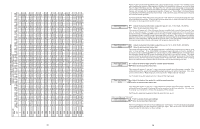
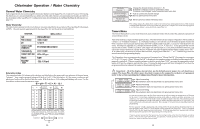
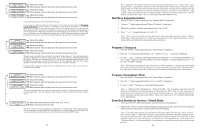
Set Day and Time Wednesday 1100::3377PP Adjust the current day of the week Move to hours setting Set Day and Time Wednesday 37 Adjust the current hour (including AM/PM if applicable) Move to minutes setting Set Day and Time Wednesday 10: P Adjust the current minute Move to previous/next menu item Use this function to set the current day of the week and time. These values are used for all the automatic timeclock functions of the Aqua Plus 16v and are also displayed as part of the default menu. The Aqua Plus 16v is designed to keep the clock running during power outages lasting less than 7 days. If power has been off for longer than 7 days, then the time may have to be reset. Display Light On for 60 sec Toggle between Always On and On for 60 sec. Move to previous/next menu item This function controls the backlight on the display. If the "On for 60 seconds" option is selected, then the backlight will automatically turn off 60 seconds after the last key is pressed and will stay off until next time a key is pressed. Note that the Display Light selection only applies to the display keypad that you are currently using. Other display/keypads will not be affected. You need to individually set this option for each display/ keypad in the system. Beeper Enabled Toggle between Enabled (default) and Disabled Beeper Move to next menu item When "Enabled", the keypad will beep every time a key is pressed. If this audible indication is not desired, select "Disabled". This function only applies to the display/keypad that you are currently using. You need to set this option for each display/keypad in your system. NOTE: This function is not supported on all display/keypads. If the "Enabled" selection is not blinking, then the current software revision of that particular keypad/display does not support the option and it will default to Beeper Enabled. Teach Wireless + to start Press and hold wireless button Teach Wireless Successful Teach Wireless NOT Successful Teach Wireless Base NOT Found Push to start process Move to previous/next menu item Press any button on wireless remote Move to previous/next menu item Move to previous/next menu item Move to previous/next menu item Move to previous/next menu item This menu will only appear if a wireless base station is connected to the Aqua Plus 16v. Perform this procedure each time a wireless remote control is added to the Aqua Plus 16v system. During this procedure the wireless remote "learns" and remembers the ID code for the wireless base station connected to this particular Aqua Plus 16v unit and will reject messages with any other ID codes. If "Base NOT found" is displayed, then the Aqua Plus 16v can not communicate with the transmitter/ receiver base station attached to the main unit. If "NOT Successful" is displayed, then the base station did not receive a signal from the remote control. This may be due to the distance between the Base Receiver and the remote device being too great or may be due to interference caused by other RF equipment operating in the neighborhood. Try using the "Change Channel" command and then repeat the "Teach Wireless" command. 11 The pool's chemistry must be balanced BEFORE activating the Aqua Plus 16v's optional chlorinator function. NOTE: If the pool does not have new water, add metal remover and non-copper based algaecide to the pool, per manufacturer's instructions. This ensures a quick, troublefree transfer to the Aqua Plus 16v system. Salt (When using optional chlorinator function) Salt Level Use the chart on the following page to determine how much salt in pounds or (Kgs) should be added to reach the recommended levels. Use the equations below (measurements are in feet/gallons and meters/liters) if pool size is unknown. Gallons (pool size in feet) Liters (pool size in meters) Rectangular Length x Width x Average Depth x 7.5 Length x Width x Average Depth x 1000 Round Diameter x Diameter x Average Depth x 5.9 Diameter x Diameter x Average Depth x 785 Oval Length x Width x Average Depth x 6.7 Length x Width x Average Depth x 893 The operating salt level is between 2700-3400 PPM (parts per million) with 3200 PPM being optimal. Before adding any salt, test the salt level. This is especially important for retrofit installation to older pools where chlorine added to the pool over time has ended up as salt. If the level is low, determine the number of gallons in the pool and add salt according to the chart below. A low salt level will reduce the efficiency of the sanitization and result in low chlorine production. A high salt level can cause the Aqua Plus 16v to stop chlorinating. The salt in your pool/spa is constantly recycled and the loss of salt throughout the swimming season should be minimal. This loss is due primarily to the addition of water because of splashing, backwashing, or draining (because of rain). Salt is not lost due to evaporation. Type of Salt to Use It is important to use only sodium chloride (NaCl) salt that is greater than 99.0% pure. This can be found at most pool stores in 40-80 lb. bags labeled "for use in swimming pools". Alternatively, use common food quality or water softener salt that is at least 99.0% pure. It is also acceptable to use water conditioning salt pellets, however, it will take longer for them to dissolve. Do not use rock salt, or salt with more than 1% of yellow prussiate of soda, salt with anti-caking additives, or iodized salt. How to Add Salt For new plaster pools, wait 10-14 days before adding salt to allow the plaster to cure. Turn the circulating pump on and add salt directly into the pool. Brush the salt around to speed up the dissolving process-do not allow salt to pile up on the bottom of the pool. Run the filter pump for 24 hours with the suction coming from the main drain (use pool vacuum if there is no main drain) to allow the salt to evenly disperse throughout the pool. The salt display may take 24 hours to respond to the change in salt concentration. Always check stabilizer (cyanuric acid), when checking salt. These levels will most likely decline together. Use the chart on page 38 to determine how much stabilizer must be added to raise the level to 80 ppm. 36
-
 1
1 -
2
-
3
-
4
-
5
-
6
-
7
-
8
-
 9
9 -
 10
10 -
 11
11 -
 12
12 -
 13
13 -
 14
14 -
 15
15 -
 16
16 -
 17
17 -
 18
18 -
 19
19 -
20
-
21
-
22
-
23
-
24
-
25
-
26
 |
 |
