Hayward Perflex® Perflex EC50C90 Series - Page 7
Start-Up & Operation cont.
 |
View all Hayward Perflex® manuals
Add to My Manuals
Save this manual to your list of manuals |
Page 7 highlights
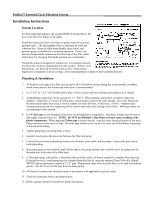
Perflex™ Extended Cycle Filtration System Start-Up & Operation (cont.) Pre-Coating Scoop 5 lbs. (2.3 kgs.) of diatomite (D.E.) into the system through the skimmer as fast as the plumbing will take it. Note and record the pressure gauge reading after the diatomite (D.E.) has been added. This is the "Pre-Coat Pressure". Filtering Filtration starts as soon as the filter has been pre-coated. As the filter removes dirt from the pool water, the accumulated dirt causes a resistance to flow. As a result, the gauge pressure will rise and the flow will decrease. When the pressure rises 7-10 psi (.49-.70 Bar) above the pre-coat pressure, regenerate the filter. Regeneration (Extending the Cycle) Stop the pump. Move the bump handle down slowly, then up briskly. Repeat 3 times. Restart the pump and filtration will resume at near the original flow and pressure. After each regeneration, and until the filter is cleaned, there may be a slight increase in the starting pressure. This is the result of dirt accumulating within the filter and is completely normal. Cleaning Cleaning is recommended when the pressure gauge rises more than 10 psi (.70 Bar) in less than a 24 hour period or when cloudy water returns to the pool for more than 30 seconds after regeneration. To clean, first stop the pump; then move the bump handle down slowly, then up briskly. Repeat 8 times. Open the vent valve (under bump cover), open the filter drain plug (Note: If the filter is installed below the pool water line, close the suction and outlet valves) and allow water and dirt to empty completely. After the filter has drained, and with the drain still open, run the pump for a few seconds to flush out any dirt remaining in the bottom of the filter. (Note: If the filter is installed below the pool water line, opening the suction valve for a few seconds with the pump off will adequately flush the unit.) Close the filter drain plug and the vent valve. Open the suction and outlet valves (when used). Start the pump and let the filter fill with water and repeat the "Cleaning" procedure. This completes the cleaning phase. The filter is now ready for re-charging. Proceed as in "Starting the Filter" and "Pre-Coating". Vacuuming Vacuuming can be performed directly into the filter whenever needed. For fastest results, regenerate the filter before and after each vacuuming operation. To Change Bump Handle Position 1. Remove the bump handle grip. Push in tab at base of handle. Carefully pry the bump cover from the retaining groove and slide the cover off the handle. 2. Using a drift (or 10 penny nail), tap the pivot pin out of the filter head anchor point, freeing the end of the handle. 3. Rotate the bump handle to the alternate position and align the handle and the head anchor holes. Tap the pivot pin in place. 4. Reinstall the bump cover and grip.
-
 1
1 -
 2
2 -
 3
3 -
 4
4 -
 5
5 -
 6
6 -
 7
7 -
 8
8 -
 9
9 -
 10
10 -
 11
11 -
 12
12
 |
 |
