HealthRider Softstrider 225p Treadmill Uk Manual
HealthRider Softstrider 225p Treadmill Manual
 |
View all HealthRider Softstrider 225p Treadmill manuals
Add to My Manuals
Save this manual to your list of manuals |
HealthRider Softstrider 225p Treadmill manual content summary:
- HealthRider Softstrider 225p Treadmill | Uk Manual - Page 1
missing or damaged parts, please call: 08457 089 009 Or write: ICON Health & Fitness, Ltd. Customer Service Department Unit 4 Revie Road Industrial Estate Revie Road, Beeston Leeds, LS118JG UK email: [email protected] CAUTION Read all precautions and instructions in this manual before using this - HealthRider Softstrider 225p Treadmill | Uk Manual - Page 2
AND ADJUSTMENT 9 HOW TO FOLD AND MOVE THE TREADMILL 13 TROUBLESHOOTING 15 CONDITIONING GUIDELINES 17 ORDERING REPLACEMENT PARTS Back Cover Note: An EXPLODED DRAWING and a PART LIST are attached in the centre of this manual. HealthRider is registered trademark of ICON Health & Fitness, Inc - HealthRider Softstrider 225p Treadmill | Uk Manual - Page 3
only a 3conductor, 1 mm2 (14-gauge) cord that is no longer than 1.5 m (5 ft.). 2. Use the treadmill only as described in this manual. 12. Keep the power cord away from heated surfaces. 3. Place the treadmill on a level surface, with at least 2 m (8 ft.) of clearance behind it and 0.5 m (2 ft.) on - HealthRider Softstrider 225p Treadmill | Uk Manual - Page 4
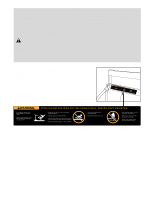
product. SAVE THESE INSTRUCTIONS The decals shown has been placed on your treadmill. If the decal is missing, or if it is not legible, please call our Customer Service Department to order a free replacement decal (see ORDERING REPLACEMENT PARTS on the back cover of this manual). Apply the decal - HealthRider Softstrider 225p Treadmill | Uk Manual - Page 5
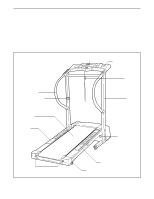
this manual carefully before using the treadmill. If you have additional questions, Before reading further, please familiarise yourself with the parts that are labelled in the drawing below. Console Water Bottle Holder (Bottle not included) Handrail Storage Latch Key/Clip Upright Walking Belt - HealthRider Softstrider 225p Treadmill | Uk Manual - Page 6
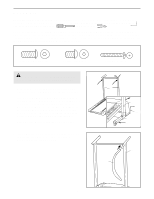
is completed. Assembly requires the included allen wrench and your own phillips screwdriver and wire cutters . Note: The underside of the treadmill walking belt is coated with high-performance lubricant. During shipping, a small amount of lubricant may be transferred to the top of the walking - HealthRider Softstrider 225p Treadmill | Uk Manual - Page 7
The Handrail Endcap should fit on the Handrail as shown, with the narrow part of the Handrail Endcap on top. Pivot the lower end of the Handrail on the Upright (11) as shown in drawing 4c. 4a 4b 4c 11 11 Narrow Part Flap 1 41 5. Refer to step 3. Tighten the Handrail Screw (53). Attach the - HealthRider Softstrider 225p Treadmill | Uk Manual - Page 8
Console Base. WARNING: Do not connect or disconnect the Wires whilst the treadmill power cord is plugged in. Tighten the plastic tie and cut off the 3 3 1 4 Tab 9. Make sure that all parts are properly tightened before you use the treadmill. Keep the included allen wrench in a secure place. - HealthRider Softstrider 225p Treadmill | Uk Manual - Page 9
accordance with all local codes and ordinances. Important: The treadmill is not compatible with GFCI-equipped outlets. Socket on treadmill Ferrite Box Plastic Tie Tab Outlet If the power cord is damaged, it must be replaced with a manufacturer-recommended power cord. DANGER: Improper connection - HealthRider Softstrider 225p Treadmill | Uk Manual - Page 10
chest. CHEST PULSE SENSOR TROUBLESHOOTING The instructions on the following pages explain treadmill, position yourself near the centre of the walking belt. For the console to display heart rate problem, try relocating the treadmill. • The CR2032 battery may need to be replaced (see page 16). 10 - HealthRider Softstrider 225p Treadmill | Uk Manual - Page 11
when turning on the power. • Always wear the clip (see the drawing above) whilst using the treadmill. When the key is removed, the walking belt will stop. • Adjust the speed in small increments. • To reduce the possibility of electric shock, keep the console dry. Avoid spilling liquids on it and - HealthRider Softstrider 225p Treadmill | Uk Manual - Page 12
treadmill, press the top or bottom of the incline control until the desired incline level is reached. 4 Follow your progress with the four displays. Speed display-This display shows the speed of the walking belt also show your heart rate. To reset the displays at any time, press the - HealthRider Softstrider 225p Treadmill | Uk Manual - Page 13
the power cord. CAUTION: You must be able to safely lift 20 kg (45 lbs.) to raise, lower, or move the treadmill. 1. Hold the treadmill with your hands in the locations shown at the right. To decrease the possibility of injury, bend your legs and keep your back straight. As - HealthRider Softstrider 225p Treadmill | Uk Manual - Page 14
until the frame and foot rail are past the storage latch. 2. Hold the treadmill firmly with both hands, and lower the treadmill to the floor. Do not drop the treadmill frame to the floor. CAUTION: To decrease the possibility of injury, bend your legs and keep your back straight. Storage Latch - HealthRider Softstrider 225p Treadmill | Uk Manual - Page 15
TROUBLESHOOTING Most treadmill problems can be solved by following the steps below. Find the symptom that applies, and follow the steps listed. If further assistance is needed, please call our Customer Service Department. PROBLEM: The power does not turn on SOLUTION: a. Make sure that the power - HealthRider Softstrider 225p Treadmill | Uk Manual - Page 16
carefully walk on the treadmill for a few minutes. Repeat until the walk- ing belt is properly tightened. PROBLEM: The heart rate monitor does not function properly SOLUTION: a. If the heart rate monitor does not function properly, refer to CHEST PULSE SENSOR TROUBLESHOOTING on page 10. b. If - HealthRider Softstrider 225p Treadmill | Uk Manual - Page 17
found by using your heart rate as a guide. The chart below shows recommended heart rates for fat burning and aerobic treadmill until your heart rate is near the highest number in your training zone. WORKOUT GUIDELINES Each workout should include the following three parts: A Warm-up-Start each workout - HealthRider Softstrider 225p Treadmill | Uk Manual - Page 18
SUGGESTED STRETCHES The correct form for several basic stretches is shown at the right. Move slowly as you stretch-never bounce. 1. Toe Touch Stretch Stand with your knees bent slightly and slowly bend forward from your hips. Allow your back and shoulders to relax as you reach down toward your - HealthRider Softstrider 225p Treadmill | Uk Manual - Page 19
NOTES - HealthRider Softstrider 225p Treadmill | Uk Manual - Page 20
NUMBER of the product (HETL40530) • the NAME of the product (HealthRider® SoftTrac 225P treadmill) • the SERIAL NUMBER of the product (see the front cover of this manual) • the KEY NUMBER and the DESCRIPTION of the part(s) (see the PART LIST and the EXPLODED DRAWING attached in the centre of this - HealthRider Softstrider 225p Treadmill | Uk Manual - Page 21
Motor Belly Pan Cable Tie Clamp Pulse Receiver Releaseable Tie Choke Belt Guide Wire Cover Walking Belt Walking Platform Belly Pan Electronics Screw Incline Wire Harness Front 4" Green Wire, F/ring 4" Black Wire, 2F 8" White Wire, Pigtail User's Manual * Includes all parts shown in the box. # These - HealthRider Softstrider 225p Treadmill | Uk Manual - Page 22
REMOVE THIS EXPLODED DRAWING AND PART LIST FROM THE MANUAL Save this EXPLODED DRAWING and PART LIST for future reference. Note: Specifications are subject to change without notice. For information about ordering replacement parts, see the back cover of the User's Manual. 34 - HealthRider Softstrider 225p Treadmill | Uk Manual - Page 23
EXPLODED DRAWING Model No. HETL40530 R0503A 11 EXPLODED DRAWING-Model No. HETL40530 1 71 31 6 81 32 38 84 39 83 83 97 62 46 99 2 10* 9 8 12 33 11 3 53 21 3 17 93 96 23 99 4 99 74 13 112 75 105 99 66 102* 14 103 34 39 59 36 76 48 47 38 37 45 44 73 40 25 38 33 43 59 78
-
 1
1 -
 2
2 -
 3
3 -
 4
4 -
 5
5 -
 6
6 -
 7
7 -
8
-
9
-
10
-
11
-
12
-
13
-
14
-
15
-
16
-
17
-
18
-
19
-
20
-
21
-
22
-
23
 |
 |
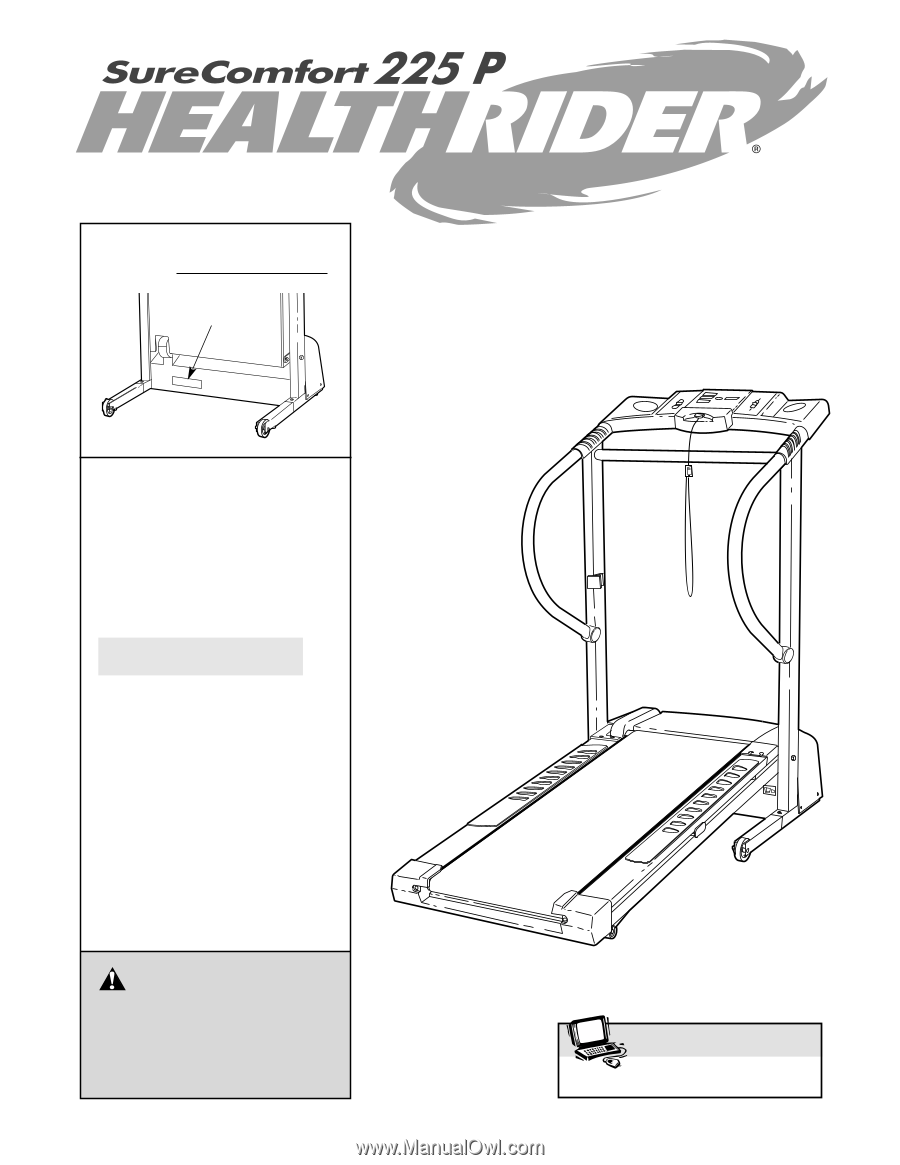
Serial Number
Decal
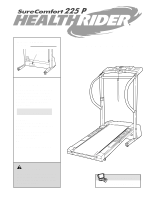
USER'S MANUAL
Model No. HETL40530
Serial No.
CAUTION
Read all precautions and instruc-
tions in this manual before using
this equipment. Save this manual
for future reference.
www.iconeurope.com
Visit our website at
QUESTIONS?
As a manufacturer, we are com-
mitted to providing complete
customer satisfaction. If you
have questions, or if there are
missing or damaged parts,
please call:
Or write:
ICON Health & Fitness, Ltd.
Customer Service Department
Unit 4
Revie Road Industrial Estate
Revie Road, Beeston
Leeds, LS118JG
UK
email: [email protected]
08457 089 009