HP 1250 Fax Setup Guide - Page 4
Open the print cartridge door
 |
View all HP 1250 Fax manuals
Add to My Manuals
Save this manual to your list of manuals |
Page 4 highlights
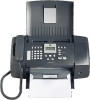
Press the on button and configure 8 Appuyez sur le bouton Activer et configurez le périphérique a After you press the On button, wait for the language prompt before continuing. b To set the language for the display, use the arrow keys to select your language, press OK, and then confirm. Use the arrow keys to select your country/region, press OK, and then confirm. a Après avoir appuyé sur le bouton Activer, attendez l'invite de la langue avant de continuer. b Pour définir la langue d'affichage, utilisez les flèches pour sélectionner votre langue, appuyez sur le bouton OK, puis confirmez votre sélection. Utilisez les flèches pour sélectionner votre pays/ région, appuyez sur OK, puis confirmez votre sélection. Open the print cartridge door 9 Ouvrez la porte d'accès aux cartouches d'impression Lift the print cartridge door. The print carriage moves to the right side. Soulevez la porte d'accès aux cartouches d'impression. Le chariot d'impression se déplace vers la droite. Remove tape from both cartridges 10 Retirez le ruban adhésif des deux cartouches Pull the tab to remove the tape from both print cartridges. CAUTION: Do not touch the copper-colored contacts or retape the cartridges. Tirez sur la languette pour retirer le ruban adhésif des deux cartouches d'impression. ATTENTION : Ne touchez pas les contacts en cuivre et ne replacez pas le ruban adhésif sur les cartouches. 4 • HP Fax
-
 1
1 -
 2
2 -
 3
3 -
 4
4 -
 5
5 -
 6
6 -
 7
7 -
 8
8
 |
 |
