HP 2500L HP Color LaserJet 2500 series 250-Sheet Feeder - Installation Guide - Page 5
Vælg bakke 2 som installeret ekstraudstyr
 |
UPC - 088698478295
View all HP 2500L manuals
Add to My Manuals
Save this manual to your list of manuals |
Page 5 highlights
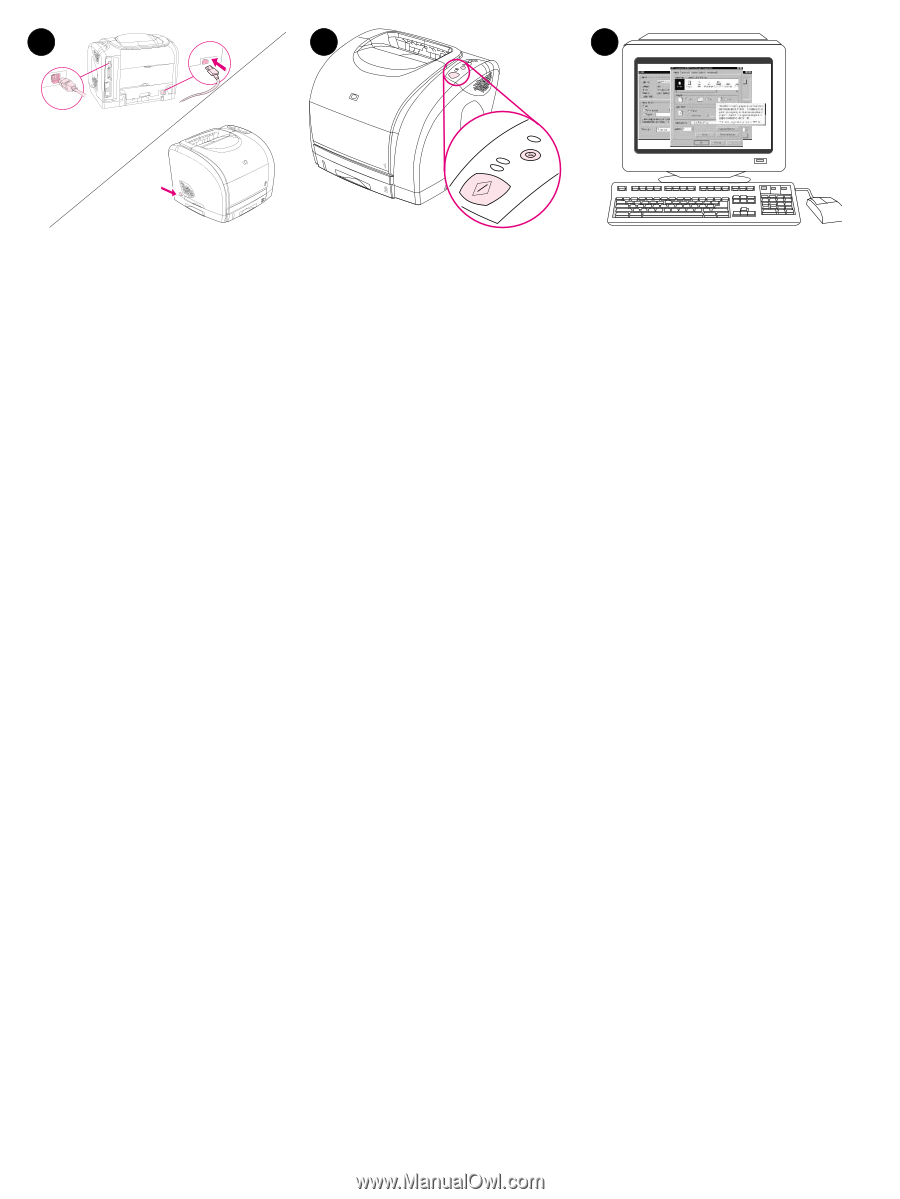
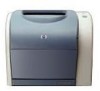
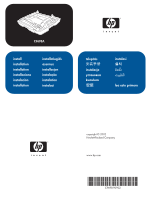
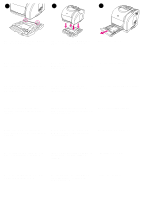
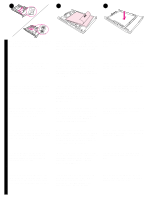
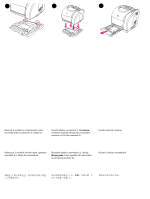
10 11 12 Reconnect the power cable and the printer cable. Turn the printer on. Press GO and CANCEL JOB simultaneously to print a Configuration page. Make sure that tray 2 is listed as installed. In the default settings for the printer driver, select tray 2 as an installed option. Reconnectez les câbles d'alimentation et d'imprimante. Mettez l'imprimante sous tension. Appuyez simultanément sur REPRISE et sur ANNULER TACHE pour imprimer une page de configuration. Vérifiez que le bac 2 est répertorié dans la liste des éléments installés. Dans les paramètres par défaut du pilote d'impression, sélectionnez le bac 2 comme option installée. Schließen Sie das Netzkabel und das Druckerkabel wieder an. Schalten Sie den Drucker ein. Drücken Sie gleichzeitig START und JOB ABBRECHEN, um eine Konfigurationsseite zu drucken. Vergewissern Sie sich, dass das Fach 2 als installiert aufgelistet wird. Wählen Sie in den Standardeinstellungen für den Druckertreiber das Fach 2 als installierte Option aus. Ricollegare i cavi di alimentazione e della stampante. Accendere la stampante. Premere contemporaneamente CONTINUA e ANNULLA OPERAZIONE per stampare una pagina di configurazione. Verificare che il cassetto 2 sia elencato tra i cassetti installati. Nelle impostazioni predefinite per il driver della stampante, selezionare il cassetto 2 come opzione installata. Vuelva a conectar el cable de alimentación y el de la impresora. Encienda la impresora. Pulse CONTINUAR y CANCELAR TRABAJO simultáneamente para imprimir una página de configuración. Compruebe que se indique como instalada la bandeja 2. En los valores predeterminados del controlador de la impresora, seleccione la bandeja 2 como opción instalada. Tilslut netledningen og printerkablet igen. Tænd printeren. Tryk på START og ANNULLER JOB samtidigt for at udskrive en konfigurationsside. Kontroller, at bakke 2 er angivet på listen som installeret. Vælg bakke 2 som installeret ekstraudstyr i standardindstillingerne for printerdriveren. Sluit het netsnoer en de printerkabel opnieuw aan. Zet de printer aan. Druk gelijktijdig op START en TAAK ANNULEREN om een configuratiepagina af te drukken. Let erop dat lade 2 wordt weergegeven als geïnstalleerde lade. In de standaardinstellingen voor de printerdriver, selecteert u lade 2 als geïnstalleerde optie. 4
-
 1
1 -
 2
2 -
 3
3 -
 4
4 -
 5
5 -
 6
6 -
 7
7 -
 8
8 -
 9
9 -
 10
10 -
 11
11 -
12
-
13
-
14
-
15
-
16
-
17
-
18
-
19
-
20
-
21
-
22
-
23
-
24
 |
 |