HP 2500c HP 2500C/C+/CM Professional Series Color Printer - (English) User's G - Page 27
metal connection points., Position the PostScript 3 Module as shown in the illustration,
 |
View all HP 2500c manuals
Add to My Manuals
Save this manual to your list of manuals |
Page 27 highlights
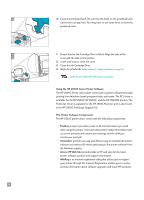
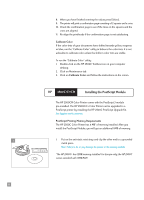
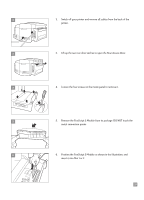
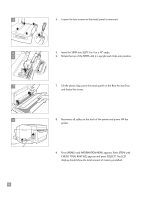
2 2. Switch off your printer and remove all cables from the back of the printer. 3 3. Lift up the two rear door latches to open the Rear Access Door. 4 4. Loosen the four screws on the metal panel to remove it. 5 5. Remove the PostScript 3 Module from its package. DO NOT touch the metal connection points. 6 6. Position the PostScript 3 Module as shown in the illustration, and insert it into Slot 1 or 2. 23
-
 1
1 -
2
-
3
-
4
-
5
-
6
-
7
-
8
-
9
-
10
-
11
-
12
-
13
-
14
-
15
-
16
-
17
-
18
-
19
-
20
-
21
-
 22
22 -
 23
23 -
 24
24 -
 25
25 -
 26
26 -
 27
27 -
 28
28 -
 29
29 -
 30
30 -
 31
31 -
 32
32 -
33
-
34
-
35
-
36
-
37
-
38
-
39
-
40
-
41
-
42
-
43
-
44
-
45
-
46
-
47
-
48
-
49
-
50
-
51
-
52
-
53
-
54
-
55
-
56
-
57
-
58
-
59
-
60
-
61
-
62
-
63
-
64
-
65
-
66
 |
 |

6
5
4
3
2
2.
Switch off your printer and remove all cables from the back of the
printer.
3.
Lift up the two rear door latches to open the Rear Access Door.
4.
Loosen the four screws on the metal panel to remove it.
5.
Remove the PostScript 3 Module from its package. DO NOT touch the
metal connection points.
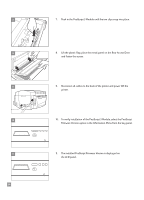
6.
Position the PostScript 3 Module as shown in the illustration, and
insert it into Slot 1 or 2.
23