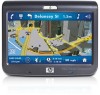
HP 310 HP iPAQ 300 Series Travel Companion - Product Guide
HP 310 - iPAQ 310 Bluetooth Widescreen Portable GPS Navigator Manual
 |
UPC - 883585309559
View all HP 310 manuals
Add to My Manuals
Save this manual to your list of manuals |
HP 310 manual content summary:
- HP 310 | HP iPAQ 300 Series Travel Companion - Product Guide - Page 1
HP iPAQ Product Guide - HP 310 | HP iPAQ 300 Series Travel Companion - Product Guide - Page 2
Hewlett-Packard Development Company, L.P. HP iPAQ warranties for Hewlett-Packard products are set forth in © IGN France This product includes mapping data licensed from Ordnance Survey with computer files under Agreement number 6776 and is an authorized distributor of selected Geomatics Canada computer - HP 310 | HP iPAQ 300 Series Travel Companion - Product Guide - Page 3
3: Charge the battery 8 Power on Travel Companion ...8 Car kit setup ...8 6 Warnings and safety information 7 Learn the basics Hardware buttons ...12 Power on/off ...12 Multifunction wheel ...12 Zoom in and out 12 Adjust volume and brightness 12 Open the Quick Launch menu 13 Screen buttons ...13 - HP 310 | HP iPAQ 300 Series Travel Companion - Product Guide - Page 4
Companion through the Startup menu Entertainment ...20 Videos ...20 Music ...21 Games ...22 Pictures ...22 Contacts ...23 Add contact ...24 Edit contact ...25 Navigate to a contact ...25 Call contact ...25 Extras ...25 Clock ...25 Phone ...27 Calculator ...27 Settings ...27 System ...28 Align screen - HP 310 | HP iPAQ 300 Series Travel Companion - Product Guide - Page 5
your Travel Companion 40 Make a call ...41 Use phone dialer ...41 Use contacts ...42 Use POI ...42 Answer or reject a call ...42 Connect to a Bluetooth stereo headphones 42 12 Map Map visualization ...45 Daylight and night color schemes 45 Current position and Lock-on-Road 45 Selected map point - HP 310 | HP iPAQ 300 Series Travel Companion - Product Guide - Page 6
...56 Brightness ...56 Power management 56 Backlight always on 56 Smart Powersave 57 Map settings ...57 Alternative Road Names 57 Show Street Labels 57 2D/3D map view 57 POI visibility ...57 Night mode ...58 Zoom settings ...58 Auto zoom ...58 Restore Lock-to-Position and Smart Zoom 59 Zoom - HP 310 | HP iPAQ 300 Series Travel Companion - Product Guide - Page 7
(for the USA map only 62 Keep position on road ...62 Regional settings ...62 Language ...63 Voice ...63 Units ...63 Time settings ...63 Set time format 63 Warnings station 66 Show excluded stations 66 16 GPS data screen 17 About screen 18 Outlook synchronization 19 Product specifications System - HP 310 | HP iPAQ 300 Series Travel Companion - Product Guide - Page 8
maintenance Using the Travel Companion ...78 Cleaning the Travel Companion ...78 Carrying or storing the Travel Companion 78 Using accessories ...78 Using the Travel Companion in public places 78 Obtain services for a cracked or damaged screen 78 Protect the Travel Companion screen from cracking - HP 310 | HP iPAQ 300 Series Travel Companion - Product Guide - Page 9
custom itineraries for export to your Travel Companion. Visit http://www.ipaq.com to learn about the latest services and content available for the Travel Companion. Use this guide to know more about how to: ● Get started with using your Travel Companion. ● Manage your contacts and synchronize data - HP 310 | HP iPAQ 300 Series Travel Companion - Product Guide - Page 10
Travel Companion You need to register the Travel Companion with Hewlett-Packard to be able to: ● Access support and services, and get the most out of your HP products. ● Manage your profile. ● Sign up for free support alerts, driver notices, and personalized newsletters. After registering the Travel - HP 310 | HP iPAQ 300 Series Travel Companion - Product Guide - Page 11
the device. NOTE: Box contents vary by model. Box Contents (1) Travel Companion (2) Stylus (3) 1700 mAH li-ion removable/rechargeable battery (4) Getting Started CD with additional software (5) Travel Companion Documentation (6) AC adapter with interchangeable plug (7) mini-USB cable - HP 310 | HP iPAQ 300 Series Travel Companion - Product Guide - Page 12
components Component (1) Power Key and LED (2) Bluetooth LED (3) Microphone Function Press and hold to turn on the Travel Companion. ● Charge LED ◦ Solid Amber - Battery charging ◦ Solid Green - Battery fully charged Blue - Bluetooth ON For Bluetooth hands free audio. 4 Chapter 4 Components - HP 310 | HP iPAQ 300 Series Travel Companion - Product Guide - Page 13
to open the Shortcut menu. Scroll to use. Use with 3.5 mm audio headphones. Use to connect the mini-USB cable. Use to reset the Travel Companion. Insert a Secure Digital (SD) storage card with the label side up for data storage. Top and bottom components Component (1) Microphone Function For - HP 310 | HP iPAQ 300 Series Travel Companion - Product Guide - Page 14
Back components Component (1) Stylus (2) Back Speaker (3) Back Cover Function Remove and use to select elements on the screen and to enter information. Use the speaker to listen to audio. Slide the cover away from the Travel Companion to remove the battery. 6 Chapter 4 Components - HP 310 | HP iPAQ 300 Series Travel Companion - Product Guide - Page 15
5 Power on and set up the Travel Companion Set up the Travel Companion Step 1: Remove the battery cover Slide the back cover down and away from the Travel Companion. Step 2: Install the battery and replace the battery cover 1. Align the battery connectors on the battery with the housing pins in the - HP 310 | HP iPAQ 300 Series Travel Companion - Product Guide - Page 16
attach the AC adapter to turn on the Travel Companion. Power on Travel Companion To power on the Travel Companion: 1. Press and hold the Power key. 2. Follow the on-screen instructions to set up the Travel Companion. NOTE: The on-screen set up instructions appear only the first time you turn on the - HP 310 | HP iPAQ 300 Series Travel Companion - Product Guide - Page 17
2. Attach the power cable to the clips on the back of the Travel Companion holder. Be sure to leave enough cable to plug into the Travel Companion, and that the connector is turned the correct way to plug into the unit. 3. Install the holder onto the windshield mounting bracket. 4. Place the car - HP 310 | HP iPAQ 300 Series Travel Companion - Product Guide - Page 18
Travel Companion into the mounted car kit holder. b. Insert the securing clip into the slot on the top of the Travel Companion. c. Plug the power cable into the Travel Companion. 6. Use the knobs to adjust the vertical and horizontal orientation of the Travel Companion. 10 Chapter 5 Power on and set - HP 310 | HP iPAQ 300 Series Travel Companion - Product Guide - Page 19
before you obey any instruction from the Travel Companion. If you need to deviate from the recommended direction, the Travel Companion suggests a modified route according to the new situation. Never place your Travel Companion where it can obstruct the view of the driver, is within the deployment - HP 310 | HP iPAQ 300 Series Travel Companion - Product Guide - Page 20
basics Your Travel Companion is a touch screen controlled device with limited hardware key functions. The device and the software are designed for easy operation. All controls are operable using your fingertips. Wherever possible, push buttons and lists are provided to make accessing functions or - HP 310 | HP iPAQ 300 Series Travel Companion - Product Guide - Page 21
bottom of all screens contain buttons that initiate functions or lead to different parts of the application. The symbols on the buttons may provide information on the current state of the Travel Companion. The buttons are as follows: Button Function Opens Backlight settings and Power management - HP 310 | HP iPAQ 300 Series Travel Companion - Product Guide - Page 22
can be operated even if the screen is locked. Reactivates the touch screen. Returns to the Main menu screen. Opens the Map screen. Displayed on the top left corner, this button opens the Phone Dialer application. On Points of interest (POI) detail screens, tapping the button calls the number - HP 310 | HP iPAQ 300 Series Travel Companion - Product Guide - Page 23
which you are traveling, or the distance of the next Via point and the destination. Toggles between the values. Displays the time remaining to reach the final destination, or to reach the next Via point. Toggles between the values. Opens Settings at the page related to the current screen's content - HP 310 | HP iPAQ 300 Series Travel Companion - Product Guide - Page 24
the + sign to zoom in. You can see a smaller part of the map in more detail. Tap the other icon to zoom out, and see a larger part of the map in less detail. On the 2D map screen (screen designed for map browsing) you can access fixed zoom levels using these icons. 16 Chapter 7 Learn the basics - HP 310 | HP iPAQ 300 Series Travel Companion - Product Guide - Page 25
of the controls frequently used in the Travel Companion. Direct selectors Some of the settings can be chosen from a list of possible values. If the values can be described graphically, icons are displayed on the screen. Tap one of the icons to set/change the value. Sometimes direct selectors appear - HP 310 | HP iPAQ 300 Series Travel Companion - Product Guide - Page 26
Travel Companion shows sliders to set Travel Companion is designed to ensure that you only need to enter letters or numbers when it is inevitable. In these cases, a full screen similar to the accented one) and the Travel Companion searches for all the Travel Companion automatically turns all initials - HP 310 | HP iPAQ 300 Series Travel Companion - Product Guide - Page 27
Aa 123 Toggles between the alphabetic and numeric keyboards. Inserts a space character in the entered text. Clears the last entered character. Tap this icon to finish entering characters. The numeric keyboard The numeric keyboard only contains numbers, on buttons. The special keys you find on the - HP 310 | HP iPAQ 300 Series Travel Companion - Product Guide - Page 28
navigate from one screen to another. When you turn on the Travel Companion, the Startup menu is displayed. You can choose from the following applications: ● Entertainment ● Contacts ● Navigation ● Extras ● Settings Entertainment Tap to access the following applications: ● Videos ● Music ● Games - HP 310 | HP iPAQ 300 Series Travel Companion - Product Guide - Page 29
playlist. . Tap to return to the main Video screen You can play, stop, or jump to next and files to Media directories to play music on your Travel Companion. For more information, see Media directories on page up by one level by tapping . ● Tap to view and organize your playlist. - HP 310 | HP iPAQ 300 Series Travel Companion - Product Guide - Page 30
playlist. ● Tap to return to the main Music screen after you finish organizing your playlist. ● You can game Each game contains a description of the rules and game controls. Pictures To view pictures using picture viewer: 1. Tap to get a thumbnail view of the pictures on your Travel Companion - HP 310 | HP iPAQ 300 Series Travel Companion - Product Guide - Page 31
the screen anywhere to stop it. Contacts The icon displays the Contact list. You can add your contacts to this list and include their phone number, address, work place, and e-mail address. You can edit the contact details any time and search for your acquaintances. If your Travel Companion is - HP 310 | HP iPAQ 300 Series Travel Companion - Product Guide - Page 32
● work address (1-3) ● home phone (1-2) ● fax ● birthday ● pager ● Web ● other address ● office location ● job ● spouse ● anniversary ● children ● home fax ● car phone ● assistant name ● assistant phone contact list, tap . 24 Chapter 8 Discovering the Travel Companion through the Startup menu - HP 310 | HP iPAQ 300 Series Travel Companion - Product Guide - Page 33
to navigate to one of your contacts could not find the address on the map. Tap the contact you wish to Travel Companion to a Bluetooth-enabled phone first. Extras Extra features of the software include clock, phone, and calculator. Clock 12 9 3 6 Tap to display the clock, set the time, or set - HP 310 | HP iPAQ 300 Series Travel Companion - Product Guide - Page 34
clock. To modify an alarm: 1. Tap an alarm entry in the list to display the detailed settings of the alarm. 2. To edit or delete a preset alarm, tap . NOTE: To delete all your alarms, tap from the Alarm list screen. 26 Chapter 8 Discovering the Travel Companion through the Startup menu - HP 310 | HP iPAQ 300 Series Travel Companion - Product Guide - Page 35
phone number, tap to initiate the call. NOTE: If you have not connected your phone via Bluetooth, your Travel Companion initiates the connection now. 4. Enter button. Settings The Settings button takes you to the settings of the device. The following options are available: ● Set the visual - HP 310 | HP iPAQ 300 Series Travel Companion - Product Guide - Page 36
Tap the menu point to calibrate the screen alignment, set up the power saving, and display information about the software and the maps. Align screen To align screen: 1. Enter the menu point to calibrate the orientation of your screen. This is necessary if your touch screen is not aligned - HP 310 | HP iPAQ 300 Series Travel Companion - Product Guide - Page 37
whether you really require to remove the selected directory. Choose Yes to confirm deletion. In this case, the particular directory is not removed from your Travel Companion, but is removed only from the list of media directories. If required, you can call back what you deleted at a later time - HP 310 | HP iPAQ 300 Series Travel Companion - Product Guide - Page 38
chosen, the map is displayed with the selected point in the middle, and the Cursor menu displays your available options. 10. Tap Set as Destination. 11. The route is automatically planned, and navigation starts. 12. Start driving, and listen to the voice instructions of the Travel Companion. 30 - HP 310 | HP iPAQ 300 Series Travel Companion - Product Guide - Page 39
tap . 8. The map is displayed with the selected point in the middle, and the Cursor menu shows your options. 9. Tap Set as Destination. 10. The route is automatically planned, and navigation starts. 11. Start driving, and listen to the voice instructions of the Travel Companion. Create a route - HP 310 | HP iPAQ 300 Series Travel Companion - Product Guide - Page 40
and a new destination: 1. If you are not on the Main menu screen, tap to return to the main menu. 2. Tap Go to, and select start point. 3. When the map appears with the Cursor menu, tap Set as Start. 4. The Travel Companion asks you to confirm that navigation does not start from the current - HP 310 | HP iPAQ 300 Series Travel Companion - Product Guide - Page 41
the Cursor menu is displayed. From the Cursor menu: ● tap Save as Favorite, if you wish to place this point on the list of your favorite destinations; ● tap Add POI, if you wish to save a useful map point with icon, telephone number, and additional information; or ● tap Add Speedcam, to save the - HP 310 | HP iPAQ 300 Series Travel Companion - Product Guide - Page 42
Settings to configure and modify the behavior of the Travel Companion. Opens Navigation Extras, the screen for additional navigation features. Go to The Go to menu is accessible from the Main menu. This screen address search screen. Opens the list of Favorites. Displays Home on the map. Home is - HP 310 | HP iPAQ 300 Series Travel Companion - Product Guide - Page 43
the list of Contacts saved with valid address(es). Opens the map to let you pick one point. Opens the co-ordinates search screen. Opens the list of saved routes. Opens the next screen to display more options. Returns to the first screen. Find an address, street, intersection, or city Searching for - HP 310 | HP iPAQ 300 Series Travel Companion - Product Guide - Page 44
the two icons, and the map with the Cursor menu is displayed with the selected point in the middle. Find a POI You can select your destination from the thousands of POIs included with the Travel Companion or from the ones you have previously created. This screen helps you find the destination you - HP 310 | HP iPAQ 300 Series Travel Companion - Product Guide - Page 45
the whole route. The distance of the POI is calculated based on the extra distance you need to travel to reach the point then return to the route. Using Quick Search you need to choose one from the previously saved search criteria, and you instantly get a list of POIs matching that criteria and - HP 310 | HP iPAQ 300 Series Travel Companion - Product Guide - Page 46
centre. Find co-ordinates In the Travel Companion, select your destination by entering map co-ordinates. The co-ordinates need to be entered in Latitude/Longitude format, based on the WGS84 earth model (the model used by most GPS devices). On accessing this screen, the co-ordinates of the current - HP 310 | HP iPAQ 300 Series Travel Companion - Product Guide - Page 47
Coordinate display format Positions are sometimes displayed with their addresses, and sometimes with their co-ordinates. This setting lets you choose whether to display co-ordinates in degrees (dd.dddddd); degrees and minutes (dd mm.mmm); or degrees, minutes and seconds (dd mm ss.s). Go to 39 - HP 310 | HP iPAQ 300 Series Travel Companion - Product Guide - Page 48
one of the following options: ● R Tap on the top of the screen. R NOTE: The icon is always available on every screen ● Go to the Settings menu and tap Bluetooth. ● Tap Extras/Phone/Key Pad menu point to dial the phone number. Connect a Bluetooth-enabled phone to your Travel Companion - HP 310 | HP iPAQ 300 Series Travel Companion - Product Guide - Page 49
list of previous connect attempts NOTE: My Shortcuts menu contains devices you have previously paired with your Travel Companion for easy access. Tap to initiate pairing from your mobile phone Tap to initiate a call Tap to end a call Make a call You can make calls using the phone feature, contacts - HP 310 | HP iPAQ 300 Series Travel Companion - Product Guide - Page 50
POI: 1. After a list of POI is displayed on your screen, tap 2. Tap to end a call. to initiate a call. Answer or reject a call If the Voice Gateway service is enabled with your phone, you can answer or reject calls on your Travel Companion. In case of a call, Incoming Call is displayed on the - HP 310 | HP iPAQ 300 Series Travel Companion - Product Guide - Page 51
the look and controls are optimized for different purposes. The Map (2D) screen is to be used for the following: ● browse the map, ● create user POI items, ● plan your route based on map points. The Map screen is designed to show the maximum map area. This screen can only be used in 2D North-up mode - HP 310 | HP iPAQ 300 Series Travel Companion - Product Guide - Page 52
. Initiates fixed tilt and zoom levels and re-enables Lock-to-Position (3D map only)**. This option is displayed only when GPS position is available. Re-enables Lock-to-Position and Smart Zoom Toggles between 2D (Map) and 3D (Cockpit) screens Selected map point (Cursor) Rotates map left (3D map only - HP 310 | HP iPAQ 300 Series Travel Companion - Product Guide - Page 53
objects to keep the average brightness of the screen low, with carefully selected colors to still keep you informed about all the necessary information on the screen. You can change between day and night views manually in Settings, or let the Travel Companion do it automatically for you. NOTE: The - HP 310 | HP iPAQ 300 Series Travel Companion - Product Guide - Page 54
a 3D map view. You can use this point as starting point, Via point, or one called 'John Smith (Home)', and another one as 'John Smith (Work)'. Elements of the active Route Your Travel Companion uses a multi-destination routing system in which you have a start point (normally your current GPS - HP 310 | HP iPAQ 300 Series Travel Companion - Product Guide - Page 55
the axis in case of one-way streets. When the map is zoomed in and the settings, sometimes they are impossible to avoid near the starting point, Via points, or the destination. If so, the Travel Companion displays those segments of the route with an alternate color. Turn preview On the Map screens - HP 310 | HP iPAQ 300 Series Travel Companion - Product Guide - Page 56
Set as Start", if the Cursor is at or near to the start point of the route. Tap it to remove the start point of the route. By inserting the selected map point as a via, you instruct the Travel Companion old one, which is now demoted to a Via point. This is the way to build your multi-point route in - HP 310 | HP iPAQ 300 Series Travel Companion - Product Guide - Page 57
the Cursor. Current street If you tap the Next street field on the map screens, the current street name is displayed for a few seconds. Distance to next not yet in the city or town where this next street is, the Travel Companion displays the name of the settlement instead of the name of the road - HP 310 | HP iPAQ 300 Series Travel Companion - Product Guide - Page 58
point of the route without a valid GPS position. The list contains the last reached Via point or the point where the Travel Companion is the highlighted one until you tap map. This helps you identify route events in the list. Other available functions on this screen are: 50 Chapter 13 Route - HP 310 | HP iPAQ 300 Series Travel Companion - Product Guide - Page 59
list, even the ones that have still to be passed. Tap any of the list items to change its name. Other available functions on this screen: Buttons Function be displayed. Route data displayed (for destination and Via points) The route data displays information about the current route. These - HP 310 | HP iPAQ 300 Series Travel Companion - Product Guide - Page 60
arrow jumps back to the left. When the Travel Companion needs to recalculate the route, the arrow does not jump back to the left as when reaching a Via point. It might drift a bit as the length of the new route may be different from the previous one. When the data corresponding to the entire - HP 310 | HP iPAQ 300 Series Travel Companion - Product Guide - Page 61
Travel Companion had to recommend a route that does not match all your preferences given at the Route Parameters settings. ● - The recommended route contains unpaved roads. ● Points have the following options on this screen: Buttons Function Fit to screen - opens the map with a 2D North-up view, - HP 310 | HP iPAQ 300 Series Travel Companion - Product Guide - Page 62
displayed on the map normally. On this screen you have the following options: Button Function Initiates track log recording. A new line is displayed in the list, and GPS position data is saved until you stop the recording or exit the Travel Companion. A icon is displayed on the map to let you - HP 310 | HP iPAQ 300 Series Travel Companion - Product Guide - Page 63
Tap any of the track log names in the list to open a new screen with the details of that track log. On this screen you have the following options: Button Function Changes the color of the track log. Opens a new screen where you can change the name of the track log. Exports the track log - HP 310 | HP iPAQ 300 Series Travel Companion - Product Guide - Page 64
from the Main menu screen, while some of its sub-screens are accessible from other parts of the Travel Companion. Visual settings You can set a few parameters that determine the appearance of your Travel Companion. 3D settings The Travel Companion is capable of displaying the map and several objects - HP 310 | HP iPAQ 300 Series Travel Companion - Product Guide - Page 65
or tap the screen. After a few seconds, the light level decreases, and after another few seconds, the backlight turns off. This helps you conserve the battery and achieve a longer battery life. Map settings These settings determine how maps are displayed on the Travel Companion. Alternative Road - HP 310 | HP iPAQ 300 Series Travel Companion - Product Guide - Page 66
. Night mode Using the automatic night mode, your Travel Companion switches between the daylight and night color schemes a few minutes before sunrise and a few minutes after sunset based on the time and location information provided by your GPS. Set Night mode permanently on or off to display only - HP 310 | HP iPAQ 300 Series Travel Companion - Product Guide - Page 67
map in the Overview mode. You can change the zoom level manually at any time, but when you enter the Overview mode again, the zoom level is reset to this value. Sound settings You can configure the parameters to determine the sounds and sound alerts on your Travel Companion on this screen. Sound - HP 310 | HP iPAQ 300 Series Travel Companion - Product Guide - Page 68
tapping the touch screen. NOTE: The sound effects on your Travel Companion are context set the minimum and maximum speeds. Route settings You can use the Route settings screen to determine how routes are calculated. This screen is also accessible from the Route Information screen. Vehicle You can set - HP 310 | HP iPAQ 300 Series Travel Companion - Product Guide - Page 69
can only be accessed by using some of the excluded road types, your Travel Companion uses them minimally. In this case a warning icon is displayed on the Route Information screen, and the road that does not match your preference is displayed using an alternate color on the map. Unpaved Roads - HP 310 | HP iPAQ 300 Series Travel Companion - Product Guide - Page 70
By default your Travel Companion plans routes using the border crossing points. However, if you live near the border, you can disable border crossing with this switch to remain within one country. U-turns Although displayed along with road types, this is a type of action. Most drivers prefer to - HP 310 | HP iPAQ 300 Series Travel Companion - Product Guide - Page 71
Correction: You can select this option to configure your Travel Companion to frequently check and correct the internal clock of the device with the always-accurate GPS time. Set time format You can set the date and time format displayed on the screen. Tap the left or right arrow to cycle through - HP 310 | HP iPAQ 300 Series Travel Companion - Product Guide - Page 72
for Speeding tolerance. Enable safety cameras Your Travel Companion can warn you when you approach known speed and red light cameras previously uploaded or copied into the device, or saved manually in the software. This can be done using the Cursor menu. On this screen you can enable or disable the - HP 310 | HP iPAQ 300 Series Travel Companion - Product Guide - Page 73
extras You can use the additional features of the Travel Companion to enhance your travel experience. Trip Planner Your Travel Companion includes access to HP iPAQ trip planning services. Visit http://www.ipaq.com to learn about the latest services and content available. Here you will find the - HP 310 | HP iPAQ 300 Series Travel Companion - Product Guide - Page 74
. Tap Done when finished. NOTE: This button is displayed only if you are in a country where the subscribed TMC services can be used with the help of the Travel Companion. ● Recalculate to avoid traffic You can enable or disable recalculation of the route during navigation based on TMC information - HP 310 | HP iPAQ 300 Series Travel Companion - Product Guide - Page 75
calculated position is. The GPS data screen also includes information like current position in latitude/longitude format, elevation, speed, date, time, the GPS connection status, and calculated accuracy. NOTE: Accuracy can be affected by several factors that Travel Companion cannot take into account - HP 310 | HP iPAQ 300 Series Travel Companion - Product Guide - Page 76
17 About screen You can access this screen from the main page by tapping Settings > System > About. The screen provides information on the maps and licenses you have installed on your Travel Companion. 68 Chapter 17 About screen - HP 310 | HP iPAQ 300 Series Travel Companion - Product Guide - Page 77
> HP IPAQ Outlook Synchronizer. You can select any of the following options: ● Data backup: launches the backup application, which lets you save the entire contact database to a file on your hard drive and restore the saved database to the Travel Companion. ● Settings: launches the Settings screen - HP 310 | HP iPAQ 300 Series Travel Companion - Product Guide - Page 78
(typical) 4.3" WVGA 800x480 TFT with touch screen, antiglare, landscape oriented, 16bit RGB depth Supports SD memory Internal Bluetooth antenna Integrated microphone, speaker, and one 3.5-mm stereo headset jack 1,700 mAh Li-ion removable/rechargeable battery Bluetooth 2.0 with Enhanced Data Rate - HP 310 | HP iPAQ 300 Series Travel Companion - Product Guide - Page 79
Operating environment Temperature Relative Humidity Maximum Altitude Operating Nonoperating Operating Nonoperating Operating Nonoperating US 32° to 104° F -9.6° to 140° F up to 85 % up to 85 % 0 to 15,000 ft 0 to 40,000 ft Metric 0° to 40° C -20° to 60° C up to 85 % up to 85 % 0 to 4572 m 0 to - HP 310 | HP iPAQ 300 Series Travel Companion - Product Guide - Page 80
and used in accordance with the instructions, may cause harmful interference to radio is encouraged to try to correct the interference by one or more of the following measures: ● Reorient or to Hewlett-Packard Company P. O. Box 692000, Mail Stop 530113 Houston, TX 77269-2000 or call 1-800-HP-INVENT - HP 310 | HP iPAQ 300 Series Travel Companion - Product Guide - Page 81
Hewlett-Packard Company P. O. Box 692000, Mail Stop 510101 Houston, TX 77269-2000 or call HP at 281-514-3333 To identify your product, refer to the part, series Declaration of Conformity issued by HP for this product or product family. This compliance is indicated by one of the following conformity - HP 310 | HP iPAQ 300 Series Travel Companion - Product Guide - Page 82
or directly with the General Direction for Frequency Planning and Management (Direzione Generale Pianificazione e Gestione Frequenze). Battery Warning WARNING! This HP iPAQ contains a lithium ion rechargeable battery. To reduce the risk of fire or burns, do not disassemble, crush, puncture, short - HP 310 | HP iPAQ 300 Series Travel Companion - Product Guide - Page 83
use converter kits sold for appliances to power your HP iPAQ. Acoustics Warning WARNING! Listening to this device at high volume levels and for extended durations may damage one's hearing. In order to reduce the risk of damage to hearing, one should lower the volume to a safe, comfortable level, and - HP 310 | HP iPAQ 300 Series Travel Companion - Product Guide - Page 84
Airline Travel Notice medical equipment is shielded from RF energy. Turn off your HP iPAQ in health care facilities or hospitals when there are posted , human proximity to the antenna should be minimized. No metallic body accessories are allowed and 1.5 cm spacing between PDA and the body must - HP 310 | HP iPAQ 300 Series Travel Companion - Product Guide - Page 85
Bluetooth Devices Taiwan DGT Notice Korean Notice Taiwan DGT Notice 77 - HP 310 | HP iPAQ 300 Series Travel Companion - Product Guide - Page 86
Using the Travel Companion in public places Turn off the Travel Companion or switch it to silent mode when you are asked to in public places. Obtain services for a cracked or damaged screen NOTE: HP is not responsible for damage that occurs as a result of failure to follow the instructions that came - HP 310 | HP iPAQ 300 Series Travel Companion - Product Guide - Page 87
the Travel Companion against hard objects. ● Never use any device other than the stylus that comes with the Travel Companion or an approved replacement to tap or write on the screen. If you lose or break your stylus, order extras at http://www.hp.com/accessories/ipaq. ● Clean the Travel Companion by
-
 1
1 -
 2
2 -
 3
3 -
 4
4 -
 5
5 -
 6
6 -
 7
7 -
8
-
9
-
10
-
11
-
12
-
13
-
14
-
15
-
16
-
17
-
18
-
19
-
20
-
21
-
22
-
23
-
24
-
25
-
26
-
27
-
28
-
29
-
30
-
31
-
32
-
33
-
34
-
35
-
36
-
37
-
38
-
39
-
40
-
41
-
42
-
43
-
44
-
45
-
46
-
47
-
48
-
49
-
50
-
51
-
52
-
53
-
54
-
55
-
56
-
57
-
58
-
59
-
60
-
61
-
62
-
63
-
64
-
65
-
66
-
67
-
68
-
69
-
70
-
71
-
72
-
73
-
74
-
75
-
76
-
77
-
78
-
79
-
80
-
81
-
82
-
83
-
84
-
85
-
86
-
87
 |
 |

HP iPAQ
Product Guide