HP 3700 HP Embedded Web Server for HP LaserJet Printers - User Guide - Page 25
Configuring outgoing e-mail, Enable Outgoing Email, SMTP Server, Apply, POP3 Server
 |
UPC - 808736551106
View all HP 3700 manuals
Add to My Manuals
Save this manual to your list of manuals |
Page 25 highlights
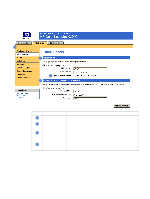
Note Configuring outgoing e-mail It is only necessary to configure outgoing e-mail if you intend to use the Alerts or AutoSend feature. 1 Gather the following information. (Your organization's network or e-mail administrator typically provides the information that is required to configure outgoing mail.) • The Internet protocol (IP) address of the simple mail transfer protocol (SMTP) mail server on your network. The EWS uses the SMTP Server IP address to relay e-mail messages to other computers. • The e-mail domain name suffix that is used to address e-mail messages within your organization. 2 Select the Enable Outgoing Email check box. 3 Type the SMTP server IP address in the SMTP Server text box. 4 Type the domain name, and then click Apply to save the changes. Configuring incoming e-mail You should configure incoming e-mail if you intend to request information pages from the product by using e-mail messages. For more information, see "Sending e-mail commands to the product" on page 28. 1 Establish a Post Office Protocol 3 (POP3) mailbox account for the product on a mail server within your organization's network. Each POP3 account requires a username and a password. The username combined with the product's domain name (which is specified in the outgoing mail configuration) is the email address for the product. For example, if the POP3 mailbox account username is "product" and the POP3 server is "hp.com", the product's e-mail address will be "[email protected]". Each product that is configured for incoming mail must have its own POP3 mailbox account on your network's e-mail server. The POP3 mailbox accounts are typically configured by your organization's network or e-mail administrator. 2 Select the Enable Incoming Email check box. 3 Type the IP address of the POP3 mail server in the POP3 Server text box. 4 Type username and password for the product's mailbox account, and then click Apply to save the changes. ENWW Email Server 21
-
 1
1 -
2
-
3
-
4
-
5
-
6
-
7
-
8
-
9
-
10
-
11
-
12
-
13
-
14
-
15
-
16
-
17
-
18
-
19
-
 20
20 -
 21
21 -
 22
22 -
 23
23 -
 24
24 -
 25
25 -
 26
26 -
 27
27 -
 28
28 -
 29
29 -
 30
30 -
31
-
32
-
33
-
34
-
35
-
36
-
37
-
38
-
39
-
40
-
41
-
42
-
43
-
44
-
45
-
46
-
47
-
48
 |
 |