HP 50 StorageWorks Modular Smart Array 50 Storage Enclosure User Guide - Page 39
To replace the component, Remove the hard drive.
 |
View all HP 50 manuals
Add to My Manuals
Save this manual to your list of manuals |
Page 39 highlights
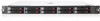
Removal and replacement procedures 39 - In RAID 1+0 configurations, any drives that are not mirrored to other removed or failed drives can be simultaneously replaced offline without data loss. To remove the component: CAUTION: To prevent improper cooling and thermal damage, do not operate the storage enclosure unless all bays are populated with either a component or a blank. 1. Determine the status of the hard drive from the hot-plug hard drive LEDs. 2. Back up all data on the hard drive. 3. Remove the hard drive. To replace the component: 1. Slide the drive into the cage until it clicks, locking the drive into place. 2. Close the lever. IMPORTANT: When the drive is inserted, the drive LEDs flash for 2 seconds to indicate that the drive is seated properly and receiving power. 3. As the drive begins to spin, be sure that the drive LEDs illuminate one at a time and then turn off together to indicate that the system has recognized the new drive.
-
 1
1 -
2
-
3
-
4
-
5
-
6
-
7
-
8
-
9
-
10
-
11
-
12
-
13
-
14
-
15
-
16
-
17
-
18
-
19
-
20
-
21
-
22
-
23
-
24
-
25
-
26
-
27
-
28
-
29
-
30
-
31
-
32
-
33
-
 34
34 -
 35
35 -
 36
36 -
 37
37 -
 38
38 -
 39
39 -
 40
40 -
 41
41 -
 42
42 -
 43
43 -
 44
44 -
45
-
46
-
47
-
48
-
49
-
50
-
51
-
52
-
53
-
54
-
55
-
56
-
57
-
58
-
59
-
60
-
61
-
62
-
63
 |
 |
