HP 540 Drives - Windows XP
HP 540 - Notebook PC Manual
 |
View all HP 540 manuals
Add to My Manuals
Save this manual to your list of manuals |
HP 540 manual content summary:
- HP 540 | Drives - Windows XP - Page 1
Drives User Guide - HP 540 | Drives - Windows XP - Page 2
© Copyright 2008 Hewlett-Packard Development Company, L.P. Windows is a U.S. registered trademark of Microsoft Corporation. The information contained herein is subject to change without notice. The only warranties for HP products and services are set forth in the express warranty statements - HP 540 | Drives - Windows XP - Page 3
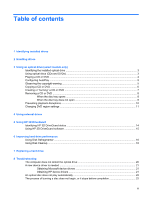
Improving hard drive performance Using Disk Defragmenter ...16 Using Disk Cleanup ...16 7 Replacing a hard drive 8 Troubleshooting The computer does not detect the optical drive 20 A new device driver is needed ...21 Obtaining Microsoft device drivers 21 Obtaining HP device drivers 21 An optical - HP 540 | Drives - Windows XP - Page 4
A DVD playing in Windows Media Player produces no sound or display 22 Index ...23 iv - HP 540 | Drives - Windows XP - Page 5
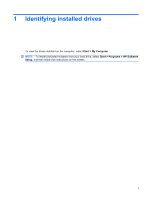
1 Identifying installed drives To view the drives installed on the computer, select Start > My Computer. NOTE: To install preloaded software from your hard drive, select Start > Programs > HP Software Setup, and then follow the instructions on the screen. 1 - HP 540 | Drives - Windows XP - Page 6
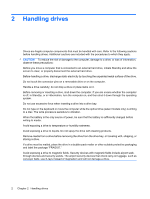
inserting a drive into a drive bay. Do not type on the keyboard or move the computer while the optical drive (select models only) is writing to a disc. The write process is sensitive to vibration. When the battery is the only source of power, be sure that the battery is sufficiently charged before - HP 540 | Drives - Windows XP - Page 7
, as described in the following table. NOTE: Some of the optical drives listed may not be supported by your computer. The listed drives are not necessarily all of the supported optical drives. Optical drive type Write to CD-RW Write to DVD ±RW/R Write label to Read Blu-ray Disc Write to BD-R/RE - HP 540 | Drives - Windows XP - Page 8
Playing a CD or DVD 1. Turn on the computer. 2. Press the release button (1) on the drive bezel to release the disc tray. 3. Pull out the tray (2). 4. Hold the disc by the edges to It prompts you to select how you want to use the media content. 4 Chapter 3 Using an optical drive (select models only) - HP 540 | Drives - Windows XP - Page 9
network drive to a destination disc. Do not use the computer keyboard or move the computer while the computer is writing to a disc. The write process is sensitive to vibration. NOTE: For details about using software included with the computer, refer to the software manufacturer's instructions, which - HP 540 | Drives - Windows XP - Page 10
Copying a CD or DVD 1. Select Start > All Programs > Roxio > Creator Business. 2. In the right pane, click Copy Disc. 3. Insert the disc you want to copy into the optical drive. 4. Click Copy at the bottom right of the screen. Creator Business reads the source disc and copies the data to a temporary - HP 540 | Drives - Windows XP - Page 11
data files or for testing audio or video recordings before you burn them to a CD or DVD that cannot be changed. ● DVD players used in home systems usually do not support all DVD formats. Refer to the user guide that came with your DVD player for a list of supported formats. ● An MP3 file uses - HP 540 | Drives - Windows XP - Page 12
DVD There are 2 ways to remove a disc, depending on whether the disc tray opens normally or not. When the disc tray opens 1. Press the release button (1) on the drive end of a paper clip (1) into the release access in the front bezel of the drive. 2. Press in gently on the paper clip until the tray - HP 540 | Drives - Windows XP - Page 13
not fully accessible, tilt the disc carefully as you remove it. 4. Close the disc tray and place the disc in a protective case. Removing a CD or DVD 9 - HP 540 | Drives - Windows XP - Page 14
close all open programs before playing a CD or a DVD. ● Log off the Internet before playing a CD or a DVD. ● Be sure that you insert the disc properly displayed, click No. After you click No, the computer may behave in either of the following ways: ◦ Playback may resume. - or - ◦ The playback window - HP 540 | Drives - Windows XP - Page 15
time becomes the permanent region setting on the DVD drive. The number of region changes remaining is displayed on the DVD Region tab. To change settings through the operating system: 1. Select Start > My Computer. 2. Right-click in the window, and select Properties > Hardware tab > Device Manager - HP 540 | Drives - Windows XP - Page 16
and drivers, or to learn which computer port to use, refer to the manufacturer's instructions. To connect an external drive to the computer: CAUTION: To reduce the risk of damage to the equipment when connecting a powered drive, be sure that the AC power cord is unplugged. 1. Connect the drive to - HP 540 | Drives - Windows XP - Page 17
the following conditions: ● You drop the computer. ● You move the computer with the display closed while the computer is running on battery power. A short time after the end of one of these events, HP 3D DriveGuard returns the hard drive to normal operation. NOTE: Hard drives that are in an optional - HP 540 | Drives - Windows XP - Page 18
: If the computer is running on battery power and reaches a critical battery level, HP 3D DriveGuard allows the computer to initiate Hibernation. ● The computer will not activate battery alarms set on the Alarms tab in Power Options Properties. Before you move the computer, HP recommends that you - HP 540 | Drives - Windows XP - Page 19
3D DriveGuard. NOTE: Depending on your user privileges, you may not be able to enable or disable HP 3D DriveGuard. ● Determine whether a drive in the system is supported. ● Hide or show the icon in the notification area. To open the software and change settings, follow these steps: 1. Double-click - HP 540 | Drives - Windows XP - Page 20
searches the hard drive for unnecessary files that you can safely delete to free up disk space and help the computer to run more efficiently. To run Disk Cleanup: 1. Select Start > All Programs > Accessories > System Tools > Disk Cleanup. 2. Follow the on-screen instructions. 16 Chapter 6 Improving - HP 540 | Drives - Windows XP - Page 21
down the computer and close the display. 3. Disconnect all external hardware devices connected to the computer. 4. Unplug the power cord from the AC outlet. 5. Turn the computer upside down on a flat surface, with the hard drive bay toward you. 6. Remove the battery from the computer. 7. Loosen the - HP 540 | Drives - Windows XP - Page 22
hard drive bay. To install a hard drive: 1. Insert the hard drive into the hard drive bay (1). 2. Pull the hard drive tab (2) to the right to connect the hard drive. 3. Tighten the hard drive screw (3). 4. Align the tabs (1) on the hard drive cover with the notches on the computer. 5. Replace the - HP 540 | Drives - Windows XP - Page 23
6. Tighten the hard drive cover screws (3). 19 - HP 540 | Drives - Windows XP - Page 24
optical drive, use Device Manager to troubleshoot the device and then update, uninstall, or disable the device driver. To check your devices and drivers in Device Manager, follow these steps: 1. Remove any discs from the optical drive. 2. Select Start > My Computer. 3. Right-click in the window and - HP 540 | Drives - Windows XP - Page 25
and driver downloads, and then type your computer model number in the product box. - or - If you want a specific SoftPaq, type the SoftPaq number in the Search box, at the top-right corner of the screen. 4. Press enter, and then follow the on-screen instructions. A new device driver is needed - HP 540 | Drives - Windows XP - Page 26
from your hard drive. ● Reinstall the disc-burning device driver located in the DVD/CD-ROM drives category in Device Manager. A DVD playing in Windows Media Player produces no sound or display You must use WinDVD, which is preinstalled on the computer, to play a DVD. 22 Chapter 8 Troubleshooting - HP 540 | Drives - Windows XP - Page 27
installing 18 replacing 17 HP 3D DriveGuard 13 L light, drive 14 M maintenance Disk Cleanup 16 Disk Defragmenter 16 O optical drive 3, 12 optical drive detection 20 P preventing playback disruptions 10 R region codes, DVD 11 S software Disk Cleanup 16 Disk Defragmenter 16 T troubleshooting burning - HP 540 | Drives - Windows XP - Page 28
-
 1
1 -
 2
2 -
 3
3 -
 4
4 -
 5
5 -
 6
6 -
 7
7 -
8
-
9
-
10
-
11
-
12
-
13
-
14
-
15
-
16
-
17
-
18
-
19
-
20
-
21
-
22
-
23
-
24
-
25
-
26
-
27
-
28
 |
 |

Drives
User Guide