HP 6720t End-User Reference Guide - Windows XP
HP 6720t - Compaq Mobile Thin Client Manual
 |
UPC - 883585721658
View all HP 6720t manuals
Add to My Manuals
Save this manual to your list of manuals |
HP 6720t manual content summary:
- HP 6720t | End-User Reference Guide - Windows XP - Page 1
HP Compaq 6720t Mobile Thin Client End-User Reference Guide - HP 6720t | End-User Reference Guide - Windows XP - Page 2
in the express warranty statements accompanying such products and services. Nothing herein should be construed as constituting an additional warranty. HP shall not be liable for technical or editorial errors or omissions contained herein. First Edition: January 2008 Document Part Number: 466204-001 - HP 6720t | End-User Reference Guide - Windows XP - Page 3
on your lap or obstruct the computer air vents. Use the computer only on a hard, flat surface. Do not allow another hard surface, such as an adjoining optional printer, or a soft surface, such as pillows or rugs or clothing, to block airflow. Also, do not allow the AC adapter to contact the skin or - HP 6720t | End-User Reference Guide - Windows XP - Page 4
iv Safety warning notice - HP 6720t | End-User Reference Guide - Windows XP - Page 5
Product notice This user guide describes features that are common to most models. Some features may not be available on your computer. v - HP 6720t | End-User Reference Guide - Windows XP - Page 6
vi Product notice - HP 6720t | End-User Reference Guide - Windows XP - Page 7
Table of contents 1 Notebook tour Identifying the hardware ...1 Top components ...1 Pointing devices 1 Lights ...2 Buttons and switches keyboard ...11 Using hotkeys ...11 Displaying system information (fn+esc 11 Initiating Standby (fn+f3 12 Switching the screen image (fn+f4 12 Viewing battery - HP 6720t | End-User Reference Guide - Windows XP - Page 8
23 Resolving a low battery level when no power source is available 23 Conserving battery power 23 Storing a battery ...23 Disposing of a used battery 24 Using external AC power ...24 Connecting the AC adapter 25 5 Multimedia Using multimedia hardware ...26 Using the audio features ...26 Using - HP 6720t | End-User Reference Guide - Windows XP - Page 9
-specific modem cable adapter 36 Selecting a location setting 37 Viewing the current location selection 37 Solving travel connection problems 38 Connecting to a local area network ...39 8 Security Protecting the computer ...40 Using passwords ...41 Setting passwords in Windows 41 Using a power - HP 6720t | End-User Reference Guide - Windows XP - Page 10
x - HP 6720t | End-User Reference Guide - Windows XP - Page 11
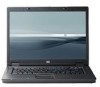
1 Notebook tour Identifying the hardware Components included with the computer may vary by region and model. The illustrations in this chapter identify the standard features on most computer models. Top components Pointing devices Component Description (1) TouchPad* Moves the pointer and - HP 6720t | End-User Reference Guide - Windows XP - Page 12
lights† (2) (3) Caps lock light (4) Num lock light (5) Volume mute light (6) Battery light 2 Chapter 1 Notebook tour Description ● On: The computer is on. ● Blinking: The computer is in Standby. ● Off: The computer is off. ● Blue: An integrated wireless device, such as a wireless local - HP 6720t | End-User Reference Guide - Windows XP - Page 13
stays off until the battery reaches a low battery level. (7) Drive light Blinking: The flash drive or optional optical drive is being accessed. *The 2 power lights display the same information. The light on the power button is visible only when the computer is open. The power light on the front - HP 6720t | End-User Reference Guide - Windows XP - Page 14
mute button (5) Volume down button (6) Volume up button Keys Description Mutes and restores computer sound. Decreases speaker sound. Increases speaker sound. Component (1) esc key (2) fn key used system functions when pressed in combination with the fn key. 4 Chapter 1 Notebook tour - HP 6720t | End-User Reference Guide - Windows XP - Page 15
components Description Opens the computer. Component (1) Audio-out (headphone) jack (2) Audio-in (microphone) jack (3) USB ports (2) (4) Optical drive (select models only) Left-side components Description Produces sound when connected to optional powered stereo speakers, headphones, ear - HP 6720t | End-User Reference Guide - Windows XP - Page 16
an AC adapter. Connects an external VGA monitor or projector. Component (1) Battery bay (2) Battery release latches (2) (3) Business card holder (4) Flash drive bay (5) Docking connector 6 Chapter 1 Notebook tour Description Holds the battery. Release the battery from the battery bay - HP 6720t | End-User Reference Guide - Windows XP - Page 17
Component (6) Memory module compartment (7) Vent (8) Accessory battery connector Description Contains the memory module slot. Enables airflow to cool internal components. Connects an optional accessory battery. Wireless antennae Wireless antennae send and receive signals from one or more - HP 6720t | End-User Reference Guide - Windows XP - Page 18
need when you troubleshoot system problems or travel internationally with the computer: ● Service tag-Provides the product brand and series name, serial number (s/n), and product number (p/n) of your computer. Have this information available when you contact technical support. The service tag label - HP 6720t | End-User Reference Guide - Windows XP - Page 19
2 Enhanced Write Filter Using the Enhanced Write Filter The Enhanced Write Filter (EWF) provides a secure environment for your computer by protecting it from undesired flash memory writes. In order to save changes to your system configuration settings, you must commit your changes in the EWF. - HP 6720t | End-User Reference Guide - Windows XP - Page 20
Panel > Printers and Other Hardware > Mouse. Connecting an external mouse You can connect an external USB mouse to the computer using one of the USB ports on the computer. A USB mouse can also be connected to the computer using the ports on an optional docking device. 10 Chapter 3 Pointing devices - HP 6720t | End-User Reference Guide - Windows XP - Page 21
the image. Display battery information Decrease screen brightness. Increase screen brightness. Hotkey fn+esc fn+f3 fn+f4 fn+f8 fn+f9 fn+f10 To use a hotkey command on the computer keyboard, information about system hardware components and the system BIOS version number. Using the keyboard 11 - HP 6720t | End-User Reference Guide - Windows XP - Page 22
that use them, are supported by the fn+f4 hotkey: ● LCD (computer display) ● External VGA (most external monitors) Viewing battery charge information (fn+f8) Press fn+f8 to display charge information for all installed batteries. The display indicates which batteries are charging and reports the - HP 6720t | End-User Reference Guide - Windows XP - Page 23
down the hotkey to increase the brightness level incrementally. Using the keypads The computer has an embedded numeric keypad and also supports an optional external numeric keypad or an optional external keyboard that includes a numeric keypad. Component (1) Num lock light (2) fn key (3) num lk key - HP 6720t | End-User Reference Guide - Windows XP - Page 24
keyboard functions. NOTE: The embedded numeric keypad will not function while an external keyboard or numeric keypad is connected to the computer or an optional docking station the factory): ● When num lock is on, most keypad keys type numbers. ● When num lock is off, most keypad keys function like - HP 6720t | End-User Reference Guide - Windows XP - Page 25
is in Standby. ● Off: The computer is off. ● When the computer is off, press the button to turn on the computer. ● When the computer is on, press the button to turn off the computer. ● When the computer is in Standby, press the button briefly to exit Standby. Power control and light locations 15 - HP 6720t | End-User Reference Guide - Windows XP - Page 26
, the light stays off until the battery reaches a low battery level. *The 2 power lights display the same information. The light on the power button is visible only when the computer is open. The power light on the front of the computer is visible whether the computer is open or closed. 16 Chapter - HP 6720t | End-User Reference Guide - Windows XP - Page 27
you are connecting an external hardware device that does not connect to a USB port ● When the computer will be unused and disconnected from external power for an extended period To shut down the computer, follow these steps: 1. Save your work and close all open programs. 2. Select Start > Turn Off - HP 6720t | End-User Reference Guide - Windows XP - Page 28
enabled at the factory: Standby. When Standby is initiated, the power lights blink and the screen clears. Your computer is disconnected from the network. CAUTION: To prevent possible audio and video degradation, loss of audio or video playback functionality, or loss of information, do not initiate - HP 6720t | End-User Reference Guide - Windows XP - Page 29
and select an item from the list. Different battery meter icons indicate whether the computer is running on battery or external power. The icon also displays a message if the battery has reached a critical battery level. To hide or display the battery meter icon: 1. Right-click the taskbar, and then - HP 6720t | End-User Reference Guide - Windows XP - Page 30
power, the computer runs on battery power. When the computer is plugged into external AC power, the computer runs on AC power. If the computer contains a charged battery and is running on external AC power supplied through the AC adapter, the computer switches to battery power if the AC adapter - HP 6720t | End-User Reference Guide - Windows XP - Page 31
WARNING! Do not charge the computer battery while you are onboard aircraft. The battery charges whenever the computer is plugged into external power through an AC adapter, an optional power adapter, or an optional docking device. The battery charges whether the computer is off or in use, but it - HP 6720t | End-User Reference Guide - Windows XP - Page 32
affect lights. Identifying low battery levels When a battery that is the sole power source for the computer reaches a low battery level, the battery light blinks. If a low battery level is not resolved, the computer enters a critical battery level, and the battery light begins blinking rapidly. If - HP 6720t | End-User Reference Guide - Windows XP - Page 33
● AC adapter ● Optional docking device ● Optional power adapter Resolving a low battery level when a charged battery is available 1. Turn off the computer. 2. Remove the discharged battery, and then insert a charged battery. 3. Turn on the computer. Resolving a low battery level when no power source - HP 6720t | End-User Reference Guide - Windows XP - Page 34
AC power External AC power is supplied through one of the following devices: WARNING! To reduce potential safety issues, use only the AC adapter provided with the computer, a replacement AC adapter provided by HP, or a compatible AC adapter purchased from HP. ● Approved AC adapter ● Optional docking - HP 6720t | End-User Reference Guide - Windows XP - Page 35
important safety feature. To connect the computer to external AC power, follow these steps: 1. Plug the AC adapter into the power connector (1) on the computer. 2. Plug the power cord into the AC adapter (2). 3. Plug the other end of the power cord into an AC outlet (3). Using external AC power 25 - HP 6720t | End-User Reference Guide - Windows XP - Page 36
Audio-in (microphone) jack (6) Audio-out (headphone) jack Description Produce sound. Mutes and restores computer sound. Decreases computer sound. Increases computer sound. Connects an optional computer headset microphone, stereo array microphone, or monaural microphone. Connects optional powered - HP 6720t | End-User Reference Guide - Windows XP - Page 37
Started guide. CAUTION: To prevent possible damage to an external device, do not plug a single sound channel (monaural) connector into the headphone jack. In addition to connecting headphones, the headphone jack is used to connect the audio-out function of an audio device such as external powered - HP 6720t | End-User Reference Guide - Windows XP - Page 38
You can adjust the volume using the following controls: ● Computer volume buttons: ◦ Volume mute button ◦ Volume down button to add it: a. Select Start > Control Panel > Sounds, Speech, and Audio Devices > Sounds and Audio Devices > Volume tab. b. Select the Place volume icon in the taskbar check - HP 6720t | End-User Reference Guide - Windows XP - Page 39
as an external monitor or a projector, to the computer. ▲ To connect a display device, connect the image, press fn+f4 to transfer the image to the device. Repeatedly pressing fn+f4 alternates the screen image between the computer display, the device, and simultaneous display on both the computer - HP 6720t | End-User Reference Guide - Windows XP - Page 40
may be located in subfolders. 2. Insert the media disc, such as an audio CD, into the optical drive. 3. Follow the instructions on the screen. - or - 1. Insert the media disc, such as an audio CD, into the optical drive. 2. Click a multimedia task from the list of tasks. 30 Chapter 5 Multimedia - HP 6720t | End-User Reference Guide - Windows XP - Page 41
a disc. Otherwise, you may see a warning message asking if you want to continue. If this message is displayed, click No. After you click No, the computer may behave in either of the following ways: ● Playback may resume. - or - ● The playback window in the multimedia program may close. To return to - HP 6720t | End-User Reference Guide - Windows XP - Page 42
light is on (blue) when you turn on the computer. The wireless light indicates the overall power state of your wireless devices, not the status of guide for your operating system. Using WLAN With a WLAN device, you can access a wireless local area network, which is composed of other computers - HP 6720t | End-User Reference Guide - Windows XP - Page 43
uses wireless access points that can accommodate a large number of computers and accessories and can separate critical network functions. ● computer, you must connect to a WLAN infrastructure (provided through a service provider or a public or corporate network). Computers with WLAN devices support - HP 6720t | End-User Reference Guide - Windows XP - Page 44
through your ISP and the user guide included with your wireless router and WLANs include Cisco Internet Mobile Office Wireless Locations, Hotspotlist problem connecting to a wireless network, confirm that the integrated WLAN device is properly installed on your computer: 1. Select Start > HP - HP 6720t | End-User Reference Guide - Windows XP - Page 45
modem cable (purchased separately). In some countries, a country-specific modem cable adapter is also required. Jacks for digital PBX systems may resemble radio reception, orient the circuitry end (2) of the cable toward the computer. Connecting a modem cable WARNING! To reduce the risk of electric - HP 6720t | End-User Reference Guide - Windows XP - Page 46
Telephone jacks vary by country. To use the modem and the modem cable outside the country in which you purchased the computer, you must obtain a country-specific modem cable adapter. To connect the modem to an analog telephone line that does not have an RJ-11 telephone jack, follow these steps - HP 6720t | End-User Reference Guide - Windows XP - Page 47
Selecting a location setting Viewing the current location selection To view the current location setting for the modem, follow these steps: 1. Select Start > Control Panel. 2. Click Date, Time, Language, and Regional Options. 3. Click Regional and Language Options. 4. Your location is displayed - HP 6720t | End-User Reference Guide - Windows XP - Page 48
connection problems when using the computer outside Check for pulse or tone dialing. An analog telephone line supports one of 2 dialing modes: pulse dialing or tone dialing ● Check the telephone number you are dialing and the response of the remote modem. Dial a telephone number, make sure there is - HP 6720t | End-User Reference Guide - Windows XP - Page 49
prevents interference from TV and radio reception, orient the circuitry end of the cable (2) toward the computer. To connect the network cable: 1. Plug the network cable into the network jack (1) on the computer. 2. Plug the other end of the cable into a network wall jack (2). WARNING! To reduce the - HP 6720t | End-User Reference Guide - Windows XP - Page 50
Power-on authentication using passwords ● Administrator passwords ● User passwords Microsoft Windows Firewall-An improved Microsoft Windows Firewall (previously known as Internet Connection Firewall, or ICF) that prevents outside requests for data from entering the computer, unless specifically - HP 6720t | End-User Reference Guide - Windows XP - Page 51
with keyboard number keys will not be recognized if you enter it thereafter with embedded numeric keypad number keys. ● It can include any combination of up to 32 letters and numbers and is not case sensitive. Managing a power-on password A power-on password is set, changed, and deleted in Computer - HP 6720t | End-User Reference Guide - Windows XP - Page 52
, use the arrow keys to select File > Save changes and exit. Then follow the instructions on the screen. Your preferences go into effect when the computer restarts. Entering a power-on password At the Power-on Password prompt, type your password (using the same kind of keys you used to set the - HP 6720t | End-User Reference Guide - Windows XP - Page 53
Installing a security cable NOTE: The security cable (purchased separately) is designed to act as a deterrent, but it may not prevent the computer from being mishandled or stolen. 1. Loop the security cable around a secured object. 2. Insert the key (1) into the cable lock (2). 3. Insert the cable - HP 6720t | End-User Reference Guide - Windows XP - Page 54
drive, printer, scanner, or hub. Devices can be connected to the computer or an optional docking device. Some USB devices may require additional support software, which is usually included with the device. For more information about device-specific software, refer to the manufacturer's instructions - HP 6720t | End-User Reference Guide - Windows XP - Page 55
docking connector The docking connector connects the computer to an optional docking device. An optional docking device provides additional ports and connectors that can be used with the computer. NOTE: The HP Advanced Docking Station is not supported on this computer. Using the docking connector - HP 6720t | End-User Reference Guide - Windows XP - Page 56
and external media cards, do not insert an ExpressCard into a PC Card slot. CAUTION: To prevent damage to the connectors: Use minimal force when inserting a PC Card. Do not move or transport the computer when a PC Card is in use. The PC Card slot may contain a protective insert. The insert must be - HP 6720t | End-User Reference Guide - Windows XP - Page 57
into the PC Card slot, and then push in on the card until it is firmly seated. NOTE: An inserted PC Card uses power even when idle. To conserve power, stop or remove a PC Card when it is not in use. To remove a PC Card, follow these steps: 1. Close all programs and - HP 6720t | End-User Reference Guide - Windows XP - Page 58
10 Hardware upgrades Identifying installed drives To view the drives installed on the computer, select Start > HP System Information. NOTE: Windows includes the User Account Control feature to improve the security of your computer. You may be prompted for your permission or password for tasks such - HP 6720t | End-User Reference Guide - Windows XP - Page 59
message is displayed, click No. ● You may need to restart the CD or DVD to resume audio and video playback. Inserting an optical disc (CD or DVD) 1. Turn on the computer. 2. Press the release button (1) on the drive bezel to release the disc tray. 3. Pull out the tray (2). 4. Hold the disc by the - HP 6720t | End-User Reference Guide - Windows XP - Page 60
2 ways to remove a disc, depending on whether the disc tray opens normally or not. When the disc tray opens 1. Press the release button (1) on the drive bezel to release the disc tray, and then gently pull out the tray (2) until it stops. 50 Chapter 10 Hardware - HP 6720t | End-User Reference Guide - Windows XP - Page 61
a protective case. When the disc tray does not open 1. Insert the end of a paper clip (1) into the release access in the front bezel of the drive. 2. Press in gently on the paper clip until the tray is released, and then pull out the tray (2) until it stops. Using optical - HP 6720t | End-User Reference Guide - Windows XP - Page 62
fully accessible, tilt the disc carefully as you remove it. 4. Close the disc tray and place the disc in a protective case. 52 Chapter 10 Hardware upgrades - HP 6720t | End-User Reference Guide - Windows XP - Page 63
antistatic wipes or an antistatic screen cleaner. Cleaning the keyboard WARNING! To reduce the risk of electric shock or computer, damage to a drive, or loss of information, remove discs from a drive before removing the drive from a drive bay, and before shipping, storing, or traveling with a drive - HP 6720t | End-User Reference Guide - Windows XP - Page 64
-related customs regulations for each country or region on your itinerary. ◦ Contact technical support to discuss power cord and adapter requirements for each location in which you plan to use the computer. Voltage, frequency, and plug configurations vary. WARNING! To reduce the risk of electric - HP 6720t | End-User Reference Guide - Windows XP - Page 65
53 cleaning the keyboard 53 compartments, memory module 7 components bottom 6 front 4 left-side 5 right-side 5 wireless antennae 7 Computer Setup power-on password 41 connecting to a WLAN 34 connection, external power 25 connectors accessory battery 7 docking 6 conservation, power 23 copyright - HP 6720t | End-User Reference Guide - Windows XP - Page 66
(LAN) cable required 39 connecting cable 39 low battery level 22 M memory module compartment, identifying 7 microphone (audio-in) jack 5 microphones, supported 27 modem approval label 8 modem cable connecting 35 country-specific cable adapter 36 noise suppression circuitry 35 modem jack, identifying - HP 6720t | End-User Reference Guide - Windows XP - Page 67
security, wireless 34 serial number, computer 8 service tag 8 setup of WLAN 33 setup, computer 1 shipping the computer 53 shutting down 17 slots PC Card 6 security cable 5 software, using 30 speaker 26 Standby exiting 18 initiating 18 Standby hotkey 12 storing battery 23 system information hotkey 11 - HP 6720t | End-User Reference Guide - Windows XP - Page 68
-
 1
1 -
 2
2 -
 3
3 -
 4
4 -
 5
5 -
 6
6 -
 7
7 -
8
-
9
-
10
-
11
-
12
-
13
-
14
-
15
-
16
-
17
-
18
-
19
-
20
-
21
-
22
-
23
-
24
-
25
-
26
-
27
-
28
-
29
-
30
-
31
-
32
-
33
-
34
-
35
-
36
-
37
-
38
-
39
-
40
-
41
-
42
-
43
-
44
-
45
-
46
-
47
-
48
-
49
-
50
-
51
-
52
-
53
-
54
-
55
-
56
-
57
-
58
-
59
-
60
-
61
-
62
-
63
-
64
-
65
-
66
-
67
-
68
 |
 |

HP Compaq 6720t Mobile Thin Client
End-User Reference Guide