HP 8/80 EZSwitchSetup Administrator's Guide v6.3.0 (53-1001344-01, July 2009) - Page 25
Confirming IP addresses
 |
View all HP 8/80 manuals
Add to My Manuals
Save this manual to your list of manuals |
Page 25 highlights
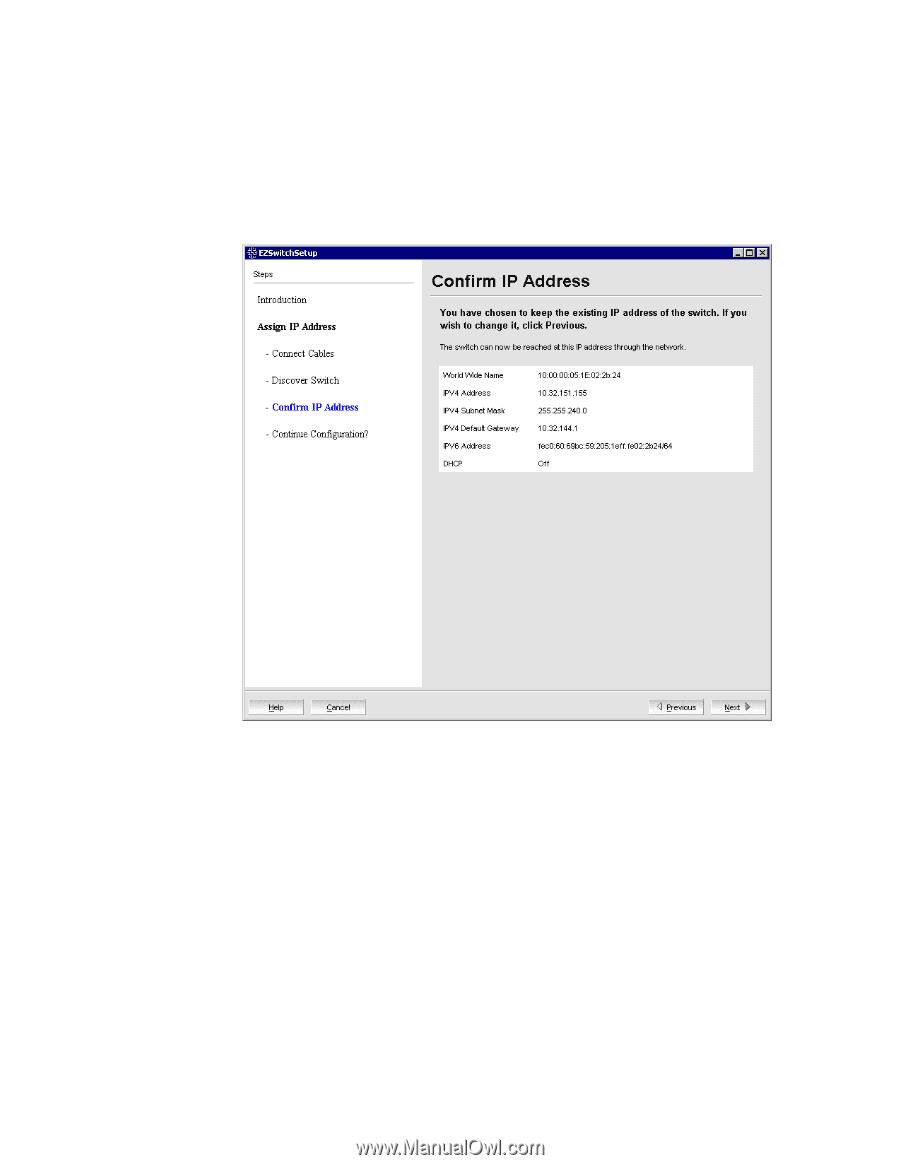
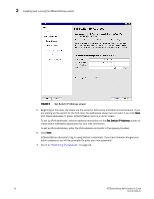
Installing and running the EZSwitchSetup wizard 2 Confirming IP addresses The Confirm IP Address screen (Figure 10) is displayed after you have assigned IP addresses, using either a serial connection or an Ethernet connection. 1. Check the displayed addresses carefully to be sure they are correct. FIGURE 10 EZSwitchSetup Confirm IP Address 2. Click Next to confirm the addresses. The Continue Configuration? screen is displayed (Figure 11). 3. Select one of the following continuation options: • Continue setting up your target switch with EZManager Select this option if you intend to use EZSwitchSetup Manager as your primary management program for this switch. • Discover another switch on the same subnet for IP assignment only Select this option to discover another switch and set the IP address. If you select this option, EZSwitchSetup Manager will not be the default management tool for this current target switch. To set up EZSwitchSetup Manager as the management tool for this switch, you must discover it again with EZSwitchSetup and select the first continuation option. EZSwitchSetup Administrator's Guide 13 53-1001344-01
-
 1
1 -
2
-
3
-
4
-
5
-
6
-
7
-
8
-
9
-
10
-
11
-
12
-
13
-
14
-
15
-
16
-
17
-
18
-
19
-
 20
20 -
 21
21 -
 22
22 -
 23
23 -
 24
24 -
 25
25 -
 26
26 -
 27
27 -
 28
28 -
 29
29 -
 30
30 -
31
-
32
-
33
-
34
-
35
-
36
-
37
-
38
-
39
-
40
-
41
-
42
-
43
-
44
-
45
-
46
-
47
-
48
-
49
-
50
-
51
-
52
-
53
-
54
-
55
-
56
-
57
-
58
-
59
-
60
-
61
-
62
-
63
-
64
 |
 |