HP AP775A HP C-series Nexus 5000 Converged Network Switch quick start instruct - Page 2
Connect the devices, Con IEEE DCB ports for CNA connectivity, Back up the configuration
 |
UPC - 884962062708
View all HP AP775A manuals
Add to My Manuals
Save this manual to your list of manuals |
Page 2 highlights
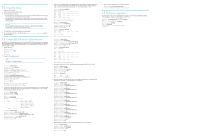
10 Connect the devices 1. Attach an ESD wrist strap. 2. Remove the dust cover from the port cage. 3. Insert the transceiver into the port: • If the transceiver has a Mylar tab, position the transceiver with the tab on the bottom and then gently insert the transceiver into the port until it clicks into place. • If the transceiver has a bale clasp, position the transceiver with the clasp on the bottom, close the clasp by pushing it up over the transceiver, and then gently insert the transceiver into the port until it clicks into place. CAUTION: If you have difficulty inserting the transceiver, ensure that it is positioned correctly and that the tab or clasp is in the correct position before continuing. 4. Check the LEDs to verify that all components are functioning. 5. Verify correct operation of the switch by entering the show interface transceiver command from the workstation. 11 Configure IEEE DCB ports for CNA connectivity To establish CNA connectivity and log in to the C-series Nexus 5000 CN Switch, perform the configuration steps on the IEEE Data Center Bridging (IEEE DCB) ports as shown in the following example. In this example, you enable FCoE on a Nexus 5010, create a VLAN200, and bind the Ethernet ports to VSAN2 from an 8-port FC expansion module. 1. Log into the switch: Nexus 5000 Switch Nexus5010 login: admin Password: Nexus5010# 2. Enable FCoE (disabled by default). NOTE: The Nexus 5010 will require a reload. Nexus5010# configure terminal Nexus5010(config)# feature fcoe Nexus5010(config)# 2009 Apr 1 12:05:06 Nexus5010 %$ VDC-1 %$ %PLATFORM-2-FC_LICENSE_DESIRED: FCoE/FC feature will be enabled after the configuration is saved followed by a reboot Nexus5010(config)# exit Nexus5010# copy running-config startup-config 100% Packaging and storing to flash: \Packaging and storing to flash: |Packaging and storing to flash: / Nexus5010# reload WARNING: This command will reboot the system Do you want to continue? (y/n) [n] y The system is going down for reboot NOW! 3. Create a new VLAN. By default all ports are in VLAN 1. HP recommends that you use a different VLAN for FCoE. In this example you create a VLAN 200, allow access to Ethernet ports 1/1 to 1/20, and create virtual Fibre Channel (VFC) ports 1-20. Nexus5010# configure terminal Nexus5010(config)# vlan 200 Nexus5010(config-vlan)# exit Nexus5010(config)# exit Nexus5010# show vlan brief VLAN Name Status Ports 1 default active Eth1/1, Eth1/2, Eth1/3, Eth1/4, Eth1/5, Eth1/6, Eth1/7, Eth1/8, Eth1/9, Eth1/10, Eth1/11, Eth1/12, Eth1/13, Eth1/14, Eth1/15, Eth1/16, Eth1/17, Eth1/18, Eth1/19, Eth1/20 2 VLAN200 active Nexus5010# configure terminal Nexus5010(config)# interface ethernet 1/1-20 Nexus5010(config-if-range)# switchport mode trunk Nexus5010(config-if-range)# switchport trunk allowed vlan 1, 200 Nexus5010(config-if-range)# interface vfc 1-20 Nexus5010(config-if-range)# exit Nexus5010(config)# exit 4. Create a new VSAN and include the desired Fibre Channel and VFC ports. By default, all ports are in VSAN 1. HP recommends that you use a different VSAN for SAN connectivity. In this example you create a VSAN 2 and include Fibre Channel ports 2/1 to 2/8 and VFC ports 1 to 20. Nexus5010# show vsan membership vsan 1 interfaces: fc2/1 fc2/2 fc2/3 fc2/4 fc2/7 fc2/8 vfc1 vfc2 vfc3 vfc4 vfc7 vfc8 vfc9 vfc10 vfc11 vfc12 vfc15 vfc16 vfc17 vfc18 vfc19 vfc20 fc2/5 vfc5 vfc13 fc2/6 vfc6 vfc14 vsan 4094(isolated_vsan) interfaces: Nexus5010# configure terminal Nexus5010(config)# vsan database Nexus5010(config-vsan-db)# vsan 2 Nexus5010(config-vsan-db)# exit Nexus5010(config)# exit Nexus5010# show vsan membership vsan 1 interfaces: fc2/1 fc2/2 fc2/3 fc2/4 fc2/5 fc2/7 fc2/8 fc2/6 vsan 2 interfaces: vsan 4094(isolated_vsan) interfaces: Nexus5010# configure terminal Nexus5010(config)# vsan database Nexus5010(config-vsan-db)# vsan 2 interface fc2/1-8 Nexus5010(config-vsan-db)# vsan 2 interface vfc 1-20 Nexus5010(config-vsan-db)# exit Nexus5010(config)# exit Nexus5010# show vsan membership vsan 1 interfaces: vsan 2 interfaces: fc2/1 fc2/2 fc2/3 fc2/7 fc2/8 vfc1 vfc2 vfc3 vfc7 vfc8 vfc9 vfc10 vfc11 vfc15 vfc16 vfc17 vfc18 vfc19 fc2/4 vfc4 vfc12 vfc20 fc2/5 vfc5 vfc13 fc2/6 vfc6 vfc14 vsan 4094(isolated_vsan) interfaces: 5. Associate the VLAN with the VSAN. The following example associates VLAN 200 with VSAN 2. Nexus5010# configure terminal Nexus5010(config)# vlan 200 Nexus5010(config-vlan)# fcoe vsan 2 Nexus5010(config-vlan)# exit Nexus5010(config)# exit Nexus5010# show vlan fcoe VLAN VSAN Status 200 2 Operational 6. Bind each VFC port to a unique Ethernet port. In this example you create VFC 1 through VFC 8 and bind each VFC to Ethernet 1/1 through Ethernet 1/8, respectively. Nexus5010# configure terminal Nexus5010(config)# interface vfc 1 Nexus5010(config-if)# bind interface ethernet 1/1 Nexus5010(config-if)# exit Nexus5010(config)# interface vfc 2 Nexus5010(config-if)# bind interface ethernet 1/2 Nexus5010(config-if)# exit Nexus5010(config)# interface vfc 3 Nexus5010(config-if)# bind interface ethernet 1/3 Nexus5010(config-if)# exit Nexus5010(config)# interface vfc 4 Nexus5010(config-if)# bind interface ethernet 1/4 Nexus5010(config-if)# exit Nexus5010(config)# interface vfc 5 Nexus5010(config-if)# bind interface ethernet 1/5 Nexus5010(config-if)# exit Nexus5010(config)# interface vfc 6 Nexus5010(config-if)# bind interface ethernet 1/6 Nexus5010(config-if)# exit Nexus5010(config)# interface vfc 7 Nexus5010(config-if)# bind interface ethernet 1/7 Nexus5010(config-if)# exit Nexus5010(config)# interface vfc 8 Nexus5010(config-if)# bind interface ethernet 1/8 Nexus5010(config-if)# exit Nexus5010(config)# interface vfc 1-8 Nexus5010(config-if)# no shutdown Nexus5010(config-if)# exit Nexus5010(config)# exit 7. Enable the Fibre Channel ports. In this example you enable FC ports 2/1 through 2/8. Nexus5010# configure terminal Nexus5010(config)# interface fc 2/1-8 Nexus5010(config-if)# no shutdown Nexus5010(config-if)# exit Nexus5010(config)# exit 8. Save the running configuration to the startup configuration: Nexus5010# copy running-config startup-config 100% 12 Back up the configuration As a best practice, copy the running configuration to a remote server after making configuration changes. In this example you save the running-configuration to an FTP site. Nexus5010# copy running-config ftp://10.10.20.1/backup.txt Enter vrf (If no input, default vrf is considered): management Enter username: [username] Password: [password] ***** Transfer of file Completed Successfully ***** Nexus5010#
-
 1
1 -
 2
2
 |
 |
