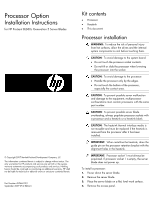
HP BL680c ProLiant BL680c Generation 5 Processor Option Installation Instructi - Page 2
tightened in diagonally opposite pairs in an X
 |
UPC - 884420396314
View all HP BL680c manuals
Add to My Manuals
Save this manual to your list of manuals |
Page 2 highlights
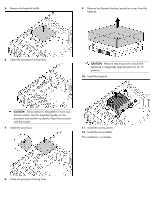
5. Remove the heatsink baffle. 9. Remove the thermal interface protective cover from the heatsink. 6. Open the processor locking lever. CAUTION: Heatsink retaining screws should be tightened in diagonally opposite pairs (in an "X" pattern). 10. Install the heatsink. CAUTION: The processor is designed to fit one way into the socket. Use the alignment guides on the processor and socket to properly align the processor with the socket. 7. Install the processor. 11. Install the access panel. 12. Install the server blade. The installation is complete. 8. Close the processor locking lever.
-
 1
1 -
 2
2
 |
 |

5.
Remove the heatsink baffle.
6.
Open the processor locking lever.
CAUTION:
The processor is designed to fit one way
into the socket. Use the alignment guides on the
processor and socket to properly align the processor
with the socket.
7.
Install the processor.
8.
Close the processor locking lever.
9.
Remove the thermal interface protective cover from the
heatsink.
CAUTION:
Heatsink retaining screws should be
tightened in diagonally opposite pairs (in an "X"
pattern).
10.
Install the heatsink.
11.
Install the access panel.
12.
Install the server blade.
The installation is complete.