HP CB534A User Manual
HP CB534A Manual
 |
View all HP CB534A manuals
Add to My Manuals
Save this manual to your list of manuals |
HP CB534A manual content summary:
- HP CB534A | User Manual - Page 1
HP LaserJet M1522 MFP Series User Guide - HP CB534A | User Manual - Page 2
- HP CB534A | User Manual - Page 3
HP LaserJet M1522 MFP Series User Guide - HP CB534A | User Manual - Page 4
express warranty statements accompanying such products and services. Nothing herein should be construed as constituting an additional warranty. HP shall not be liable for technical or editorial errors or omissions contained herein. Edition 1, 12/2007 Part number: CB534-90946 Trademark Credits Adobe - HP CB534A | User Manual - Page 5
22 Supported printer drivers for Windows 22 Select the correct printer driver for Windows 22 Priority for print settings ...23 Change printer-driver settings for Windows 23 Software installation types for Windows 24 Remove software for Windows ...24 Supported utilities for Windows ...25 HP - HP CB534A | User Manual - Page 6
types for Macintosh 29 Remove software from Macintosh operating systems 30 Supported utilities for Macintosh 30 Use features in the Macintosh printer driver 32 Print ...32 Scan from the product and HP Director (Macintosh 35 Scanning tasks ...35 Fax a document from a Macintosh computer - HP CB534A | User Manual - Page 7
58 Select a paper type ...58 Set the print orientation ...59 Use watermarks ...59 Save toner ...59 Create and use printing shortcuts in Windows 60 Print on both sides of the paper copy jobs ...76 Copy two-sided documents manually 76 9 Scan Load originals for scanning ...78 Use scan ...79 ENWW v - HP CB534A | User Manual - Page 8
of power 129 Fax logs and reports ...130 Change error correction and fax speed 132 Problems sending faxes 133 Problems receiving faxes 135 Performance problems ...137 11 Manage and maintain the product Information pages ...140 HP ToolboxFX ...142 View HP ToolboxFX ...142 Status ...142 vi ENWW - HP CB534A | User Manual - Page 9
Settings ...150 Embedded Web server ...151 Features ...151 Use HP Web Jetadmin software ...152 Security features ...152 Secure the embedded cartridge area 177 Avoid repeated jams ...178 Solve image-quality problems ...179 Print problems ...179 Copy problems ...185 Scan problems ...189 Fax problems - HP CB534A | User Manual - Page 10
204 Print cartridge limited warranty statement 205 HP Customer Care ...206 Online Services ...206 Telephone support ...206 Software utilities, drivers, and electronic information 206 HP direct ordering for accessories or supplies 206 HP service information ...206 HP service agreements 206 - HP CB534A | User Manual - Page 11
Return and recycling instructions 216 Paper ...216 Material restrictions ...216 Disposal of waste equipment by users in private households in the European Union .... 217 Material Safety Data Sheet (MSDS - HP CB534A | User Manual - Page 12
x ENWW - HP CB534A | User Manual - Page 13
1 Product basics ● Product comparison ● Product features ● Product walkaround ● Supported operating systems ● Supported product software ENWW 1 - HP CB534A | User Manual - Page 14
. HP LaserJet M1522n MFP HP LaserJet M1522nf MFP ● Prints letter-size pages at speeds up to 24 pages per HP LaserJet M1522n MFP, plus: minute (ppm) and A4-size pages at speeds up to 23 ppm. ● V.34 fax modem and 4-megabyte (MB) flash fax-storage ● PCL 5 and PCL 6 printer drivers and HP - HP CB534A | User Manual - Page 15
Printer driver features Interface connections Economical printing Supplies Accessibility ● Prints up to 24 ppm (letter) or 23 ppm (A4). ● 600 x 2 dots per inch (dpi) with Resolution Enhancement Technology (RET). ● Adjustable settings to optimize print quality. ● The HP UltraPrecise print cartridge - HP CB534A | User Manual - Page 16
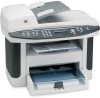
Product walkaround Front view 1 2 3 4 5 7 6 1 Automatic document feeder (ADF) input tray 2 Automatic document feeder (ADF) output bin 3 Control panel 4 Print-cartridge door latch 5 Output bin 6 Priority input tray 7 Tray 1 Back view 87 9 11 10 8 Interface ports 9 Power switch 10 Power - HP CB534A | User Manual - Page 17
Interface ports All models have a 10/100 Base-T (RJ-45) network port and a Hi-Speed USB 2.0 port. Fax models have fax ports as well. 1 2 3 1 Hi-Speed USB 2.0 port 2 Network port 3 Fax ports (fax models only) Serial number and model number location The serial number and product model number label is - HP CB534A | User Manual - Page 18
installed. Recommended installation for Windows ● HP drivers ◦ PCL 6 printer driver ◦ Scan driver ● HP MFP software ◦ HP ToolboxFX ◦ HP LaserJet Scan program ◦ HP Send Fax program and driver ◦ HP Fax Setup Wizard ◦ Uninstall program ● HP Update program ● HP Customer Participation Program ● Shop for - HP CB534A | User Manual - Page 19
installed using the Microsoft Add Printer wizard. Macintosh software ● HP Product Setup Assistant ● HP Device Configuration ● HP Uninstaller ● HP LaserJet software ◦ HP Scan ◦ HP Director ◦ Fax program ◦ Scan to e-mail program ◦ HP Photosmart Supported printer drivers Operating system Windows Mac - HP CB534A | User Manual - Page 20
8 Chapter 1 Product basics ENWW - HP CB534A | User Manual - Page 21
2 Control panel ● Control-panel walkaround ● Control-panel menus ENWW 9 - HP CB534A | User Manual - Page 22
Control-panel walkaround 1 2 345 1 Fax controls (fax models only). Use the fax controls to change commonly used fax settings. 2 Alphanumeric buttons. Use the alphanumeric buttons to type data into the product control-panel display and dial telephone numbers for faxing. 3 Setup and cancel - HP CB534A | User Manual - Page 23
quality, or volume levels (fax models only). ● Use the Network config menu to configure network settings such as TCP/IP configuration. ● Use the Service menu to restore default settings, clean the product, and activate special modes that affect print output. NOTE: To print a detailed list of the - HP CB534A | User Manual - Page 24
Table 2-2 Fax functions menu (fax models only) (continued) Menu item Description Reprint last Reprints the faxes that are stored in the product memory. Polling receive Allows the product to call another fax machine that has polling send enabled. Clear saved faxs Clears all faxes in the - HP CB534A | User Manual - Page 25
. Prints a list of all the product settings. Includes network information when the product is connected to the network. Prints the print-cartridge status. Includes the following information: ● Estimated pages remaining ● Serial number ● Number of pages printed Displays status for: ● Network hardware - HP CB534A | User Manual - Page 26
item Usage page PCL font list PS font list PCL6 font list Service page Description ● TCP/IP and SNMP information ● Network statistics Displays PS fonts. Prints a list of all installed PCL 6 fonts. Displays supported paper types, copy settings, and miscellaneous product settings. Table 2-5 Fax - HP CB534A | User Manual - Page 27
Table 2-5 Fax setup menu (fax models only) (continued) Menu Item Sub-menu item Sub-menu item Description Fax Send setup Def. Resolution Fine Superfine Photo Sets the resolution for sent documents. Higher resolution images have more dots per inch (dpi), so they show more detail. Lower - HP CB534A | User Manual - Page 28
ring is generated to alert the user of an incoming voice call. ● Manual : The user must press the Start Fax button or use an extension phone each with a different ring pattern (on a phone system with distinctive-ring service). ● All Rings: The product answers any calls that come through the telephone - HP CB534A | User Manual - Page 29
Table 2-5 Fax setup menu (fax models only) (continued) Menu Item Sub-menu item Sub-menu item Description Block faxes Add entry Delete entry Clear all Modifies the blocked fax list. The blocked fax list can contain up to 30 numbers. When the product receives a call from one of the blocked fax - HP CB534A | User Manual - Page 30
the time up to 3600 seconds. Sets the percentage at which the control panel generates a low-toner message. Sets how the product reacts when it detects that the print cartridge is out. Sets how much toner the product should apply to thicken lines and edges. Sets the volume levels for the product - HP CB534A | User Manual - Page 31
Manual Link speed Auto crossover ENWW Automatic 10T Full 10T Half 100TX Full 100TX Half On Description Prints or schedules a report that is used to troubleshoot time, this option sets the product to a mode that reduces toner smearing and dusting. The default setting is Off. Sets all customized - HP CB534A | User Manual - Page 32
Table 2-8 Network config menu (continued) Menu item Sub-menu item Off Network services IPv4 IPv6 Show IP Address Yes No Restore defaults Description Sets whether the product will use either IPv4 or IPv6 protocol. Sets whether the product - HP CB534A | User Manual - Page 33
3 Software for Windows ● Supported operating systems for Windows ● Supported printer drivers for Windows ● Select the correct printer driver for Windows ● Priority for print settings ● Change printer-driver settings for Windows ● Software installation types for Windows ● Remove software for Windows - HP CB534A | User Manual - Page 34
Windows Vista (32-bit and 64-bit) Print and scan driver ● Windows 2000 ● Windows 2003 Server (32-bit) Supported printer drivers for Windows ● PCL 5 ● PCL 6 ● PS level 3 emulation The printer drivers include online Help that has instructions for common printing tasks and also describes the buttons - HP CB534A | User Manual - Page 35
and do not override changes made in the Page Setup dialog box. ● Printer Properties dialog box (printer driver): Click Properties in the Print dialog box to open the printer driver. Settings changed in the Printer Properties dialog box do not override settings anywhere else in the printing software - HP CB534A | User Manual - Page 36
solution. ● Express. Installs the printer and scan drivers only. There is an express drivers to install. Remove software for Windows 1. Click Start, and then click Programs or All Programs. 2. Click HP, and then click HP LaserJet M1522. 3. Click Uninstall, and then follow the onscreen instructions - HP CB534A | User Manual - Page 37
Supported utilities for Windows HP ToolboxFX The HP ToolboxFX is a program that you can use for the following tasks: ● Checking the device status ● Checking the supplies status ● Setting up alerts ● Viewing device documentation ● Gaining access to troubleshooting and maintenance tools HP ToolboxFX - HP CB534A | User Manual - Page 38
Participation Program ● HP Update Software for other operating systems OS UNIX Linux Software For HP-UX and Solaris networks, go to www.hp.com/support/net_printing to download the HP Jetdirect printer installer for UNIX. For information, go to www.hp.com/go/linuxprinting. 26 Chapter 3 Software - HP CB534A | User Manual - Page 39
4 Use the product with Macintosh ● Software for Macintosh ● Use features in the Macintosh printer driver ● Scan from the product and HP Director (Macintosh) ● Fax a document from a Macintosh computer (fax models only) ENWW 27 - HP CB534A | User Manual - Page 40
OS v10.4 and later, PPC and Intel Core Processor Macs are supported. Supported printer drivers for Macintosh The HP installer provides PostScript® Printer Description (PPD) files, Printer Dialog Extensions (PDEs), and the HP Printer Utility for use with Macintosh computers. The PPDs, in combination - HP CB534A | User Manual - Page 41
run automatically, double-click the CD icon on the desktop. 3. Double-click the Installer icon in the HP LaserJet Installer folder. 4. Follow the instructions on the computer screen. USB printer queues are created automatically when the device is attached to the computer. However, the queue will use - HP CB534A | User Manual - Page 42
. 10. Close the Print Center or the Printer Setup Utility. Remove software from Macintosh operating systems To remove the software from a Macintosh computer, drag the PPD files to the trash can. Supported utilities for Macintosh Embedded Web server The device is equipped with an embedded Web server - HP CB534A | User Manual - Page 43
icon in the dock. 2. In HP Director, click Settings. 3. Select Configure device to open the Macintosh Configure Device home page in a browser. View Macintosh Configure Device when the product is connected to a network 1. Open one of the following supported Web browsers: ● Safari 1.2 or later - HP CB534A | User Manual - Page 44
the preset. 5. Click OK. Use printing presets 1. On the File menu, click Print. 2. Select the driver. 3. In the Presets box, select the printing preset that you want to use. NOTE: To use printer-driver default settings, select Factory Default. Resize documents or print on a custom paper size You can - HP CB534A | User Manual - Page 45
This feature provides a cost-effective way to print draft pages. 1. On the File menu, click Print. 2. Select the driver. 3. Open the Layout pop-up menu. 4. Next to Pages per Sheet, select the number of pages that you want to page on the sheet. ENWW Use features in the Macintosh printer driver 33 - HP CB534A | User Manual - Page 46
face-up with the bottom edge feeding into the printer first. ● For all other trays, load the pop-up menu, select the Manual Duplex option. 4. Click Print. Follow the instructions in the pop-up window that go to various support Web sites for this device, select an Internet Services option from the - HP CB534A | User Manual - Page 47
the document at the corner indicated by the icon on the scanner. Gently close the lid. 2. Double-click the HP Director desktop alias. 3. Click the HP Director, and then click Scan to open the HP dialog box. 4. Click Scan. 5. To scan multiple pages, load the next page and click Scan. Repeat until all - HP CB534A | User Manual - Page 48
Fax a document from a Macintosh computer (fax models only) 1. In the software program, on the File menu, select Print. 2. Click PDF, and then select Fax PDF. 3. Enter a fax number in the To field. 4. To include a fax cover page, select Use Cover Page, and then enter the cover page subject and - HP CB534A | User Manual - Page 49
to a computer with USB ● Printer sharing disclaimer ● Supported network operating systems ● Supported network protocols ● Install the product , the manual method to configure specific TCP/IP settings can be done from the control panel, the embedded Web server, HP ToolboxFX, or HP Web Jetadmin - HP CB534A | User Manual - Page 50
2. Follow the installer instructions. 3. Allow the installation process to complete, and then restart the computer. Printer sharing disclaimer HP does not support peer-to-peer networking, as the feature is a function of Microsoft operating systems and not of the HP printer drivers. Go to Microsoft - HP CB534A | User Manual - Page 51
tables list the networking services/protocols that are supported on the product. Table 5-1 Printing Service name Description port 9100 (Direct Mode) Line printer daemon (LPD) Printing service Printing service Table 5-2 Network product discovery Service name SLP (Service Location Protocol) mDNS - HP CB534A | User Manual - Page 52
. If the software installer does not start, navigate to the setup.exe file on the CD and double-click the file. 4. Follow the installer instructions. NOTE: When the installer prompts for a network address, provide the IP address listed on the configuration page that you printed before starting the - HP CB534A | User Manual - Page 53
Web server (EWS) or HP ToolboxFX to view or change the HP ToolboxFX. In HP ToolboxFX, click the Network Settings tab. From the Networking tab (EWS) or the Network Settings tab (HP ToolboxFX), you can change the following configurations: ● Host Name ● Manual IP Address ● Manual Subnet Mask ● Manual - HP CB534A | User Manual - Page 54
for use. NOTE: If you want to disable or enable specific automatic IP modes (such as BOOTP, DHCP, or AutoIP), these settings can be by using the embedded Web server or HP ToolboxFX only. IPv4 and IPv6 settings Only the IPv4 protocol can be configured manually. Link speed setting NOTE: Incorrect - HP CB534A | User Manual - Page 55
4. Use the arrow buttons to select one of the following settings. ● Automatic ● 10T Full ● 10T Half ● 100TX Full ● 100TX Half NOTE: The setting must match with the network product to which you are connecting (a network hub, switch, gateway, router, or computer). 5. Press OK. The product will power - HP CB534A | User Manual - Page 56
44 Chapter 5 Connectivity ENWW - HP CB534A | User Manual - Page 57
6 Paper and print media ● Understand paper and print media use ● Supported paper and print media sizes ● Special paper or print media guidelines ● Load paper and print media ● Configure trays ENWW 45 - HP CB534A | User Manual - Page 58
in this user guide. Paper or print media that does not meet these guidelines might cause the following problems: ● Poor print quality ● Increased jams ● Premature wear on the product, requiring repair For best results, use only HP-brand paper and print media designed for laser printers or multiuse - HP CB534A | User Manual - Page 59
it adapts to various media. NOTE: To obtain best print results, select the appropriate paper size and type in the print driver before printing. Table 6-1 Supported paper and print media sizes Size Dimensions Priority input tray Tray 1 Letter 216 x 279 mm (8.5 x 11 inches) Legal 216 x 356 - HP CB534A | User Manual - Page 60
supports printing on special media. Use the following guidelines to obtain satisfactory results. When using special paper or print media, be sure to set the type and size in your print driver to obtain the best print results. CAUTION: HP LaserJet printers use fusers to bond dry toner particles - HP CB534A | User Manual - Page 61
in laser printers than the recommended media and meets the weight specifications specification for this product unless for this product. it is HP paper that not skewed (crooked on the media). When loading media, adjust the media guides to match the width of the media that you are using. Tray - HP CB534A | User Manual - Page 62
through the product at one time. Configure trays When using one of the trays for specific size of paper, you can set the default size for the tray in HP ToolboxFX or from the control panel. In HP ToolboxFX, select Paper handling, and then select the size for the tray you want to - HP CB534A | User Manual - Page 63
section provides information about common printing tasks. ● Change the print driver to match the media type and size ● Get help for source ● Select a paper type ● Set the print orientation ● Use watermarks ● Save toner ● Create and use printing shortcuts in Windows ● Print on both sides of the paper - HP CB534A | User Manual - Page 64
select the correct media type or size. 5. Click OK. Supported paper types and tray capacity This product has the following tray printer driver before printing. Type is Plain Color Preprinted Prepunched Recycled Light Envelopes Labels Bond Rough Transparencies Mid weight Heavy Media specifications - HP CB534A | User Manual - Page 65
1 capacity1 Not supported. Up to 250 sheets Get help for any print option Printer-driver Help is separate from program Help. The printer-driver help provides explanations for the buttons, check boxes, and drop-down lists that are in the printer driver. It also includes instructions for performing - HP CB534A | User Manual - Page 66
Delete. ◦ Windows XP: Click Start, click Settings, and then click Printers and Faxes. Double-click the product icon to open the window, right- Click Start, click Control Panel, and then, under Hardware and Sound, click Printer. Double-click the product icon to open the window, right-click the print - HP CB534A | User Manual - Page 67
has eight pages, the device prints pages 1 and 8 on the same sheet. 1. On the File menu in the software program, click Print. 2. Select the driver, and then click Properties or Preferences. 3. Click the Finishing tab. 4. Select Print On Both Sides. 5. In the drop-down box for Booklet Layout, select - HP CB534A | User Manual - Page 68
that the paper or print media that you are using meets HP specifications. Generally, smoother paper provides better results. 1. Open the media printed on is facing up. 3. Adjust the media guides to the length and width of the media. 4. On the printer driver, on the Paper tab or the Paper/Quality tab - HP CB534A | User Manual - Page 69
Use different paper and print covers Follow these instructions for printing a first page that is different from other pages in the print job. 1. On the File menu in the software program, click Print. 2. Select the driver, and then click Properties or Preferences. 3. Click the Paper/Quality tab. 4. - HP CB534A | User Manual - Page 70
on a different size paper, with or without scaling. Reduce or enlarge a document 1. On the File menu in the software program, click Print. 2. Select the driver, and then click Properties or Preferences. 3. On the Effects tab, select % of actual size, and then type the percentage by which you want to - HP CB534A | User Manual - Page 71
Page Only. 6. Click OK. To remove the watermark, click (none) in the Watermarks drop-down list. Save toner 1. On the File menu in the software program, click Print. 2. Select the driver, and then click Properties or Preferences. 3. On the Paper/Quality tab, click EconoMode. 4. Click OK. ENWW Set - HP CB534A | User Manual - Page 72
Create and use printing shortcuts in Windows Use printing shortcuts to save the current driver settings for reuse. Shortcuts are available on most printer-driver tabs. You can save up to 25 printing shortcuts. Create a printing shortcut 1. On the File menu in the software program, click Print. 2. - HP CB534A | User Manual - Page 73
menu in the software program, click Print. 3. Select the driver, and then click Properties or Preferences. 4. On the Finishing tab, select Print on both sides (manually). 5. Click OK. 6. Send the print job to the product. Follow the instructions in the pop-up window that appears before feeding the - HP CB534A | User Manual - Page 74
Windows You can print more than one page on a single sheet of paper. 1. On the File menu in the software program, click Print. 2. Select the driver, and then click Properties or Preferences. 3. Click the Finishing tab. 4. In the Pages per sheet drop-down list, select the number of pages that you - HP CB534A | User Manual - Page 75
settings EconoMode The EconoMode setting in the product printer driver conserves toner. For instructions about using the EconoMode setting, see Save toner on page 59. Archive print Archive print produces output that is less susceptible to toner smearing and dusting. Use archive print to create - HP CB534A | User Manual - Page 76
64 Chapter 7 Print tasks ENWW - HP CB534A | User Manual - Page 77
8 Copy ● Load originals ● Use copy ● Copy settings ● Copy a book ● Copy photos ● Copy mixed-size originals ● Duplex (two-sided) copy jobs ENWW 65 - HP CB534A | User Manual - Page 78
copied on top of the stack. If the media is longer than letter- or A4-sized paper, pull out the ADF input tray extension to support the media. 2. Slide the stack into the ADF until it does not move any farther. Document loaded appears on the control-panel display. 3. Adjust the - HP CB534A | User Manual - Page 79
Flatbed scanner NOTE: The maximum media size for flatbed scanning is letter/A4. Use the ADF for scanning media larger than letter/A4. 1. Make sure that the automatic document feeder (ADF) contains no media. 2. Lift the flatbed scanner cover. 3. Place the original document face-down on the flatbed - HP CB534A | User Manual - Page 80
appears on the product control-panel display. You must change the default media size in the media input tray to match the output size, or part of your copy might be cut off. Adjust the default copy size NOTE: The default copy size is the size to which copies are normally - HP CB534A | User Manual - Page 81
NOTE: If you select Custom: 25-400%, type in the percentage of the original size that you normally want for copies. If you select 2 pages/sheet or 4 pages/sheet, select the orientation (portrait or landscape). 5. Press OK to save the selection. The product can reduce copies to as little as 25% of - HP CB534A | User Manual - Page 82
3. Use the arrow buttons to select Def. Collation, and then press OK. 4. Use the arrow buttons to select On or Off. 5. Press OK to save the selection. NOTE: The factory-set default for automatic copy collation is On. Copy settings Copy quality Four copy-quality settings are available: Text, Mixed, - HP CB534A | User Manual - Page 83
that has been moistened with nonabrasive glass cleaner. CAUTION: Do not use abrasives, acetone, benzene, ammonia, ethyl alcohol, or carbon tetrachloride on any part of the product; these can damage the product. Do not place liquids directly on the glass. They might seep under it and damage the - HP CB534A | User Manual - Page 84
Adjust the default lighter/darker setting NOTE: The default lighter/darker setting affects all copy jobs. 1. On the product control panel, press Setup ( ). 2. Use the arrow buttons button to select Copy setup, and then press OK. 3. Use the arrow buttons button to select Def. light/dark, and then - HP CB534A | User Manual - Page 85
Media-type settings ● Plain ● Light ● Heavy ● Transparency ● Labels ● Letterhead ● Envelope ● Preprinted ● Prepunched ● Colored ● Bond ● Recycled ● Mid weight ● Extra heavy ● Rough ● Vellum Change the default media-size setting 1. On the product control panel, press Setup ( ). 2. Use the arrow - HP CB534A | User Manual - Page 86
Restore the copy-settings defaults Use the control panel to restore the copy settings to the factory-set default values. 1. On the product control panel, press Setup ( ). 2. Use the arrow buttons to select Copy setup, and then press OK. 3. Use the arrow buttons to select Restore defaults, and then - HP CB534A | User Manual - Page 87
3. Gently press down on the lid to press the book to the flatbed scanner surface. CAUTION: Pressing on the flatbed cover with too much force can break the lid hinges. 4. Press Start Copy. Copy photos NOTE: Photographs should be copied from the product flatbed scanner, not from the automatic document - HP CB534A | User Manual - Page 88
select On or Off. 5. Press OK to save the selection. NOTE: The factory-set default for automatic copy collation is On. Copy two-sided documents manually 1. Load the first page of the document on the flatbed scanner. 2. Press Start Copy. 3. Remove the first page, and then load the second page onto - HP CB534A | User Manual - Page 89
9 Scan ● Load originals for scanning ● Use scan ● Scan settings ● Scan a book ● Scan a photo ENWW 77 - HP CB534A | User Manual - Page 90
copied on top of the stack. If the media is longer than letter- or A4-sized paper, pull out the ADF input tray extension to support the media. 2. Slide the stack into the ADF until it does not move any farther. Document loaded appears on the control-panel display. 3. Adjust the - HP CB534A | User Manual - Page 91
methods Scan jobs can be performed in the following ways. ● Scan from the computer by using HP LaserJet Scan (Windows) ● Scanning by using HP Director (Macintosh). See Scan from the product and HP Director (Macintosh) on page 35. ● Scan from the product ● Scan from TWAIN-compliant or Windows Imaging - HP CB534A | User Manual - Page 92
based programs that support TWAIN-compliant or WIA-compliant scanning devices and with Macintosh-based programs that support TWAIN-compliant scanning from a TWAIN-compliant program, the HP LaserJet Scan software program might start automatically. If the HP LaserJet Scan program starts, you can make - HP CB534A | User Manual - Page 93
instructions in the online Help. Use the Scan To feature ● Scanning from the product control panel is only supported with a full software installation. HP prior to using the Scan To button on the control panel. Use HP LaserJet Scan to program the folder, e-mail, and program destinations for scanning - HP CB534A | User Manual - Page 94
destinations 1. Click Start, click Programs (or All Programs in Windows XP), click HP, click the product, click Scan, and then click Setup. 2. Select Create input tray, with the top of the document forward, and adjust the media guides. -or- Lift the flatbed scanner lid and load the original that is - HP CB534A | User Manual - Page 95
the Messaging Application Programming Interface (MAPI) protocol. Many versions of popular e-mail programs seem to be MAPI-compliant. See the support information for your e-mail program to determine whether or not it is MAPI-compliant. Canceling a scan job To cancel a scan job, use one of the - HP CB534A | User Manual - Page 96
or a photo to a computer results in the file being saved as a .TIF file. ● Scanning a document to email results in the file being saved as a .PDF file. ● Scanning a photo to e-mail results in the file being saved as a .JPEG file. NOTE: Different file types can be selected when using the scan - HP CB534A | User Manual - Page 97
Resolution and color guidelines The following table describes the recommended resolution and color settings for different types of scan jobs. Intended use Fax E-mail Edit text Print (graphics or text) Display on screen Recommended resolution 150 ppi 150 ppi 300 ppi 600 ppi for complex graphics, or - HP CB534A | User Manual - Page 98
that has been moistened with nonabrasive glass cleaner. CAUTION: Do not use abrasives, acetone, benzene, ammonia, ethyl alcohol, or carbon tetrachloride on any part of the product; these can damage the product. Do not place liquids directly on the glass. They might seep under it and damage the - HP CB534A | User Manual - Page 99
Scan a book 1. Lift the lid and place the book on the flatbed scanner with the page that you want to copy at the corner indicated by the icon on the scanner. 2. Gently close the lid. 3. Gently press down on the lid to press the book to the flatbed scanner surface. CAUTION: Pressing on the flatbed - HP CB534A | User Manual - Page 100
Scan a photo 1. Place the photo on the flatbed scanner with the picture-side down and the upper-left corner of the photo at the corner indicated by the icon on the scanner. 2. Gently close the lid. 3. Scan the photo by using one of the scanning methods. 88 Chapter 9 Scan ENWW - HP CB534A | User Manual - Page 101
● Fax features ● Setup ● Change fax settings ● Use fax ● Solve fax problems NOTE: Many of the functions that are described in this chapter also can be performed by using HP ToolboxFX or the embedded Web server. For more information, see the HP ToolboxFX online Help or Embedded Web server on page 151 - HP CB534A | User Manual - Page 102
300 fax pages ● Fax forwarding ● Delayed sending of faxes ● Ring features: Configure rings to answer and distinctive ring compatibility (service required through local telecommunications company) ● Fax confirmation report ● Junk fax blocking ● Fax security ● Eight cover page templates available in - HP CB534A | User Manual - Page 103
analog device. HP recommends using the you do not want to connect a specific device, skip the step that explains it telephone line. NOTE: Voicemail is not supported with this product. 1. Unplug the power a telephone line, see the getting started guide before proceeding. The product should already be - HP CB534A | User Manual - Page 104
4. To connect an internal or external modem on a computer, plug one end of a telephone cord into the product "telephone" port ( ). Plug the other end of the telephone cord into the modem "line" port. NOTE: Some modems have a second "line" port to connect to a dedicated voice line. If you have two " - HP CB534A | User Manual - Page 105
the product environment. Configure fax settings The product fax settings can be set from the control panel, from HP ToolboxFX, or from the embedded Web server. At the initial set-up process, the HP Fax Setup Wizard can be used to configure the settings. In the United States and many other countries - HP CB534A | User Manual - Page 106
at any time by using the Fax Setup Wizard. 1. Click Start, and then click Programs. 2. Click HP, click the name of the product, and then click HP Fax Setup Wizard. 3. Follow the onscreen instructions in the HP Fax Setup Wizard to set the time, date, and fax header, as well as several other settings - HP CB534A | User Manual - Page 107
ToolboxFX can import contact information from other software program phone books. The following table shows which programs are supported for HP ToolboxFX. Program Microsoft Outlook Description Personal Address Book (PAB) entries, Contacts entries, or both combined may be selected. Individuals and - HP CB534A | User Manual - Page 108
will be added to the name in the home entry. Goldmine Goldmine version 4.0 is supported. HP ToolboxFX imports the file last used by Goldmine. Symantec Act! Act! versions 4.0 and 2000 are supported. HP ToolboxFX imports the database last used by Act!. Complete the following steps to import - HP CB534A | User Manual - Page 109
Manage speed dials Create and edit speed dials Speed dials 1 through 12 are also associated with their corresponding one-touch keys on the control panel. The one-touch keys can be used for speed dials or group-dial entries. A maximum of 50 characters can be entered for a single fax number. NOTE: To - HP CB534A | User Manual - Page 110
. Manage group-dial entries Create and edit group-dial entries 1. Assign a speed-dial entry to each fax number that you want in the group. (For instructions, see Create and edit speed dials on page 97.) 2. On the control panel, press Setup ( ). 3. Use the arrow buttons to select Fax setup, and then - HP CB534A | User Manual - Page 111
to store faxes on the product until you are at the product to print them. NOTE: A single password can be set from the control panel, HP ToolboxFX, or the embedded Web server. Turn on password protection To set up the product security password, complete the following steps: 1. On the control panel - HP CB534A | User Manual - Page 112
5. Use the alphanumeric buttons to enter the product password, and then press OK. 6. To confirm the product password, use the alphanumeric buttons to re-enter the password, and then press OK. Turn on private receive feature The password-protection feature must be turned on before the private-receive - HP CB534A | User Manual - Page 113
outside of your company telephone system. While this setting is activated, you can dial a fax number without the dial prefix by using manual dial. For instructions, see Manual dial faxing on page 116. 1. On the control panel, press Setup ( ). 2. Use the arrow buttons to select Fax setup, and then - HP CB534A | User Manual - Page 114
4. Use the arrow buttons to select Dial Prefix, and then press OK. 5. Use the arrow buttons to select On or Off, and then press OK. 6. If you selected On, use the alphanumeric buttons to enter the prefix, and then press OK. You can use numbers, pauses, and dialing symbols. Set the dial-tone - HP CB534A | User Manual - Page 115
4. Use the arrow buttons to select Redial-no answer, and then press OK. 5. Use the arrow buttons to select On or Off, and then press OK. Set the redial-on-communication-error option If this option is turned on, the product redials automatically if some sort of communication error occurs. The factory - HP CB534A | User Manual - Page 116
the appropriate resolution setting. 3. Press OK to save the selection. NOTE: This procedure changes the fax resolution for the current fax job. For instructions about changing the default fax resolution, see Set the default resolution setting on page 104. NOTE: To change the fax contrast or glass - HP CB534A | User Manual - Page 117
codes 1. Load the document in the automatic document feeder (ADF) input tray or on the flatbed scanner. 2. On the control panel, enter the phone number manually, by speed-dial, or by group-dial entry. 3. Press Start Fax. 4. Enter the billing code, and then press Start Fax. The fax job is sent - HP CB534A | User Manual - Page 118
controlpanel display. (The minimum and maximum number of rings allowed varies by country/region.) One line with two separate numbers and a ring-pattern service One or two rings. (If you have an answering machine or computer voicemail for the other telephone number, make sure that the product is - HP CB534A | User Manual - Page 119
call is a voice call, the product generates an audible ring to indicate an incoming voice call that you must answer on an extension phone. ● Manual: In this answer mode, the product never answers calls. You must start the fax-receiving process yourself, either by pressing Start Fax on the control - HP CB534A | User Manual - Page 120
, ask someone to send a fax to you in order to verify that the ring-pattern service is working correctly. Set up the computer to receive faxes NOTE: Receiving faxes by using a computer is not supported for Macintosh. Receiving faxes to a computer is available only if a full software installation was - HP CB534A | User Manual - Page 121
4. Click Fax Tasks. 5. Under Fax Receive Mode, select Receive faxes to this computer. Turn off the receive-to-PC setting from the control panel The receive-to-PC setting can be activated only from one computer. If for any reason that computer is no longer available, you can use the following - HP CB534A | User Manual - Page 122
Block or unblock fax numbers If you do not want to receive faxes from specific people or businesses, you can block as many as 30 fax numbers by the fax failed. NOTE: Fax numbers also can be blocked or unblocked by using HP ToolboxFX. To print a list of numbers that you have blocked or the fax - HP CB534A | User Manual - Page 123
default setting is On. Turn this setting off only if you use pulse dialing or if you have a service from your telephone company that also uses the 1-2-3 sequence. The telephone company service does not work if it conflicts with the product. 1. On the control panel, press Setup ( ). 2. Use the arrow - HP CB534A | User Manual - Page 124
Supported fax themselves are fixed forms. Customize a fax cover sheet 1. Open the HP LaserJet Send Fax software program. 2. In the Fax To section, provide the cover page prior to sending the fax. Cancel a fax Use these instructions to cancel a single fax that is currently dialing or a fax that is - HP CB534A | User Manual - Page 125
Press OK to confirm the deletion. Use fax on a DSL, PBX, ISDN, or VoIP system HP products are designed specifically for use with traditional analog phone services. They are not designed to work on DSL, PBX, ISDN lines, or VoIP services, but they might work with the proper setup and equipment. NOTE - HP CB534A | User Manual - Page 126
, it might be necessary to contact the PBX provider for assistance. HP does not guarantee that the product will be compatible with digital environments machines unless the provider explicitly states that it supports fax over IP services. If the product experiences problems getting a fax to work on a - HP CB534A | User Manual - Page 127
2. Slide the stack into the ADF until it does not move any farther. Document loaded appears on the control-panel display. 3. Adjust the media guides until they are snug against the media. 4. Use the alphanumeric buttons on the control panel to dial the number. -orIf the fax number you are - HP CB534A | User Manual - Page 128
sided document, use the scanner glass. See Fax from the flatbed scanner on page 115. Manual dial faxing Usually, the product dials after you press Start Fax. At times, however, dialing internationally, you might need to dial part of the number and then listen for dial tones before continuing to dial. 116 - HP CB534A | User Manual - Page 129
pauses, dial tones, international access tones, or calling card acceptance tones before continuing to dial. Send a fax to a group manually (ad hoc faxing) Use the following instructions to send a fax to a group of recipients that has not been assigned a groupdial entry: 1. Load the document into the - HP CB534A | User Manual - Page 130
fail, the product updates the fax activity log by adding the error, and then it proceeds to the next number in the group. Redial manually 1. Load the document into the automatic document feeder (ADF) input tray or onto the flatbed scanner. 2. On the control panel, press Redial. 3. Press Start - HP CB534A | User Manual - Page 131
Use speed dials and group-dial entries Send a fax by using a speed dial 1. Load the document into the automatic document feeder (ADF) input tray or on the flatbed scanner. 2. Press the one-touch key for the speed dial. -or- Press Phone Book, use the alphanumeric buttons to specify the speed-dial - HP CB534A | User Manual - Page 132
5. If you have already placed the document on the flatbed scanner, press OK (or place the document on the flatbed scanner and then press OK). After scanning the page, Another page? 1=Yes 2=No appear on the control-panel display. 6. If you have more pages to scan, press 1 to select Yes, and then - HP CB534A | User Manual - Page 133
specifications. The most typical steps follow. 1. Click Start, click Programs (or All Programs in Windows XP), and then click Hewlett-Packard. 2. Click HP LaserJet Open HP Director by clicking the icon in the dock, and then click Fax. The Apple print dialog appears. 3. Select Fax PDF from the PDF pop - HP CB534A | User Manual - Page 134
menu, and then click Print. 3. Select the fax print driver from the printer driver drop-down list. The fax software appears. 4. Complete one of v10.3: Select Fax from the Print dialog. -orMac OS X v10.4: Select Fax PDF from the PDF pop-up menu. b. Enter the fax number of one or more recipients. c. - HP CB534A | User Manual - Page 135
, if you are sending a fax to a person whose device is in the manual receive mode, you can precede the fax with a voice call to let that person the fax number by using the telephone keypad. 3. When the recipient answers, instruct the person to start the fax machine. 4. When you hear the fax tones - HP CB534A | User Manual - Page 136
touch key. NOTE: This feature does not support undefined (ad hoc) groups. 9. Press destination, dial manually to allow for pauses and international dialing codes. See Manual dial faxing on If you want to reprint a fax because the print cartridge was empty or if the fax was printed on the - HP CB534A | User Manual - Page 137
on a computer, the product must be configured to receive faxes to the computer. See Set up the computer to receive faxes on page 108. 1. Open HP ToolboxFX. 2. Select the product. 3. Click Fax. 4. Click Fax Receive Log. 5. In the Fax Image column, click the "view" link of the fax that you want - HP CB534A | User Manual - Page 138
Solve fax problems Fax error messages Alert and warning messages appear try sending the fax again. Try a different phone cord. If the error persists, contact HP. See www.hp.com/support/ljm1522 or the support flyer that came in the product box. Fax is busy Redial pending The fax line to - HP CB534A | User Manual - Page 139
try sending the fax again. Try a different phone cord. If the error persists, contact HP. See www.hp.com/support/ljm1522 or the support flyer that came in the product box. Fax memory full Canceling recv. During the fax page 132. Ask the sender to resend the fax. ENWW Solve fax problems 127 - HP CB534A | User Manual - Page 140
on page 132. Ask the sender to resend the fax. Connect the product to a different phone line. If the error persists, contact HP. See www.hp.com/support/ljm1522 or the support flyer that came in the product box. Fax Send error An error occurred while trying to send a fax. Try resending the fax - HP CB534A | User Manual - Page 141
a jack for another phone line. If the error persists, contact HP. See www.hp.com/support/ljm1522 or the support flyer that came in the product box. Fax memory is retained when there is a loss of power The HP LaserJet M1522 MFP flash memory protects against data loss when a power failure occurs - HP CB534A | User Manual - Page 142
about 60 minutes after a power failure occurs. Flash memory can maintain its data for years without power applied. Fax logs and reports Use the following instructions to print fax logs and reports: Print all fax reports Use this procedure to print all of the following reports at one time: ● Fax - HP CB534A | User Manual - Page 143
. It can be set to print after the following events: ● Every fax job ● Send fax ● Receive fax ● Never (the factory-set default) ENWW Solve fax problems 131 - HP CB534A | User Manual - Page 144
of the fax be resent. The factory-set default for error correction is On. You should turn off error correction only if you are having trouble sending or receiving a fax, and you are willing to accept the errors in the transmission. Turning off the setting might be useful when you are - HP CB534A | User Manual - Page 145
You should change the setting only if you are having trouble sending a fax to or receiving a fax from 5. Use the arrow buttons to select a speed setting, and then press OK. Problems sending faxes Problem The document stops feeding in the middle of faxing. Faxes stop during sending. Cause - HP CB534A | User Manual - Page 146
Problem Cause Solution The product is receiving faxes but is not If the product is on a digital system, the sending them. system might be generating a dial tone that the product cannot detect. Disable the detect-dial-tone setting. If the error persists, contact the system service provider. A - HP CB534A | User Manual - Page 147
that the product functions correctly. Problem Cause Solution The product cannot service, or you do have the service and the feature is not set correctly. Check the answer-ring pattern feature to verify that it is set properly. The fax cord might not be correctly See the getting started guide - HP CB534A | User Manual - Page 148
service. ● Get a telephone line that is dedicated to fax calls. ● Set the product answer mode to Manual. In manual are blank, The product ran out of toner while or have poor print quality. printing a .) As soon as possible, replace the print cartridge, and then reprint the fax. The fax - HP CB534A | User Manual - Page 149
Performance problems Problem Cause Solution Faxes are transmitting or being received very slowly. check the telephone line. If the fax is being sent via a digital phone line, contact the service provider. The fax is being sent via an international Allow more time to transmit fax jobs call. - HP CB534A | User Manual - Page 150
138 Chapter 10 Fax ENWW - HP CB534A | User Manual - Page 151
11 Manage and maintain the product ● Information pages ● HP ToolboxFX ● Embedded Web server ● Use HP Web Jetadmin software ● Security features ● Manage supplies ENWW 139 - HP CB534A | User Manual - Page 152
problems with the product. NOTE: If the product language was not correctly set during installation, you can set the language manually so the information pages print in one of the supported ( ). Shows the remaining life of the HP print cartridge, the 2. estimated pages remaining, the number of - HP CB534A | User Manual - Page 153
Page description Menu map Shows the control-panel menus and available settings. Network report Shows the product network settings. Fax reports How to print the page 1. On the product control panel, press Setup ( ). 2. Use the arrow buttons to select Reports, and then press OK. 3. Use the arrow - HP CB534A | User Manual - Page 154
, click HP LaserJet M1522, and then click HP ToolboxFX. Status The HP ToolboxFX Status tab contains links to the following main pages: ● Device Status. View product status information. This page indicates product conditions such as a jam or an empty tray. After you correct a problem with the product - HP CB534A | User Manual - Page 155
-up alerts to your computer when certain events occur. Events that trigger alerts include jams, low levels of toner in HP print cartridges, non-HP print cartridge in use, empty input trays, and specific error messages. Select the pop-up format, the tray icon format, or both for the alerts. The pop - HP CB534A | User Manual - Page 156
more information about fax tasks, see Fax on page 89. NOTE: You must click Apply before the changes take effect. Fax phone book Use the HP ToolboxFX fax phone book to add and remove individuals or groups on your speed-dial list, import phone books from a variety of sources, and update - HP CB534A | User Manual - Page 157
In addition to numerical digits, the following are valid characters for fax numbers R ●W space> NOTE: You must click Apply before the changes take effect. For more information about faxes, see Fax on page 89. ENWW HP ToolboxFX 145 - HP CB534A | User Manual - Page 158
tab. Help The HP ToolboxFX Documentation tab contains links to the following main pages: ● Troubleshooting ● Animated demonstrations ● User Guide. View information about the product usage, warranty, specifications, and support. The user guide is available in both HTML and PDF format. 146 Chapter - HP CB534A | User Manual - Page 159
system settings, such as product language and jam recovery. ● Service. Gain access to various procedures required to maintain the product. Device Polling. Change the product polling settings, which determine how often HP ToolboxFX collects data from the product. ● Save/Restore Settings. Save - HP CB534A | User Manual - Page 160
, but it is adequate for printing drafts or proofs. HP does not recommend full-time use of EconoMode. If EconoMode is used full-time, it is possible that the toner supply will outlast the mechanical parts in the print cartridge. If print quality begins to degrade under these circumstances, you - HP CB534A | User Manual - Page 161
must click Apply before the changes take effect. Service During the printing process, paper, toner and dust particles can accumulate inside the product. Over time, this buildup can cause print-quality problems such as toner specks or smearing. HP ToolboxFX provides an easy method for cleaning the - HP CB534A | User Manual - Page 162
. PostScript Use the PostScript option when you are using the HP postscript level 3 emulation print personality. When the Print PostScript changes take effect. Network Settings The network administrator can use the HP ToolboxFX Network Settings tab to control the networkrelated settings for the - HP CB534A | User Manual - Page 163
server resides on a hardware device (such as an HP LaserJet product) or in firmware, rather than as software that install or configure, but you must have a supported Web browser on the computer. To gain access and order new ones ● View and change part of the product configuration ● View and print - HP CB534A | User Manual - Page 164
troubleshooting network-connected peripherals. The intuitive browser interface simplifies cross-platform management of a wide range of devices, including HP and non-HP to the HP Web site. If installed on a host server, HP Web Jetadmin is available to any client through a supported Web browser, - HP CB534A | User Manual - Page 165
non-HP print cartridge is first installed. ● Print a supplies status page, and then check the supplies levels on the page. If the supplies levels are low, you can order supplies through a local HP dealer, by telephone, or online. See Accessories and ordering information on page 201 for part numbers - HP CB534A | User Manual - Page 166
after the beginning of the call. The language line interpreter is a service that will translate between you and the representative for the HP fraud hotline. Recycle supplies To install a new HP print cartridge, follow the instructions that are included in the box that contains the new supply, or - HP CB534A | User Manual - Page 167
page, you might be able to temporarily improve print quality by redistributing the toner. 1. Remove the print cartridge from the printer. 2. To redistribute the toner, gently rock the print cartridge from front to back. CAUTION: If toner gets on your clothing, wipe it off with a dry cloth and wash - HP CB534A | User Manual - Page 168
from its packaging, and then rock the print cartridge back and forth. 4. Remove the orange cover from the print cartridge, and then pull the orange tab straight out to remove the sealing tape. 5. Insert the cartridge into the product until it is firmly in place. 156 Chapter 11 Manage and maintain - HP CB534A | User Manual - Page 169
problems such as toner specks or smearing. This product has a cleaning mode that can correct and prevent these types of problems. Specks Smearing Clean the paper path from HP ToolboxFX Use HP 2. Open HP ToolboxFX, click the product, and then click the System Settings tab. 3. Click the Service tab, - HP CB534A | User Manual - Page 170
HP ToolboxFX, you can print and use a cleaning page from the product control panel. 1. Press Setup ( ). 2. Use the arrow buttons to find the Service menu automatic document feeder (ADF) pickup roller assembly If the ADF has trouble feeding documents, clean the ADF pickup roller assembly. 1. Turn off - HP CB534A | User Manual - Page 171
4. Lower the green lever assembly, and then close the ADF cover. NOTE: If you are experiencing jams in the ADF, contact HP. See www.hp.com/support/ ljm1522 or the support flyer that came in the product box. 5. Plug in the product, and then turn on the product. Clean the lid backing Minor debris can - HP CB534A | User Manual - Page 172
, and stains off of the exterior of the product. Firmware updates Firmware updates and installation instructions for this product are available at www.hp.com/support/ ljm1522. Click Downloads and drivers, click the operating system, and then select the firmware download for the product. 160 Chapter - HP CB534A | User Manual - Page 173
12 Problem solve ● Problem-solving checklist ● Restore the factory-set defaults ● Control-panel messages ● Control-panel display problems ● Clear jams ● Solve image-quality problems ● Solve connectivity problems ● Solve software problems ENWW 161 - HP CB534A | User Manual - Page 174
that will help you correct the error. Make sure that media that meets HP specifications. See Paper and print media on page 45 Clean the paper path. feed smoothly through the ADF, and copies should print without print-quality problems. Make a copy from the flatbed as well. Paper jams when printing - HP CB534A | User Manual - Page 175
HP LaserJet M1522 MFP or telephone devices are not connected in the is the only device on the telephone line and correct order. try again to receive the fax. The product fax settings are set incorrectly. Review driver is selected. Select the proper driver. There is a port driver problem Service, - HP CB534A | User Manual - Page 176
guide specific print cartridge has an e-label error. Reinstall the print cartridge. Turn off and then turn on the product. If the problem is not solved, replace the cartridge. 10.1000 Supply Memory Error A specific print cartridge contact HP. See www.hp.com/support/ljm1522 or the support flyer - HP CB534A | User Manual - Page 177
roller assembly on page 158. If the error persists, contact HP. See www.hp.com/support/ljm1522 or the support flyer that came in the product box. Door open The print-cartridge door is open. Close the print-cartridge door. Engine comm. error The product experienced a print engine communication - HP CB534A | User Manual - Page 178
-length guide is in the correct position for the media size that you are using. Reload the media in the input tray and press Setup to continue the job. If the error persists, contact HP. See www.hp.com/support/ljm1522 or the support flyer that came in the product box. 166 Chapter 12 Problem solve - HP CB534A | User Manual - Page 179
believe you purchased an HP supply, please call the HP fraud hotline at 1-877-219-3183. Service or repairs that are required as a result of using non-HP supplies is not covered under HP warranty. Order black Cartridge Print cartridge is low. Order a new print cartridge. Page too complex, press - HP CB534A | User Manual - Page 180
on the power might fix the problem. If a critical error persists, the product might require service. Critical error message-tables Table for the product to initialize. If the error persists, contact HP. See www.hp.com/support/ljm1522 or the support flyer that came in the product box. Turn off the - HP CB534A | User Manual - Page 181
. Plug the product directly into the wall socket. Use the power switch to turn the product on. If the error persists, contact HP. See www.hp.com/support/ljm1522 or the support flyer that came in the product box. Scanner error #, Turn off then on The product has experienced an error in the Turn - HP CB534A | User Manual - Page 182
To resolve this problem, perform the overfilled, or the media guides are not set properly. cartridge door is opened during a print job. ● Too many sheets have accumulated in an output area, or sheets are blocking an output area. ● The print media that is being used does not meet HP specifications - HP CB534A | User Manual - Page 183
instructions on the following pages. If the location of the jam is not obvious, first look inside the product. Loose toner might remain in the product after a jam. This problem page 49 for more information. ● The media does not meet HP specifications, such as those for size or type. See Paper and - HP CB534A | User Manual - Page 184
part and set it aside. 3. Lifting the green lever, rotate the pick mechanism until it stays open. 4. Gently try to remove the page without tearing it. If you feel resistance, go to the next step. 5. Open the ADF lid and gently loosen the media by using both hands. 172 Chapter 12 Problem - HP CB534A | User Manual - Page 185
6. When the media is free, gently pull it out in the direction shown. 7. Close the lid to the flatbed scanner. 8. Lower the green lever. ENWW Clear jams 173 - HP CB534A | User Manual - Page 186
shown. Push down on the two tabs until the part snaps into place. Install the cleanout part correctly, because future jamming might occur if the cleanout part is not replaced correctly. 10. Close the ADF might not be necessary. 1. Open the print-cartridge door. 174 Chapter 12 Problem solve ENWW - HP CB534A | User Manual - Page 187
, grasp the side of the media that is most visible (this includes the middle), and carefully pull it free from the product. 3. Close the print-cartridge door. 4. Open tray 1. 5. With both hands, grasp the side of the media that is most visible (this includes the middle), and carefully pull it free - HP CB534A | User Manual - Page 188
is visible, open the print-cartridge door, remove the print cartridge, and rotate the upper media guide. Carefully pull the media up and out of the product. 7. Close tray 1 and the print-cartridge door. Clear jams from the carefully pull it free from the product. 176 Chapter 12 Problem solve ENWW - HP CB534A | User Manual - Page 189
the product. Pulling jammed media out of the product at an angle can damage the product. 1. Open the print-cartridge door, and remove the print cartridge. CAUTION: To prevent damage to the print cartridge, minimize its exposure to direct light. 2. With both hands, grasp the side of the media that is - HP CB534A | User Manual - Page 190
that you are using. ● Verify that the media guides are properly adjusted. ● Check that the input tray tray while the product is printing. ● Use only HP-recommended media types and sizes. See Paper and print . The print media type and the amount of toner used affect the output bin capacity. ● Check - HP CB534A | User Manual - Page 191
cause and solution for each of these examples. Problem Print is light or faded. Toner specks appear. Cause Solution The media might not meet HP specifications. Use media that meets HP specifications. See Paper and print media on page 45. The print cartridge might be defective. If you use a non - HP CB534A | User Manual - Page 192
Replace the print cartridge. See Print cartridge on page 155. Toner smears appear on the media. The media might not meet HP specifications. Use media that meets HP specifications. See Paper and print media on page 45. If toner smears appear on the leading edge Clean the media guides and the paper - HP CB534A | User Manual - Page 193
might need service. Verify that the problem also occurs on the configuration page. If so, contact HP. See www.hp.com/support/ljm1522 or the support flyer that came in the product box. The printed page is curled or wavy. The product is not set to print on the type of In the printer driver, make - HP CB534A | User Manual - Page 194
is loaded correctly and that the media guides are not too tight or too loose against the stack. See Load paper and print media on page 49. The media might not meet HP specifications. Use a different paper, such as high-quality paper that is intended for laser printers. See Paper and print media on - HP CB534A | User Manual - Page 195
inkjet printers only. Use media that is designed for laser printers. problems The following problems with media cause print-quality deviations, jamming, or even damage to the product. Problem Cause Solution Poor print quality or toner use the arrow buttons to select Service, and then press OK. Use - HP CB534A | User Manual - Page 196
again. Adjust the media guides to the width and manual feed mode and print your job again. The pickup roller might be dirty or damaged. Contact HP. See www.hp.com/support/ ljm1522 or the support Problem Pages print but are totally blank. Cause The sealing tape might still be in the print cartridge - HP CB534A | User Manual - Page 197
instructions. ● Use or make a carrier sheet to protect your originals. NOTE: Verify that the media meets HP specifications. If the media meets HP specifications, recurring feed problems indicate the pickup roller or separation pad is worn. Contact HP. See www.hp.com/ support/ljm1522 or the support - HP CB534A | User Manual - Page 198
problems Problem Images are missing or faded. Cause The print-cartridge meet HP specifications. The print-cartridge might be defective. Solution Replace the print cartridge. See Print cartridge on the settings. Text is unclear. The printer driver or product software settings may be incorrect - HP CB534A | User Manual - Page 199
problems Problem Cause Solution Poor print quality or toner that is made for laser printers. Turn the paper over Adjust the media guides to the width manual feed mode and print your job again. The pickup roller might be dirty or damaged. Contact HP. See www.hp.com/support/ ljm1522 or the support - HP CB534A | User Manual - Page 200
by the icon on the scanner. The media might not meet HP specifications. Use media that meets HP specifications. See Paper and print media on page 45. The print cartridge might be defective. Replace the print cartridge. See Print cartridge on page 155. The ADF might be loaded. Make sure that - HP CB534A | User Manual - Page 201
Solve scanned-image problems Problem The scanned image is of poor quality. Cause Solution The Scanner resolution and color on page 84. The original might have been loaded incorrectly. Use the media guides when you load the originals into the ADF. See Load paper and print media on page 49. - HP CB534A | User Manual - Page 202
Problem Part of the image did not scan. The scan takes too long Cause Solution The original might have been loaded incorrectly. A colored background might be causing images in the foreground to blend into the background. Use the media guides when you load the originals into the ADF. See Load - HP CB534A | User Manual - Page 203
See Load paper and print media on page 49 for instructions. ● Adjust the software settings according to how you plan HP. See www.hp.com/support/ljm1522 or the support flyer that came in the product box. ● Use or make a carrier sheet to protect your originals. Solve scan-quality problems Problem - HP CB534A | User Manual - Page 204
for non-HP print cartridges. ◦ If the pages do not print correctly, the problem is with the hardware. Contact HP. See www.hp.com/support/ljm1522 or the support flyer that came in the product box. 4. Print a demo page from HP ToolboxFX. If the page prints, the problem is with the printer driver. Try - HP CB534A | User Manual - Page 205
instructions, see Change printer-driver settings for Macintosh on page 28. For Windows 2000: 1. In the Windows system tray, click Start, select Settings, and then click Printers , and click OK. Solve connectivity problems Solve direct-connection problems If the product is experiencing connection - HP CB534A | User Manual - Page 206
page 140). 1. Are there any physical connection problems between the workstation or file server and the product? Verify that the network cabling, connections, and router configurations are correct. Verify that the network cable lengths meet network specifications. 2. Are the network cables connected - HP CB534A | User Manual - Page 207
sure they are compatible and that they are installed correctly with the correct printer drivers. 6. Are other users able to print? The problem may be workstation-specific. Check the workstation network drivers, printer drivers, and redirection. 7. If other users are able to print, are they using the - HP CB534A | User Manual - Page 208
Windows problems Error message: "General Protection FaultException OE" "Spool32" "Illegal Operation" Cause Solution Close all software programs, restart Windows, and try again. Select a different printer driver. If the device PCL 6 printer driver is selected, switch to the PCL 5 or HP postscript - HP CB534A | User Manual - Page 209
in the Printer Setup Utility. An encapsulated PostScript (EPS) file does not print with the correct fonts. Cause This problem occurs with some software for USB printers is not installed. Solution When adding a third-party USB card, you might need the Apple USB Adapter Card Support software. The - HP CB534A | User Manual - Page 210
Printer Setup Utility after the driver is selected. Cause Solution This problem is caused by either a software or a hardware component. Software troubleshooting ● Check that your Macintosh supports errors The following situations are PS language specific and may occur when several product - HP CB534A | User Manual - Page 211
need to print your job at 600 dots per inch, reduce the complexity of the page, or install more memory. Select unlimited downloadable fonts from printer driver. Select unlimited downloadable fonts from printer driver. ENWW Solve software problems 199 - HP CB534A | User Manual - Page 212
200 Chapter 12 Problem solve ENWW - HP CB534A | User Manual - Page 213
● To order supplies in the U.S., go to www.hp.com/sbso/product/supplies. ● To order supplies worldwide, go to www.hp.com/ghp/buyonline.html. ● To order supplies in Canada, go to www.hp.ca/catalog/supplies. ● To order supplies in Europe, go to www.hp.com/go/ljsupplies. ● To order supplies in Asia - HP CB534A | User Manual - Page 214
Supplies Product name Replacement print cartridge Description Part number Average yield for the print cartridge is CB436A approximately 2,000 pages. Actual yield depends on use. Cable and interface accessories Product name USB cable Fax cord Description 2-meter standard USB-compatible - HP CB534A | User Manual - Page 215
Service and support Hewlett-Packard limited warranty statement HP PRODUCT HP LaserJet M1522n and M1522nf DURATION OF LIMITED WARRANTY One-year limited warranty HP warrants to you, the end-user customer, that HP price upon prompt return of the product. HP products may contain remanufactured parts - HP CB534A | User Manual - Page 216
documentation in the provided shipping material. Failure to return the defective part may result in HP billing you for the replacement. With a customer self repair, HP will pay all shipping and part return costs and determine the courier/carrier to be used. 204 Appendix B Service and support ENWW - HP CB534A | User Manual - Page 217
published environmental specifications for the device product or (c) exhibit wear from ordinary use. To obtain warranty service, please return the product to place of purchase (with a written description of the problem and print samples) or contact HP customer support. At HP's option, HP will either - HP CB534A | User Manual - Page 218
Care Online Services For 24-hour access to updated HP device-specific software, product information, and support information through an Internet connection, go to the Web site: www.hp.com/support/ljm1522. HP Instant Support Professional Edition (ISPE) is a suite of Web-based troubleshooting tools - HP CB534A | User Manual - Page 219
and HP subscription service for driver updates. Go to www.hp.com/go/mac-connect for products that are designed specifically for the Macintosh user. HP maintenance agreements HP has several types of maintenance agreements that meet a wide range of support needs. Maintenance agreements are not part of - HP CB534A | User Manual - Page 220
208 Appendix B Service and support ENWW - HP CB534A | User Manual - Page 221
C Specifications This section contains the following information about the product: ● Physical specifications ● Electrical specifications ● Power consumption ● Environmental specifications ● Acoustic emissions ENWW 209 - HP CB534A | User Manual - Page 222
Product Height Depth HP LaserJet M1522n 402 mm (15.8 inches) 406 mm (16 inches) HP LaserJet M1522nf 402 mm (15.8 inches) 406 mm (16 inches) Width Weight 496 mm (19.5 inches) 11 kg (24.2 lb) 496 mm (19.5 inches) 11 kg (24.2 lb) Electrical specifications CAUTION: Power requirements - HP CB534A | User Manual - Page 223
Declared per ISO 92961 Printing (23 ppm) LpAm = 52 dB(A) Ready Inaudible 1 Values are based on preliminary data. See www.hp.com/support/ljm1522 for current information. 2 Configuration tested: HP LaserJet M1522nf printing simplex using A4 paper at 23 ppm. ENWW Environmental specifications 211 - HP CB534A | User Manual - Page 224
212 Appendix C Specifications ENWW - HP CB534A | User Manual - Page 225
D Regulatory information This section contains the following regulatory information: ● FCC compliance ● Environmental product stewardship program ● Telephone Consumer Protection Act (United States) ● IC CS-03 requirements ● EU statement for telecom operation ● New Zealand telecom statements ● - HP CB534A | User Manual - Page 226
may request you remove the equipment from the network until the problem is resolved. The following repairs can be done by the customer: Replace any original equipment that came with the device. This includes the print cartridge, the supports for trays and bins, the power cord, and the telephone cord - HP CB534A | User Manual - Page 227
product see the Product Data Sheet or Specifications Sheet. Qualified products are also listed at: www.hp.com/go/energystar Toner consumption EconoMode uses less toner, which might extend the life of the print cartridge. Paper use This device's manual duplex feature (two-sided printing) and N-up - HP CB534A | User Manual - Page 228
The enclosed label in the HP LaserJet toner cartridge box is for the return and recycling of one or more HP LaserJet print cartridges after use. Please follow the applicable instructions below. Multiple returns (two to eight cartridges) 1. Package each HP LaserJet print cartridge in its original box - HP CB534A | User Manual - Page 229
HP LaserJet M1522 Type Weight Location User-removable Carbon monofluoride lithium 0.8 g On formatter board No For recycling information, you can go to www.hp your household waste disposal service or the shop where toner) can be obtained by contacting the HP Web site at www.hp.com/go/msds or www.hp - HP CB534A | User Manual - Page 230
obtain information about these environmental topics: ● Product environmental profile sheet for this and many related HP products ● HP's commitment to the environment ● HP's environmental management system ● HP's end-of-life product return and recycling program ● Material Safety Data Sheets Visit www - HP CB534A | User Manual - Page 231
an acceptable method of connection. The customer should be aware that compliance with the above conditions may not prevent degradation of service in some situations. Repairs to certified equipment should be coordinated by a representative designated by the supplier. Any repairs or alterations made - HP CB534A | User Manual - Page 232
its connection to the PSTN. Please follow the instructions provided in the user manual. If you experience network compatibility issues, please does it imply that any product is compatible with all of Telecom's network services. This equipment may not provide for the effective hand-over of a call - HP CB534A | User Manual - Page 233
HP LaserJet M1522n Regulatory Model Number2) Product Options: Print Cartridge: BOISB-0604-01 ALL CB436A conforms to the following Product Specifications accordingly. This Device complies with Part 15 of the FCC Rules. Operation Local Hewlett-Packard Sales and Service Office or Hewlett-Packard - HP CB534A | User Manual - Page 234
HP LaserJet M1522nf Regulatory Model Number2) Product Options: Print Cartridge: BOISB-0604-02 ALL CB436A conforms to the following Product Specifications accordingly. This Device complies with Part 15 of the FCC Rules. Your Local Hewlett-Packard Sales and Service Office or Hewlett-Packard GmbH, - HP CB534A | User Manual - Page 235
Class 1" laser product under the U.S. Department of Health and Human Services (DHHS) Radiation Performance Standard according to the Radiation Control for , or performing procedures other than those specified in this user guide may result in exposure to hazardous radiation. Canadian DOC regulations - HP CB534A | User Manual - Page 236
sätt än i bruksanvisning specificerats, kan användaren utsättas för osynlig laserstrålning, som överskrider gränsen för laserklass 1. HUOLTO HP LaserJet M1522n, M1522nf - kirjoittimen sisällä ei ole käyttäjän huollettavissa olevia kohteita. Laitteen saa avata ja huoltaa ainoastaan sen huoltamiseen - HP CB534A | User Manual - Page 237
Substances table (China) ENWW Safety statements 225 - HP CB534A | User Manual - Page 238
226 Appendix D Regulatory information ENWW - HP CB534A | User Manual - Page 239
appear separate from each other. dedicated line A single telephone line that is used exclusively for either voice calls or fax calls. distinctive ring A service offered by some telephone companies in some countries/regions that allows two or three phone numbers to be set up on the same telephone - HP CB534A | User Manual - Page 240
troubleshooting tools, embedded Web server, and product documentation. HP ToolboxFX does not support Macintosh operating systems. ISDN Integrated Services printer driver A printer driver is a program that software programs use to gain access to a product's features. A printer driver either manual or - HP CB534A | User Manual - Page 241
USB Universal serial bus (USB) is a standard that was developed by the USB Implementers Forum, Inc., to connect computers and peripherals. USB is designed to concurrently connect a single computer USB port to multiple peripherals. watermarks A watermark adds background text to a document that is - HP CB534A | User Manual - Page 242
230 Glossary ENWW - HP CB534A | User Manual - Page 243
jobs 83 cartridge-door release, locating 4 cartridges HP fraud hotline 154 part numbers 202 recycling 154, 215 replacing 155 reusing 155 status, checking 153 status, viewing with HP ToolboxFX 142 storing 154 warranty 205 cartridges, print Macintosh status 34 characters, troubleshooting 181 cleaning - HP CB534A | User Manual - Page 244
tab, HP ToolboxFX 146 dots per inch (dpi) fax 103, 104 specifications 3 dots, troubleshooting 179 double-sided printing 34 dpi (dots per inch) fax 103, 104 faxing 15 scanning 84 specifications 3 drivers Macintosh settings 32 Macintosh, troubleshooting 196 operating systems supported 7 presets - HP CB534A | User Manual - Page 245
, troubleshooting 180 grayscale scanning 85 group-dial entries creating 98 deleting 98 editing 98 sending faxes to 119 H Help tab, HP ToolboxFX 146 HP Customer Care 206 HP fraud hotline 154 HP Instant Support Professional Edition (ISPE) 206 HP LaserJet Scan (Windows) 80 HP SupportPack 207 HP - HP CB534A | User Manual - Page 246
35 scanning to file 35 support 207 supported operating systems 6, 28 USB card, troubleshooting 197 Macintosh Configure Device 30 Macintosh driver settings custom-size paper 32 Services tab 34 watermarks 33 maintenance agreements 207 manual dialing 116 manual redial 118 material restrictions 216 - HP CB534A | User Manual - Page 247
type, changing 73 type, selecting 58 wrinkled 182 paper input trays feeding problems, troubleshooting 184 part numbers cables 202 supplies 202 password protection 99 pauses, inserting 96 PCL drivers operating systems supported 7 peer-to-peer printing disclaimer 38 phone book, fax adding entries 119 - HP CB534A | User Manual - Page 248
changing settings 55 print job canceling 54 print media supported 47 print quality HP ToolboxFX settings 148 troubleshooting 179, 192 Print Settings tab, HP ToolboxFX 149 printer drivers Macintosh, troubleshooting 196 specifications 3 printing configuration page 140 connect to a network 40 demo - HP CB534A | User Manual - Page 249
scanning 84 specifications 3 HP ToolboxFX 146 manual dialing 116 speed dial 119 troubleshooting 133 serial number, locating 5 service critical error messages 168 HP ToolboxFX settings 149 HP-Authorized Dealers 206 part numbers 202 repacking device 207 service agreements 207 Service menu 19 Services - HP CB534A | User Manual - Page 250
196 spots, troubleshooting 179 status alerts, HP ToolboxFX 142 fax job 11 Macintosh services tab 34 supplies, checking 153 viewing with HP ToolboxFX 142 Status tab, HP ToolboxFX 142 storing environmental specifications 211 print cartridges 154 streaks, troubleshooting 180 supplies HP fraud hotline - HP CB534A | User Manual - Page 251
driver settings booklets 55 Word, faxing from 122 wrinkles, troubleshooting 182 W warning messages 164 warranty Customer self repair 204 extended 207 print cartridge 205 product 203 transfer unit and fuser 205 watermarks 33, 59 wavy paper, troubleshooting 181 Web sites customer support 206 HP - HP CB534A | User Manual - Page 252
240 Index ENWW - HP CB534A | User Manual - Page 253
- HP CB534A | User Manual - Page 254
© 2007 Hewlett-Packard Development Company, L.P. www.hp.com *CB534-90946* *CB534-90946* CB534-90946
-
 1
1 -
 2
2 -
 3
3 -
 4
4 -
 5
5 -
 6
6 -
 7
7 -
8
-
9
-
10
-
11
-
12
-
13
-
14
-
15
-
16
-
17
-
18
-
19
-
20
-
21
-
22
-
23
-
24
-
25
-
26
-
27
-
28
-
29
-
30
-
31
-
32
-
33
-
34
-
35
-
36
-
37
-
38
-
39
-
40
-
41
-
42
-
43
-
44
-
45
-
46
-
47
-
48
-
49
-
50
-
51
-
52
-
53
-
54
-
55
-
56
-
57
-
58
-
59
-
60
-
61
-
62
-
63
-
64
-
65
-
66
-
67
-
68
-
69
-
70
-
71
-
72
-
73
-
74
-
75
-
76
-
77
-
78
-
79
-
80
-
81
-
82
-
83
-
84
-
85
-
86
-
87
-
88
-
89
-
90
-
91
-
92
-
93
-
94
-
95
-
96
-
97
-
98
-
99
-
100
-
101
-
102
-
103
-
104
-
105
-
106
-
107
-
108
-
109
-
110
-
111
-
112
-
113
-
114
-
115
-
116
-
117
-
118
-
119
-
120
-
121
-
122
-
123
-
124
-
125
-
126
-
127
-
128
-
129
-
130
-
131
-
132
-
133
-
134
-
135
-
136
-
137
-
138
-
139
-
140
-
141
-
142
-
143
-
144
-
145
-
146
-
147
-
148
-
149
-
150
-
151
-
152
-
153
-
154
-
155
-
156
-
157
-
158
-
159
-
160
-
161
-
162
-
163
-
164
-
165
-
166
-
167
-
168
-
169
-
170
-
171
-
172
-
173
-
174
-
175
-
176
-
177
-
178
-
179
-
180
-
181
-
182
-
183
-
184
-
185
-
186
-
187
-
188
-
189
-
190
-
191
-
192
-
193
-
194
-
195
-
196
-
197
-
198
-
199
-
200
-
201
-
202
-
203
-
204
-
205
-
206
-
207
-
208
-
209
-
210
-
211
-
212
-
213
-
214
-
215
-
216
-
217
-
218
-
219
-
220
-
221
-
222
-
223
-
224
-
225
-
226
-
227
-
228
-
229
-
230
-
231
-
232
-
233
-
234
-
235
-
236
-
237
-
238
-
239
-
240
-
241
-
242
-
243
-
244
-
245
-
246
-
247
-
248
-
249
-
250
-
251
-
252
-
253
-
254
 |
 |

HP LaserJet M1522 MFP Series
User Guide