HP CM8000 HP CM8060/CM8050 Color MFP with Edgeline Technology - User Guide - Page 47
Edit the phone book, Add names to the phone book - icon
 |
View all HP CM8000 manuals
Add to My Manuals
Save this manual to your list of manuals |
Page 47 highlights
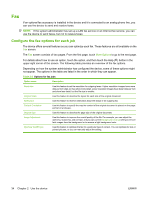
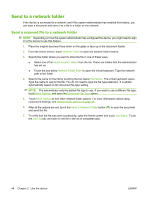
6. In the Phone Book dialog box, select the name for each fax recipient and click To to add the recipient to the Fax Recipients field. 7. After you have added all of the fax recipients to the Fax Recipients field, click OK. 8. Under Include With Fax in the Send Fax dialog box, clear Cover Page (Single recipient only) if it is selected. 9. If the billing code feature is enabled, type the billing code under Billing Information in the Send Fax dialog box. You can change the billing code for any individual fax job. 10. To send the fax to all recipients with the default settings, click Send. NOTE: Click the Setup tab in the Send Fax dialog box to view the sender, fax quality, notification information, and preview settings. This information can be changed for any individual fax job. Click Send to send the fax. 11. If you selected Show Preview Before Sending Fax on the Setup tab, a preview of the fax job appears. Review the fax for accuracy. NOTE: The preview function is not available when you use Point and Print. Point and Print is a Windows feature that you can use to connect, print, or fax to a remote printer without using installation disks. Files and configuration information are automatically downloaded from the print server to the client. 12. Click View or use the zoom drop-down menu to change the size of the document preview. 13. Click the arrow buttons to navigate through the document. 14. Click Send Fax to send the fax or Cancel Fax to edit the fax settings. Edit the phone book Use the phone book to store contact information that appears under Fax To in the Send Fax dialog box. You can add or remove names. The Send Fax phone book is saved as an XML file in the My Documents folder. HP does not recommend editing or copying this file. Add names to the phone book To add names to the phone book, do the following: 1. Under Fax To in the Send Fax dialog box, click the book icon. 2. In the Phone Book dialog box, click Add. 3. In the Add to Phone Book dialog box, type the recipient name, fax number, and company name in the text boxes. 4. Click OK. 5. In the Phone Book dialog box, click Add to add names. 6. Click OK when you are finished adding names to the phone book. ENWW Fax 39
-
 1
1 -
2
-
3
-
4
-
5
-
6
-
7
-
8
-
9
-
10
-
11
-
12
-
13
-
14
-
15
-
16
-
17
-
18
-
19
-
20
-
21
-
22
-
23
-
24
-
25
-
26
-
27
-
28
-
29
-
30
-
31
-
32
-
33
-
34
-
35
-
36
-
37
-
38
-
39
-
40
-
41
-
 42
42 -
 43
43 -
 44
44 -
 45
45 -
 46
46 -
 47
47 -
 48
48 -
 49
49 -
 50
50 -
 51
51 -
 52
52 -
53
-
54
-
55
-
56
-
57
-
58
-
59
-
60
-
61
-
62
-
63
-
64
-
65
-
66
-
67
-
68
-
69
-
70
-
71
-
72
-
73
-
74
-
75
-
76
-
77
-
78
-
79
-
80
-
81
-
82
-
83
-
84
-
85
-
86
-
87
-
88
-
89
-
90
-
91
-
92
-
93
-
94
-
95
-
96
-
97
-
98
-
99
-
100
-
101
-
102
-
103
-
104
 |
 |