HP CQ1859e CQ1859, CQ1859e, and CQ1859s LCD Monitors User Guide
HP CQ1859e - Widescreen LCD Monitor Manual
 |
View all HP CQ1859e manuals
Add to My Manuals
Save this manual to your list of manuals |
HP CQ1859e manual content summary:
- HP CQ1859e | CQ1859, CQ1859e, and CQ1859s LCD Monitors User Guide - Page 1
CQ1859, CQ1859e, and CQ1859s LCD Monitors User Guide - HP CQ1859e | CQ1859, CQ1859e, and CQ1859s LCD Monitors User Guide - Page 2
© 2009 Hewlett-Packard Development Company, L.P. Microsoft, Windows, and Windows Vista are either trademarks or registered trademarks of Microsoft Corporation in the United States and/or other countries. All other product names mentioned herein may be trademarks of their respective companies. - HP CQ1859e | CQ1859, CQ1859e, and CQ1859s LCD Monitors User Guide - Page 3
About This Guide This guide provides information on setting up the monitor, installing drivers, using the on-screen display menu, troubleshooting and technical specifications. WARNING! Text set off in this manner indicates that failure to follow directions could result in bodily harm or loss of life - HP CQ1859e | CQ1859, CQ1859e, and CQ1859s LCD Monitors User Guide - Page 4
iv About This Guide ENWW - HP CQ1859e | CQ1859, CQ1859e, and CQ1859s LCD Monitors User Guide - Page 5
contents 1 Product Features CQ1859, CQ1859e, and CQ1859s LCD Monitors 1 2 Safety and Maintenance Guidelines Important Safety Information ...2 Maintenance Guidelines ...3 Cleaning the Monitor ...3 Shipping the Monitor ...3 3 Setting Up the Monitor Installing the Monitor Stand ...4 Rear Components - HP CQ1859e | CQ1859, CQ1859e, and CQ1859s LCD Monitors User Guide - Page 6
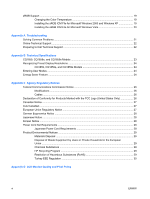
20 Appendix A Troubleshooting Solving Common Problems ...21 Online Technical Support ...22 Preparing to Call Technical Support 22 Appendix B Technical Specifications CQ1859, CQ1859e, and CQ1859s Models 23 Recognizing Preset Display Resolutions 24 CQ1859, CQ1859e, and CQ1859s Models 24 Entering - HP CQ1859e | CQ1859, CQ1859e, and CQ1859s LCD Monitors User Guide - Page 7
CQ1859, CQ1859e, and CQ1859s LCD Monitors The LCD (liquid crystal display) monitors have an active matrix, thin-film transistor (TFT) panel. The monitor features include: ● 47 cm (18.5-inch) diagonal viewable area display with 1366 × 768 resolution, plus full-screen support for lower resolutions - HP CQ1859e | CQ1859, CQ1859e, and CQ1859s LCD Monitors User Guide - Page 8
electrical and mechanical safety information. This guide is located on the Web at http://www.hp.com/ergo and/or on the documentation CD, if one is included with the monitor. CAUTION: For the protection of the monitor, as well as the computer, connect all power cords for the computer and its - HP CQ1859e | CQ1859, CQ1859e, and CQ1859s LCD Monitors User Guide - Page 9
controls that are covered in the operating instructions. If the monitor is not operating properly or has been dropped or damaged, contact an authorized HP dealer, reseller, or service provider. ● Use only a power source and connection appropriate for this monitor, as indicated on the label/ back - HP CQ1859e | CQ1859, CQ1859e, and CQ1859s LCD Monitors User Guide - Page 10
3 Setting Up the Monitor To set up the monitor, ensure that the power is turned off to the monitor, computer system, and other attached devices, then follow the instructions below. Installing the Monitor Stand CAUTION: Do not touch the surface of the LCD panel. Pressure on the panel may cause - HP CQ1859e | CQ1859, CQ1859e, and CQ1859s LCD Monitors User Guide - Page 11
(1) then snap the latches on the stand into the latch holes on the monitor (2). Figure 3-2 Installing the Monitor Stand Rear Components Figure 3-3 Rear Components Component 1 AC Power Connector 2 Audio 3 VGA Function Connects the AC power cord to the monitor. Connects the audio cable to the - HP CQ1859e | CQ1859, CQ1859e, and CQ1859s LCD Monitors User Guide - Page 12
the opening on the monitor's stand, if desired. 2. Connect one end of the VGA signal cable to the VGA connector on the monitor and connect the other panel of the computer. 4. Connect one end of the power cable to the AC power connector on the monitor and connect the other end of the cable to an - HP CQ1859e | CQ1859, CQ1859e, and CQ1859s LCD Monitors User Guide - Page 13
all LCD screens. Monitors with a "burned-in image" are not covered under the HP warranty. * A prolonged period of time is 12 consecutive hours of non-use. NOTE: You can disable the power LED in the OSD menu. Press the Menu button on the side of the monitor, then select Management > Bezel Power LED - HP CQ1859e | CQ1859, CQ1859e, and CQ1859s LCD Monitors User Guide - Page 14
provide the spare part number, product number, and serial number. You may need these numbers when contacting HP about the monitor model. The rating labels are located on the rear panel of the monitor display head. Figure 3-6 Locating the Rating Labels Installing a Cable Lock You can secure the - HP CQ1859e | CQ1859, CQ1859e, and CQ1859s LCD Monitors User Guide - Page 15
Image Color Matching) file ● auto-adjustment pattern utility ● additional software for the monitor model NOTE: If the monitor does not include a CD, the .INF and .ICM files can be downloaded from the HP monitors support Web site. See Downloading from the Worldwide Web on page 10 in this chapter. The - HP CQ1859e | CQ1859, CQ1859e, and CQ1859s LCD Monitors User Guide - Page 16
Readme file. 3. Select Install Monitor Driver Software. 4. Follow the on-screen instructions. 5. Ensure that the proper resolution and refresh rates appear in the Windows Display control panel. NOTE: You may need to install the digitally signed monitor .INF and .ICM files manually from the CD in the - HP CQ1859e | CQ1859, CQ1859e, and CQ1859s LCD Monitors User Guide - Page 17
You can optimize the screen performance for the VGA (analog) input by using the Auto/OK button on the monitor and the auto- button on the monitor side panel. ● You can also press the Menu button, then select Image Control > Auto-Adjustment from the OSD Main Menu. Refer to Adjusting the Monitor - HP CQ1859e | CQ1859, CQ1859e, and CQ1859s LCD Monitors User Guide - Page 18
Side Panel Controls Table 4-1 Monitor Side Panel Controls Control 1 Auto/OK 2 Quick View/Plus 3 Volume/Minus 4 Menu 5 Power LED 6 Power Function If the OSD menu is inactive, press to activate the auto adjustment feature to optimize the screen image. If the OSD menu is on, press to - HP CQ1859e | CQ1859, CQ1859e, and CQ1859s LCD Monitors User Guide - Page 19
Use the On-Screen Display (OSD) to adjust the screen image based on your viewing preferences. To access the OSD, do the following: 1. If the monitor is not already on, press the Power button to turn on the monitor. 2. To access the OSD Menu, press the Menu button on the monitor's side panel. 3. To - HP CQ1859e | CQ1859, CQ1859e, and CQ1859s LCD Monitors User Guide - Page 20
the previous menu level. ● Save and Return-to save all changes and return to the OSD Main Menu screen. This Save and Return option is only active if you change a menu item. Table 4-2 OSD Menu Icon Main Menu Submenu Description Brightness Adjustable scale Adjusts the brightness level of the - HP CQ1859e | CQ1859, CQ1859e, and CQ1859s LCD Monitors User Guide - Page 21
is 30 seconds. Selects the OSD and power management features of the monitor. Power Saver Enables the power saving feature. Select: ● On ● Off The factory default is On. Power On Recall Restores power to the monitor following an unexpected removal of power. Select: ● On ● Off The factory - HP CQ1859e | CQ1859, CQ1859e, and CQ1859s LCD Monitors User Guide - Page 22
) Icon Main Menu Submenu Mode Display Monitor Status DDC/CI Support Bezel Power LED Volume Sleep Timer Language Information Current Settings Description Displays the resolution, refresh rate and frequency information on the screen each time the OSD Main Menu is accessed. Select: ● On - HP CQ1859e | CQ1859, CQ1859e, and CQ1859s LCD Monitors User Guide - Page 23
Settings Serial Number FW Version Backlight Hours Service Support Description Provides the recommended resolution mode and refresh rate for the monitor. Reports the serial number of the monitor. The serial number is needed if contacting HP technical support. Reports the firmware version of the - HP CQ1859e | CQ1859, CQ1859e, and CQ1859s LCD Monitors User Guide - Page 24
failure or loss of power to the monitor will cause the timer to reset to 00:00. If this occurs, you will need to reset the sleep timer mode. 5. Press the OK button once to enter the adjustment mode for hours. 6. Press the - (Minus) or + (Plus) button to adjust the hour. 18 Chapter 4 Operating the - HP CQ1859e | CQ1859, CQ1859e, and CQ1859s LCD Monitors User Guide - Page 25
the next On Time activates or a monitor button is pressed. sRGB Support The monitor is designed to support sRGB for color management, which adapts the Color Temperature 1. Press the Menu button on the side panel of the monitor to launch the Main Menu of the OSD. 2. Select Color. 3. Select sRGB. - HP CQ1859e | CQ1859, CQ1859e, and CQ1859s LCD Monitors User Guide - Page 26
tab, then click the Change System Defaults button. 7. On the Devices tab, click theAdd button. 8. Select the RGB Color Space Profile.icm file, then click the OK button. 9. To activate a color profile for the monitor, you must set it as the Default Monitor Profile. Select sRGB Color Space Profile - HP CQ1859e | CQ1859, CQ1859e, and CQ1859s LCD Monitors User Guide - Page 27
A Troubleshooting Solving Common Problems The following table lists possible problems, the possible cause of each problem, and the recommended solutions. Problem Possible Cause Solution Screen is blank. Power cord is disconnected. Connect the power cord. Power button on side panel of Press - HP CQ1859e | CQ1859, CQ1859e, and CQ1859s LCD Monitors User Guide - Page 28
, online assistance, community forums of IT experts, broad mutlivendor knowledge base, monitoring and diagnostic tools, go to http://www.hp.com/support Preparing to Call Technical Support If you cannot solve a problem using the troubleshooting tips in this section, you may need to call technical - HP CQ1859e | CQ1859, CQ1859e, and CQ1859s LCD Monitors User Guide - Page 29
all HP's component manufacturers' typical level specifications for performance and actual performance may vary either higher or lower. CQ1859, CQ1859e, and CQ1859s Models Table B-1 Specifications Display 47 cm wide screen Type Viewable Image Size Speakers Tilt Maximum Weight (Unpacked) TFT LCD - HP CQ1859e | CQ1859, CQ1859e, and CQ1859s LCD Monitors User Guide - Page 30
signal and/or the vertical sync signal. Upon detecting the absence of these signals, the monitor screen is blanked, the backlight is turned off, and the power light is turned amber. When the monitor is in the reduced power state, the monitor will utilize 24 Appendix B Technical Specifications ENWW - HP CQ1859e | CQ1859, CQ1859e, and CQ1859s LCD Monitors User Guide - Page 31
. There is a brief warm up period before the monitor will return to its normal operating mode. Refer to the computer manual for instructions on setting energy saver features (sometimes called power management features). NOTE: The above power saver feature only works when connected to computers that - HP CQ1859e | CQ1859, CQ1859e, and CQ1859s LCD Monitors User Guide - Page 32
. This equipment generates, uses, and can radiate radio frequency energy and, if not installed and used in accordance with the instructions, may cause harmful interference to radio communications. However, there is no guarantee that interference will not occur in a particular installation - HP CQ1859e | CQ1859, CQ1859e, and CQ1859s LCD Monitors User Guide - Page 33
Box 692000, Mail Stop 530113 Houston, Texas 77269-2000 Or, call 1-800-HP-INVENT (1-800 474-6836) For questions regarding this FCC declaration, contact: Hewlett Norms) which are listed on the EU Declaration of Conformity issued by Hewlett-Packard for this product or product family. This compliance - HP CQ1859e | CQ1859, CQ1859e, and CQ1859s LCD Monitors User Guide - Page 34
of the wire must be a minimum of 0.75 mm² or 18 AWG, and the length of the cord must be between 6 feet (1.8 m) and 12 feet (3.6 m). If you have questions about the type of power cord to use, contact an authorized HP service provider. A power cord should be routed so that it is not likely to - HP CQ1859e | CQ1859, CQ1859e, and CQ1859s LCD Monitors User Guide - Page 35
HP product contains mercury in the fluorescent lamp in the display LCD that waste disposal service or the shop where you purchased the product. Chemical Substances HP is committed hp.com/ recycle. Restriction of Hazardous Substances (RoHS) A Japanese regulatory requirement, defined by specification - HP CQ1859e | CQ1859, CQ1859e, and CQ1859s LCD Monitors User Guide - Page 36
11363-2006 11363-2006 Turkey EEE Regulation In Conformity with the EEE Regulation EEE Yönetmeliğine Uygundur 30 Appendix C Agency Regulatory Notices ENWW - HP CQ1859e | CQ1859, CQ1859e, and CQ1859s LCD Monitors User Guide - Page 37
D LCD Monitor Quality and Pixel Policy The TFT monitor uses high-precision technology, manufactured according to HP standards, to guarantee trouble-free performance. Nevertheless, the display may have cosmetic imperfections that appear as small bright or dark spots. This is common to all LCD
-
 1
1 -
 2
2 -
 3
3 -
 4
4 -
 5
5 -
 6
6 -
 7
7 -
8
-
9
-
10
-
11
-
12
-
13
-
14
-
15
-
16
-
17
-
18
-
19
-
20
-
21
-
22
-
23
-
24
-
25
-
26
-
27
-
28
-
29
-
30
-
31
-
32
-
33
-
34
-
35
-
36
-
37
 |
 |

CQ1859, CQ1859e, and CQ1859s LCD
Monitors
User Guide