HP Color LaserJet CM4730 HP Color LaserJet CM4730 MFP - Job Aid - Scan/Email - Page 1
HP Color LaserJet CM4730 - Multifunction Printer Manual
 |
View all HP Color LaserJet CM4730 manuals
Add to My Manuals
Save this manual to your list of manuals |
Page 1 highlights
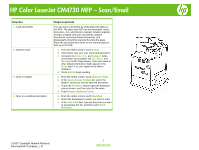
HP Color LaserJet CM4730 MFP - Scan/Email How do I 1 Load documents 2 Send to email 3 Scan to a folder 4 Scan to a workflow destination Steps to perform You can scan a document by using either the glass or the ADF. The glass and ADF can accommodate Letter-, Executive-, A4-, and A5-size originals. Smaller originals, receipts, irregular and worn documents, stapled documents, previously folded documents, and photographs should be scanned by using the glass. Place the document face-down on the scanner glass or face-up in the ADF. a. From the Home screen, touch E-mail. b. If prompted, type your user name and password. c. Complete the From:, To:, and Subject: fields. Scroll down and complete the CC:, BCC:, and Message fields if appropriate. Your user name or other default information might appear in the From: field. If so, you might not be able to change it. d. Press Start to begin sending. a. From the Home screen, touch Network Folder. b. In the Quick Access Folders list, select the folder in which you want to save the document. c. Touch the File Name field to open the keyboard pop-up screen, and then type the file name. d. Touch Send to Network Folder. a. From the Home screen, touch Workflow. b. Select the destination to which you want to scan. c. In the Text Field field, type the data that you want to accompany the file, and then touch Send Workflow. ©2007 Copyright Hewlett-Packard Development Company, L.P. 1 www.hp.com
-
 1
1
 |
 |