HP Dc7600 Troubleshooting Guide
HP Dc7600 - Compaq Business Desktop Manual
 |
View all HP Dc7600 manuals
Add to My Manuals
Save this manual to your list of manuals |
HP Dc7600 manual content summary:
- HP Dc7600 | Troubleshooting Guide - Page 1
Troubleshooting Guide Business PCs Document Part Number: 384569-001 May 2005 This guide provides helpful hints and solutions for troubleshooting the above products as well as scenarios for possible hardware and software problems. - HP Dc7600 | Troubleshooting Guide - Page 2
© Copyright 2005 Hewlett-Packard Development Company, L.P. The information contained herein is subject to change without notice. Microsoft, MS-DOS, and Windows are trademarks of Microsoft Corporation in the U.S. and other countries. The only warranties for HP products and services are set forth in - HP Dc7600 | Troubleshooting Guide - Page 3
MultiBay Problems 2-17 Solving Display Problems 2-18 Solving Audio Problems 2-23 Solving Printer Problems 2-26 Solving Keyboard and Mouse Problems 2-27 Solving Hardware Installation Problems 2-30 Solving Network Problems 2-33 Solving Memory Problems 2-37 Troubleshooting Guide www.hp.com - HP Dc7600 | Troubleshooting Guide - Page 4
12 B Password Security and Resetting CMOS Resetting the Password Jumper B-2 Clearing and Resetting the CMOS B-3 Using the CMOS Button B-3 Using Computer Setup to Reset CMOS B-5 C Drive Protection System (DPS) Accessing DPS Through Computer Setup C-2 Index iv www.hp.com Troubleshooting Guide - HP Dc7600 | Troubleshooting Guide - Page 5
The Survey tab is displayed when you invoke HP Insight Diagnostics. This tab shows the current configuration of the computer. From the Survey tab placing a call to the Customer Support Center. ✎ Third party devices may not be detected by HP Insight Diagnostics. Troubleshooting Guide www.hp.com 1-1 - HP Dc7600 | Troubleshooting Guide - Page 6
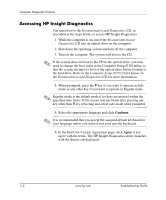
drive. Refer to the Computer Setup (F10) Utility Guide on the Documentation and specific keyboard. 6. In the End User License Agreement page, click Agree if you agree with the terms. The HP Insight Diagnostics utility launches with the Survey tab displayed. 1-2 www.hp.com Troubleshooting Guide - HP Dc7600 | Troubleshooting Guide - Page 7
information about storage media connected to the computer. This list includes all fixed disks, diskette drives, and optical drives. System-Shows information about the system board, processor, chassis, and BIOS, plus internal speaker and PCI bus information. Troubleshooting Guide www.hp.com 1-3 - HP Dc7600 | Troubleshooting Guide - Page 8
Computer Unattended Mode-Does not display prompts and requires no interaction. If errors are found, they are displayed when testing is testing of a system. The Custom Test mode allows you to specifically select which devices, tests, and test parameters are run. To begin hp.com Troubleshooting Guide - HP Dc7600 | Troubleshooting Guide - Page 9
Cancel Testing button is displayed for use if you want to cancel the test. After testing has completed, the Cancel Testing button is replaced with a Retest button. The overall elapsed time ■ The individual elapsed test times ■ The condition status of each test Troubleshooting Guide www.hp.com 1-5 - HP Dc7600 | Troubleshooting Guide - Page 10
code and recommended actions for each code. To find an error code description quickly, enter the code in the box at the top of the window and click the Find Error Codes button. The Test Components view displays low-level information on tests that are run. 1-6 www.hp.com Troubleshooting Guide - HP Dc7600 | Troubleshooting Guide - Page 11
the Support & Drivers link. 3. Click the Download driver and software radio button. 4. Enter your product number (for example, dc7600) in the text box and press the Enter key. 5. Select your OS. 6. Click the Diagnostic link. 7. Locate HP Insight Diagnostics and click Download. Troubleshooting Guide - HP Dc7600 | Troubleshooting Guide - Page 12
Windows operating system and software can be restored to the original state that they were when you purchased the computer by using the Restore Plus! CD. See the documentation included with the Restore Plus! CD for complete instructions on using this feature. 1-8 www.hp.com Troubleshooting Guide - HP Dc7600 | Troubleshooting Guide - Page 13
audio, memory, and software problems. If you encounter problems with the computer, refer to the tables in this chapter for probable causes and recommended solutions. ✎ For information on specific error Information on the Documentation and Diagnostics CD. Troubleshooting Guide www.hp.com 2-1 - HP Dc7600 | Troubleshooting Guide - Page 14
Test in Computer Setup. Refer to the Computer Setup (F10) Utility Guide on the Documentation and Diagnostics CD for more information. ■ Check the Power LED on the front of the computer to see if it is flashing red. The flashing lights are error codes that will help you diagnose the problem. Refer to - HP Dc7600 | Troubleshooting Guide - Page 15
call is handled properly: ■ Be in front of your computer when you call. ■ Write down the computer serial number and product ID number, and the monitor serial number before calling. ■ Spend time troubleshooting the problem with the service technician. ■ Remove any hardware that was recently added to - HP Dc7600 | Troubleshooting Guide - Page 16
loss is set in Computer Setup. If it does not restart, press the power button to start the computer. ■ Reconfigure the computer after installing a non-plug and play expansion board or other option. See "Solving Hardware Installation Problems" for instructions. 2-4 www.hp.com Troubleshooting Guide - HP Dc7600 | Troubleshooting Guide - Page 17
in Computer Setup. Ä CAUTION: When the computer is plugged into an AC power source, there is always voltage applied to the system board. You must disconnect the power cord from the power source before opening the computer to prevent system board or component damage. Troubleshooting Guide www.hp - HP Dc7600 | Troubleshooting Guide - Page 18
of the RTC battery. First, reset the date and time under Control Panel (Computer Setup can also be used to update the RTC date and time). If the problem persists, replace the RTC battery. See the Hardware Reference Guide on the Documentation and Diagnostics CD for instructions on installing a new - HP Dc7600 | Troubleshooting Guide - Page 19
installed properly. Transfer data from the hard drive to create more space on the hard drive. Add more memory. Defragment hard drive. Restart the computer. Run virus protection program. 1. Close unnecessary applications to free up memory. 2. Add more memory. Troubleshooting Guide www.hp.com 2-7 - HP Dc7600 | Troubleshooting Guide - Page 20
seated or installed. 3. If fan is plugged in and seated properly, but is not spinning, then replace the processor fan. 4. Reseat processor heatsink and verify that the fan assembly is properly attached. 5. Contact an authorized reseller or service provider. 2-8 www.hp.com Troubleshooting Guide - HP Dc7600 | Troubleshooting Guide - Page 21
Remove the expansion cards one at a time until the 5V_aux light on the system board turns on. 3. Replace the system board. replace the power button harness. 5. If the 5V_aux light on the system board is off, then replace the power supply. 6. Replace the system board. Troubleshooting Guide www.hp - HP Dc7600 | Troubleshooting Guide - Page 22
seated or installed. 3. If fan is plugged in and seated properly, but is not spinning, then replace the processor fan. 4. Reseat processor heatsink and verify that the fan assembly is properly attached. 5. Contact an authorized reseller or service provider. 2-10 www.hp.com Troubleshooting Guide - HP Dc7600 | Troubleshooting Guide - Page 23
until failure occurs. Replace the device that is causing the failure. Continue adding devices one at a time to ensure all devices are functioning properly. 4. Contact an authorized service provider to replace the power supply. 5. Replace the system board. Troubleshooting Guide www.hp.com 2-11 - HP Dc7600 | Troubleshooting Guide - Page 24
. Format the diskette. 1. From Windows Explorer select the disk (A) drive. 2. Right-click the drive letter and select Format. 3. Select the desired options, and click Start to begin formatting the diskette. Use another diskette or remove the write protection. 2-12 www.hp.com Troubleshooting Guide - HP Dc7600 | Troubleshooting Guide - Page 25
, and select a drive. Select File > Properties > Tools. Under Error-checking, click Check Now. Check the type of drive that you are using and use the correct diskette type. Check the drive letter in the path statement. Replace the diskette with a new one. Troubleshooting Guide www.hp.com 2-13 - HP Dc7600 | Troubleshooting Guide - Page 26
Boot function in Computer Setup overrides the Boot Order enable command. Run Computer Setup and disable Network Server Mode in Security > Password Options. Run Computer Setup and enable Removable Media Boot in Storage > Storage Options > Removable Media Boot. 2-14 www.hp.com Troubleshooting Guide - HP Dc7600 | Troubleshooting Guide - Page 27
a driver problem. If it is not listed, the probable cause is a hardware problem. If this is a newly installed drive, enter Computer Setup and try adding a POST delay under Advanced > Power-On. Run Computer Setup and enable all the SATA controllers in Storage > Storage Options. Troubleshooting Guide - HP Dc7600 | Troubleshooting Guide - Page 28
. If FAT32 formatting, the hard drive cannot be accessed. Run Computer Setup and enable the hard drive entry in the Storage > Boot Order list. If attempting to boot from a hard drive, ensure it is attached to the system board connector labeled P60 SATA 0. 2-16 www.hp.com Troubleshooting Guide - HP Dc7600 | Troubleshooting Guide - Page 29
beep codes. See the Worldwide Limited Warranty for terms and conditions. Attempt the normal Windows "Shut Down" procedure. If this fails, press the power button for four or more seconds to turn off the power. To restart the computer, press the power button again. Solving MultiBay Problems Solving - HP Dc7600 | Troubleshooting Guide - Page 30
if set, type your password. System ROM is corrupted; system is running is Boot Block Emergency Recovery Mode (indicated by eight beeps). Reflash the system ROM with the latest BIOS image. See the "Boot Block Emergency Recovery Mode" section of the Desktop Management Guide on the Documentation and - HP Dc7600 | Troubleshooting Guide - Page 31
Display icon and select the Settings tab. 4. Use the sliding control to reset the resolution. 1. Reseat DIMMs. Power on the system. 2. Replace DIMMs one at a time to isolate the faulty module. 3. Replace third-party memory with HP memory. 4. Replace the system board. Troubleshooting Guide www.hp - HP Dc7600 | Troubleshooting Guide - Page 32
. Adjust the monitor brightness and contrast controls. Check that the graphics cable is securely connected to the graphics card and the monitor. Install the video drivers included in the upgrade kit. Change requested resolution. Replace the graphics card. 2-20 www.hp.com Troubleshooting Guide - HP Dc7600 | Troubleshooting Guide - Page 33
the video cable. Restart the computer and enter Safe Mode. Change the settings to a supported setting then restart the computer so that the new settings take effect. None. It is normal for the degaussing coil to be activated when the monitor is powered on. Troubleshooting Guide www.hp.com 2-21 - HP Dc7600 | Troubleshooting Guide - Page 34
-screen display menu. 2. Manually synchronize the Clock and Clock Phase on-screen display functions. To download a SoftPaq that will assist you with the synchronization, go to the following Web site, select the appropriate monitor, and download either SP20930 or SP22333: www.hp.com/support 1. Reseat - HP Dc7600 | Troubleshooting Guide - Page 35
quality slider to Best and retest the audio. Double-click the Speaker icon on the taskbar, then make sure that Mute is not selected and use the volume slider to adjust the volume. Enable the audio in Computer Setup: Security > Device Security > Audio. Troubleshooting Guide www.hp.com 2-23 - HP Dc7600 | Troubleshooting Guide - Page 36
from standby mode. Ä CAUTION: When attempting to resume from standby mode, do not hold down the power button for more than four seconds. Otherwise, the computer will shut down and you will lose any unsaved data. 2-24 www.hp.com Troubleshooting Guide - HP Dc7600 | Troubleshooting Guide - Page 37
audio. The hard disk may be full. Solution Plug the headphones into the headphone connector on the front of the computer. Before recording, make sure there is enough free space on the hard disk. You can also try recording the audio file in a compressed format. Troubleshooting Guide www.hp - HP Dc7600 | Troubleshooting Guide - Page 38
the power cord and electrical outlet. Install the correct printer driver for the application. Reconnect all cables. Reset the printer by turning it off for one minute, then turn it back on. Check the paper tray and refill it if it is empty. Select online. 2-26 www.hp.com Troubleshooting Guide - HP Dc7600 | Troubleshooting Guide - Page 39
table. Solving Keyboard Problems Problem Cause Solution Keyboard commands and typing are not recognized by the computer. Keyboard connector is not properly connected. 1. On the Windows Desktop, click Start. 2. Click Shut Down. The Shut Down Windows dialog box is displayed. 3. Select Shut - HP Dc7600 | Troubleshooting Guide - Page 40
stopped responding to commands. Mouse may need cleaning. Mouse may need repair. Solution Shut down the computer using the keyboard. 1. Press the Ctrl and Esc keys at the same time (or press the Windows logo key) to display the Start menu. 2. Use the up or down arrow key to select Shut Down and then - HP Dc7600 | Troubleshooting Guide - Page 41
Troubleshooting Without Diagnostics Solving Mouse Problems (Continued) Problem Cause Solution Mouse does not respond to movement or is too slow. (continued) Wireless device error. 1. Check the software, if available, for device status. 2. Check/replace device batteries. 3. Reset receiver and - HP Dc7600 | Troubleshooting Guide - Page 42
Troubleshooting Without Diagnostics Solving Hardware Installation Problems You may need to reconfigure the computer when you add or remove hardware, such as an additional drive or expansion card. If you install a plug and play device, Windows XP automatically recognize the device and configure the - HP Dc7600 | Troubleshooting Guide - Page 43
faulty module. 3. Replace third-party memory with HP memory. 4. Replace the system board. Power LED flashes Red six times, once every second, followed by a two second pause, and the computer beeps six times. (Beeps stop after fifth iteration but LEDs continue flashing.) Graphics card is not seated - HP Dc7600 | Troubleshooting Guide - Page 44
flashing.) Bad option card. 1. Check each option card by removing the cards one at time (if multiple cards), then power on the system to see if fault goes away. 2. Once bad card is identified, remove and replace bad option card. 3. Replace the system board. 2-32 www.hp.com Troubleshooting Guide - HP Dc7600 | Troubleshooting Guide - Page 45
. 1. Run Computer Setup and enable network controller. 2. Enable the network controller in the operating system via Device Manager. Check the network controller documentation for the correct driver or obtain the latest driver from the manufacturer's Web site. Troubleshooting Guide www.hp.com 2-33 - HP Dc7600 | Troubleshooting Guide - Page 46
problem with the cable or a device at the other end of the cable. Solution Check cabling and network equipment for proper connection. Check for the device status within Windows, such as Device Manager for driver load and the Network Connections applet within Windows for link status. 1. Run Computer - HP Dc7600 | Troubleshooting Guide - Page 47
menu, change the resource settings for the board. Reinstall the network drivers, using the Restore Plus! CD. Ensure that the cable is securely attached to the network connector and that the other end of the cable is securely attached to the correct device. Troubleshooting Guide www.hp.com 2-35 - HP Dc7600 | Troubleshooting Guide - Page 48
boot sequence to boot from another source. Verify Network Connectivity, that a DHCP Server is present, and that the Remote System Installation Server contains the NIC drivers for your NIC. Contact an authorized service provider. 2-36 www.hp.com Troubleshooting Guide - HP Dc7600 | Troubleshooting Guide - Page 49
Troubleshooting Without Diagnostics Solving Memory Problems If you encounter memory problems, some common causes and solutions are listed in the following table. Ä CAUTION: For those systems that support ECC memory, HP does not support mixing ECC and non-ECC memory. Otherwise, the computer will not - HP Dc7600 | Troubleshooting Guide - Page 50
Troubleshooting Without Diagnostics Solving Memory Problems (Continued) Problem Cause Power LED flashes Red five times, once every second, followed by a two second pause, and the computer beeps five times. (Beeps stop after fifth iteration but LEDs continue flashing.) Memory is installed - HP Dc7600 | Troubleshooting Guide - Page 51
in Storage > Boot Order. See the documentation that came with the optional device. See the documentation that came with the DVD drive. Install decoder software. Replace media. Use DVD software to remove parental lock. Reinstall media. Troubleshooting Guide www.hp.com 2-39 - HP Dc7600 | Troubleshooting Guide - Page 52
-ROM or DVD-ROM drive. 1. Use Device Manager to remove or uninstall the device in question. 2. Restart the computer and let Windows detect the CD or DVD driver. Recording audio CDs is difficult or impossible. Wrong or poor quality media type. 1. Try using a slower speed when recording. 2. Verify - HP Dc7600 | Troubleshooting Guide - Page 53
front of the computer and restart the computer. If the USB device requires AC power, be sure one end is connected to the device and one end is connected to a live outlet. 1. Install the correct driver for the device. 2. You might need to reboot the computer. Troubleshooting Guide www.hp.com 2-41 - HP Dc7600 | Troubleshooting Guide - Page 54
modem. You should see a "power" LED light on the front of the cable/DSL modem. Try connecting to the Internet at a later time or contact your ISP. (If the cable/DSL service is connected, the "cable" LED light on the front of the cable/DSL modem will be on.) 2-42 www.hp.com Troubleshooting Guide - HP Dc7600 | Troubleshooting Guide - Page 55
server can store temporarily with your Web browser. This is useful for having your browser remember some specific information that the Web server can later retrieve.) In Windows XP: 1. Select Start > Control Panel. 2. Double-click Internet Options. 3. On the General tab, click the Delete Cookies - HP Dc7600 | Troubleshooting Guide - Page 56
, then click Properties. 7. Under Device status, verify that the modem is working properly. 8. Under Device usage, verify the modem is enabled. 9. If there are further problems, click the Troubleshoot button and follow the on-screen instructions. 2-44 www.hp.com Troubleshooting Guide - HP Dc7600 | Troubleshooting Guide - Page 57
. Use recovery diskette to scan hard drive for errors. Verify that the software is certified by Microsoft for your version of Windows (see program packaging for this information). If possible, save all data, close all programs, and restart the computer. Troubleshooting Guide www.hp.com 2-45 - HP Dc7600 | Troubleshooting Guide - Page 58
you, visit www.hp.com. ✎ If you take the computer to an authorized reseller, dealer, or service provider for service, remember to provide the setup and power-on passwords if they are set. ✎ Refer to the number listed in the warranty or in the Support Telephone Numbers guide on the Documentation and - HP Dc7600 | Troubleshooting Guide - Page 59
source of the problem, and steps you can take to resolve the error condition. POST Message Disabled suppresses most system messages during POST, such as memory count and non-error text messages. If a POST error occurs, the screen will display the error message. To manually switch to the POST - HP Dc7600 | Troubleshooting Guide - Page 60
and Resetting CMOS.") 5. If the message disappears, there may be a problem with the expansion card. 6. Replace the system board. 1. Clear CMOS. (See Appendix B, "Password Security and Resetting CMOS.") 2. Remove expansion boards. 3. Replace the system board. A-2 www.hp.com Troubleshooting Guide - HP Dc7600 | Troubleshooting Guide - Page 61
configuration memory. RTC (real-time clock) battery may need to be replaced. Reset the date and time under Control Panel (Computer Setup can also be used). If the problem persists, replace the RTC battery. See the Hardware Reference Guide on the Documentation and Diagnostics CD for instructions on - HP Dc7600 | Troubleshooting Guide - Page 62
type. 201-Memory Error RAM failure. 1. Run Computer Setup or Windows utilities. 2. Ensure memory modules are correctly installed. 3. Verify proper memory module type. 4. Remove and replace the identified faulty memory module(s). 5. If the error persists after replacing memory modules, replace the - HP Dc7600 | Troubleshooting Guide - Page 63
CMOS. (See Appendix B, "Password Security and Resetting CMOS.") 3. Reconfigure card resources and/or run Computer Setup. 410-Audio Interrupt IRQ address conflicts Conflict with another device. Enter Computer Setup and reset the IRQ in Advanced > Onboard Devices. Troubleshooting Guide www.hp - HP Dc7600 | Troubleshooting Guide - Page 64
B, "Password Security and Resetting CMOS.") 3. Verify monitor is attached and turned on. 4. Replace the graphics card (if possible). 510-Flash Screen Image Corrupted Flash Screen image has errors. Reflash the system ROM with the latest BIOS image. 511-CPU, CPUA, or CPUB Fan not Detected CPU fan - HP Dc7600 | Troubleshooting Guide - Page 65
Been Removed Since Last System Startup Computer cover was removed since last system startup. No action required. 917-Front Audio Not Connected Front audio harness has been detached or unseated from motherboard. Reconnect or replace front audio harness. Troubleshooting Guide www.hp.com A-7 - HP Dc7600 | Troubleshooting Guide - Page 66
Both external and internal serial ports are assigned to COM2. 1. Remove any serial port expansion cards. 2. Clear CMOS. (See Appendix B, "Password Security and Resetting CMOS.") 3. Reconfigure card resources and/or run Computer Setup or Windows utilities. A-8 www.hp.com Troubleshooting Guide - HP Dc7600 | Troubleshooting Guide - Page 67
to same IRQ. 1. Remove any serial port expansion cards. 2. Clear CMOS. (See Appendix B, "Password Security and Resetting CMOS.") 3. Reconfigure card resources and/or run Computer Setup or Windows utilities. 1201-System Audio Address Conflict Detected Device IRQ address conflicts with another - HP Dc7600 | Troubleshooting Guide - Page 68
SATA 0 and SATA 1. For three devices, use SATA 0, SATA1, and SATA 2. 1801-Microcode Patch Error Processor is not supported by ROM BIOS. 1. Upgrade BIOS to proper version. 2. Change the processor. Invalid Electronic Serial Number Electronic serial number has become corrupted. 1. Run Computer - HP Dc7600 | Troubleshooting Guide - Page 69
, make sure the fan's cable is plugged onto the system board header. Ensure the heatsink is properly seated and installed. 2. If the fan is plugged in and the heatsink is properly seated but the fan does not spin, then replace the heatsink-fan assembly. Troubleshooting Guide www.hp.com A-11 - HP Dc7600 | Troubleshooting Guide - Page 70
Action Green Power LED On. None Computer on. None Green Power LED flashes every two seconds. None Computer in Suspend to RAM mode (some models only) or normal Suspend mode. None required. Press any key or move the mouse to wake the computer. A-12 www.hp.com Troubleshooting Guide - HP Dc7600 | Troubleshooting Guide - Page 71
times, once every second, followed by a two second pause. Beeps stop after fifth iteration but LEDs continue until problem is solved. Processor not installed (not an indicator of bad processor). 1. Check to see that the processor is present. 2. Reseat the processor. Troubleshooting Guide - HP Dc7600 | Troubleshooting Guide - Page 72
iteration but LEDs continue until problem is solved. 5 Pre-video memory 1. Reseat DIMMs. Power on the error. system. 2. Replace DIMMs one at a time to isolate the faulty module. 3. Replace third-party memory with HP memory. 4. Replace the system board. A-14 www.hp.com Troubleshooting Guide - HP Dc7600 | Troubleshooting Guide - Page 73
six times, once every second, followed by a two second pause. Beeps stop after fifth iteration but LEDs continue until problem is solved. 6 Pre-video graphics For systems with a graphics card: error. 1. Reseat the graphics card. Power on the system. 2. Replace the graphics card. 3. Replace the - HP Dc7600 | Troubleshooting Guide - Page 74
10 Bad option card. 1. Check each option card by removing the card (one at a time if multiple cards), then power on the system to see if fault goes away. 2. Once a bad card is identified, remove and replace the bad option card. 3. Replace the system board. A-16 www.hp.com Troubleshooting Guide - HP Dc7600 | Troubleshooting Guide - Page 75
the expansion cards one at a time until the 5V_aux light on the system board turns on. 3. Replace the system board replace the power button harness. 5. If the 5V_aux light on the system board is not turned on, then replace the power supply. 6. Replace the system board. Troubleshooting Guide www.hp - HP Dc7600 | Troubleshooting Guide - Page 76
customized information including passwords, asset numbers, and special settings. It is important to back up the computer CMOS settings before resetting them in case they are needed later. Back up is easily done through Computer Setup. See the Computer Setup (F10) Utility Guide on the Documentation - HP Dc7600 | Troubleshooting Guide - Page 77
. The IPM can be downloaded from www.hp.com/support. 5. Remove the jumper from pins 1 and 2. Place the jumper on either pin 1 or 2, but not both, so that it does not get lost. 6. Replace the computer cover or access panel. 7. Reconnect the external equipment. B-2 www.hp.com Troubleshooting Guide - HP Dc7600 | Troubleshooting Guide - Page 78
8. Establish the new passwords in Computer Setup. Refer to the Computer Setup (F10) Utility Guide on the Documentation and Diagnostics CD for Computer Setup instructions. Clearing and Resetting the CMOS The computer's configuration memory (CMOS) stores password information and information about - HP Dc7600 | Troubleshooting Guide - Page 79
customized information including passwords, asset numbers, and special settings. It is important to back up the computer CMOS settings before resetting them in case they are needed later. Back up is easily done through Computer Setup. See the Computer Setup (F10) Utility Guide on the Documentation - HP Dc7600 | Troubleshooting Guide - Page 80
and time. See the Desktop Management Guide on the Documentation and Diagnostics CD for further instructions on reestablishing passwords. For instructions on Computer Setup, see the Computer Setup (F10) Utility Guide on the Documentation and Diagnostics CD. Using Computer Setup to Reset CMOS To reset - HP Dc7600 | Troubleshooting Guide - Page 81
DPS when you suspect a hard drive problem. If the computer reports a SMART Hard Drive Detect Imminent Failure message, there is no need to run DPS; instead, back up the information on the hard drive and contact a service provider for a replacement hard drive. Troubleshooting Guide www.hp.com C-1 - HP Dc7600 | Troubleshooting Guide - Page 82
0. ■ Test Aborted. Completion Code 1 or 2. ■ Test Failed. Drive Replacement Recommended. Completion Code 3 through 14. If the test failed, the completion code should be recorded and reported to your service provider for help in diagnosing the computer problem. C-2 www.hp.com Troubleshooting Guide - HP Dc7600 | Troubleshooting Guide - Page 83
codes A-12 audio problems 2-23 B battery, replacing 2-6 beep codes A-12 blank screen 2-18 booting options Full Boot A-1 Quick Boot A-1 C CD-ROM or DVD problems 2-39 CMOS backing up B-1 button B-1, B-3 clearing and resetting B-3 Customer Support 2-2, 2-46 D date and time display 2-6 diagnostics - HP Dc7600 | Troubleshooting Guide - Page 84
2-45 processor problems 2-38 Q Quick Boot A-1 R resetting CMOS B-1 password jumper B-1 RTC battery A-3 S security password B-1 setup password B-1 software problems 2-45 protecting 1-8 restoring 1-8 system board, error codes A-2 W Wake-on-LAN feature 2-33 Index-2 www.hp.com Troubleshooting Guide
-
 1
1 -
 2
2 -
 3
3 -
 4
4 -
 5
5 -
 6
6 -
 7
7 -
8
-
9
-
10
-
11
-
12
-
13
-
14
-
15
-
16
-
17
-
18
-
19
-
20
-
21
-
22
-
23
-
24
-
25
-
26
-
27
-
28
-
29
-
30
-
31
-
32
-
33
-
34
-
35
-
36
-
37
-
38
-
39
-
40
-
41
-
42
-
43
-
44
-
45
-
46
-
47
-
48
-
49
-
50
-
51
-
52
-
53
-
54
-
55
-
56
-
57
-
58
-
59
-
60
-
61
-
62
-
63
-
64
-
65
-
66
-
67
-
68
-
69
-
70
-
71
-
72
-
73
-
74
-
75
-
76
-
77
-
78
-
79
-
80
-
81
-
82
-
83
-
84
 |
 |

Troubleshooting Guide
Business PCs
Document Part Number: 384569-001
May 2005
This guide provides helpful hints and solutions for troubleshooting
the above products as well as scenarios for possible hardware and
software problems.