HP Designjet 3D HP Designjet 3D Printer Series - User Guide (English)
HP Designjet 3D Manual
 |
View all HP Designjet 3D manuals
Add to My Manuals
Save this manual to your list of manuals |
HP Designjet 3D manual content summary:
- HP Designjet 3D | HP Designjet 3D Printer Series - User Guide (English) - Page 1
HP Designjet 3D Printer HP Designjet Color 3D Printer User Guide CQ656-90004 CQ656-90004 - HP Designjet 3D | HP Designjet 3D Printer Series - User Guide (English) - Page 2
to change without notice. The only warranties for HP Products and services are set forth in the express warranty statement accompanying such products and services. Nothing herein should be construed as constituting an additional warranty. HP shall not be liable for technical or editorial errors - HP Designjet 3D | HP Designjet 3D Printer Series - User Guide (English) - Page 3
Installing Firmware on printer 12 Adding the second HP Designjet 3D Material Bay 13 Installing the HP Designjet 3D Material Bay 13 Operation Display panel and keypad 17 System firmware overview 18 HP Designjet 3D Software Solution overview 19 Processing your STL file for printing 20 Opening - HP Designjet 3D | HP Designjet 3D Printer Series - User Guide (English) - Page 4
48 Clogged tip ...49 Material Jam ...50 Recovering from loss of extrusion 53 Support Introduction ...58 HP Professional Services 58 Contact HP Support 59 Recycling Removing the EEproms from the material guides 60 Removing the desiccant from the material spool 61 Printer Specifications Physical - HP Designjet 3D | HP Designjet 3D Printer Series - User Guide (English) - Page 5
, tap, sand and paint your creations. HP Designjet 3D printer and HP Designjet Color 3D printer are an innovative combination of proprietary hardware, software and material technology. Welcome to the new dimension of 3D modeling! How to use this guide This User Guide is laid out in easy to follow - HP Designjet 3D | HP Designjet 3D Printer Series - User Guide (English) - Page 6
printer yourself, contact your local Service Representative. See Support section of User Guide. • Use only the power cord supplied with the printer. Do not damage, cut or repair the power cord. A damaged power cord has risk of fire and electric shock. Replace for materials and packaging. ESD: - HP Designjet 3D | HP Designjet 3D Printer Series - User Guide (English) - Page 7
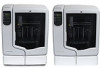
parts that are ready to use immediately after completion. HP Designjet 3D Printer and HP Designjet Color 3D Printer consist of two primary components - the 3D printer and material bay. HP Designjet 3D Software Solution is the preprocessing software that runs on Windows XP Pro, Windows Vista or - HP Designjet 3D | HP Designjet 3D Printer Series - User Guide (English) - Page 8
Figure 2: Interior chamber - front view 1 2 9 3 8 7 6 4 5 1 Extrusion Head 2 Tip wipe assembly 3 Purge bucket 4 Z stage platen 5 Modeling base retainers (x2) 6 Modeling base 7 Z stage lead screw 8 Z stage guide rods 9 Extrusion Tips 4 - HP Designjet 3D | HP Designjet 3D Printer Series - User Guide (English) - Page 9
Figure 3: Rear view of printer 1 2 3 4 5 6 7 1 Model Material Y Connector 2 Model Material Tube 3 AC Power Cord Connector 4 Circuit Breaker 5 Material Bay 6 Optional Model Material Tube 7 Optional Material Bay 8 Support Material Y Connector 8 9 10 11 12 13 14 15 16 9 Support Material Tube 10 UPS - HP Designjet 3D | HP Designjet 3D Printer Series - User Guide (English) - Page 10
Figure 4: Material carriers Model material carrier Support material carrier Figure 5: Modeling base Modeling base 6 - HP Designjet 3D | HP Designjet 3D Printer Series - User Guide (English) - Page 11
1 Crossover cable (orange) 2 Network cable (blue) 3 Tip replacement kit (A. Support tip B. Model tip C. 8 Tip shields D. 4 Tip wipe assemblies) 4 Model material spool 5 Startup DVD 6 1/8 inch T-Handle wrench (red) 7 10x magnifier loupe 8 Support material spool 9 Needle nose pliers 10 Cutters 11 7/64 - HP Designjet 3D | HP Designjet 3D Printer Series - User Guide (English) - Page 12
Finding more information HP Designjet 3D Software Solution Online Help Simple operating instructions for HP Designjet 3D Software Solution are available in HP Designjet 3D Software Solution Dynamic Help. You can also see HP Designjet 3D Software Solution Help from the menu bar Help>Contents World - HP Designjet 3D | HP Designjet 3D Printer Series - User Guide (English) - Page 13
the printer and material bay(s) per assembly instructions included with printer. Installing software There are two software programs that work with HP Designjet 3D and HP Designjet Color 3D: 1. HP Designjet 3D Software Solution, installed on your workstation, processes the STL files for printing and - HP Designjet 3D | HP Designjet 3D Printer Series - User Guide (English) - Page 14
From your workstation, start the HP Designjet 3D Software Solution. 4. From the General tab, click the Manage 3D Printers button. 5. Click the Add Click Add Printer and you are ready to print. Close the Add 3D Printer window. Note: If your printer is not displayed in the "Add 3D Printer" window, - HP Designjet 3D | HP Designjet 3D Printer Series - User Guide (English) - Page 15
display panel. The display will show Mainte- nance and the software version. 3. Press System. 4. Press Set Network. The top window displays: Network From your workstation, start the HP Designjet 3D Software Solution. A. From the General tab, click the Manage 3D Printers button. B. Click the Add from - HP Designjet 3D | HP Designjet 3D Printer Series - User Guide (English) - Page 16
Services tab. 6. Select your printer from the drop down list then click the Update Software button. 7. Navigate the HP Designjet 3D Software Solution to the directory where the firmware file is located and select the HP Designjet 3D.upg file for HP Designjet 3D or select the HP Designjet Color 3D - HP Designjet 3D | HP Designjet 3D Printer Series - User Guide (English) - Page 17
is printing. Installing the HP Designjet 3D Material Bay: 1. Remove the HP Designjet 3D Material Bay, material bay cable, material spools and material carriers from the box. 2. Unload the model and support material from the printer. 3. Remove the model and support material carriers from the material - HP Designjet 3D | HP Designjet 3D Printer Series - User Guide (English) - Page 18
. See Figure 9 Figure 9: Positioning material bays 14. With 2 people, position the printer on to the top of the material bays. Be sure the feet and pins are properly aligned. See Figure 10 Figure 10: Positioning printer 15. Remove the black plugs from the model and support Y blocks by pushing in on - HP Designjet 3D | HP Designjet 3D Printer Series - User Guide (English) - Page 19
inserted. 17. Repeat with the short black striped (S1) material tube for support side. See Figure 12 Figure 12: Connecting the short material tubes 18. Connect the long red striped material tube (M2) from model (M) coupler of lower material bay to right side of model Y block by inserting firmly - HP Designjet 3D | HP Designjet 3D Printer Series - User Guide (English) - Page 20
"Send Upgrade from Workstation", See "Updating printer firmware:" on page 31. 26. Insert model and support material spools into the new material carriers. 27. From display panel press Material. Display will show Add/Remove. 28. Open material bay doors and push both red handled model carriers - HP Designjet 3D | HP Designjet 3D Printer Series - User Guide (English) - Page 21
and keypad The main user interface for the printer is the display panel and keypad. See Figure 15. Figure 15: Display panel and keypad 1 2 3 1 Keypad buttons 2 Main display window 3 Lower display windows The HP Designjet 3D and HP Designjet Color 3D display panel and keypad consist of - HP Designjet 3D | HP Designjet 3D Printer Series - User Guide (English) - Page 22
print time or material remaining and set the printer to auto power down. • Material: From this section you can load material, unload material or replace material. • Standby: From this section you can set the printer to Standby mode. • Maintenance: From this section you can make changes to the System - HP Designjet 3D | HP Designjet 3D Printer Series - User Guide (English) - Page 23
specific operating information regarding the printer). Figure 17: HP Designjet 3D Software Solution hierarchy HP Designjet 3D Software Solution General tab Orientation tab Pack tab Printer Status tab Printer Services tab • Layer resolution • Model fill style • Support style • Number of copies - HP Designjet 3D | HP Designjet 3D Printer Series - User Guide (English) - Page 24
the part. Selecting support style: HP Designjet 3D Support Material is used to support the model during the build process. It is removed when the part is complete. Support styles will affect the support strength and build time of the print. SMART support is the default support setting. • Basic - May - HP Designjet 3D | HP Designjet 3D Printer Series - User Guide (English) - Page 25
window will determine how the part is oriented when it prints. Orientation impacts build speed, part strength, surface finish and material consumption. Orientation can also affect the ability of HP Designjet 3D Software Solution to repair any problems with the STL file. You can choose to auto orient - HP Designjet 3D | HP Designjet 3D Printer Series - User Guide (English) - Page 26
will now be on the display. 4. From your HP Designjet 3D Software Solution workstation, send a part to the printer. The printer will automatically start to build the part. See "Processing your STL file for printing" on page 20 for detailed instructions. Starting a build from the display panel: If - HP Designjet 3D | HP Designjet 3D Printer Series - User Guide (English) - Page 27
build to allow for material replacement. To pause the build at any time, from the display panel press Pause. Note: The printer will complete the current and are ready to resume building the part, press Resume and the printer will resume printing. Canceling a build You can cancel a build at any time - HP Designjet 3D | HP Designjet 3D Printer Series - User Guide (English) - Page 28
part. Note: Parts are easier to remove from the modeling base when still warm. Removing HP Designjet 3D Support Material HP Designjet 3D and HP Designjet Color 3D use HP Designjet 3D Support Material which is designed to dissolve in a soap and water based solution. Your part is left with a smooth - HP Designjet 3D | HP Designjet 3D Printer Series - User Guide (English) - Page 29
avoid damage. Replacing material for single material bay 1. From the display panel press Material... The display will show Add/Remove and S1( or Unload Support. 4. The printer will now unload material from the head. When the material has unloaded, you will need to replace the material carriers. 5. - HP Designjet 3D | HP Designjet 3D Printer Series - User Guide (English) - Page 30
excess 2 inches (50mm) of material from the material guide leaving a blunt end. 9. Replace the material spool. 10. Close and latch the carrier. 11. Once the material carriers have been replaced press Load... 12. Select Load Model, Load Support or Load both. 13. After material has been loaded to the - HP Designjet 3D | HP Designjet 3D Printer Series - User Guide (English) - Page 31
, Unload Model or Unload Support. 4. The printer will now unload material from the head. When the material has unloaded, you will need to replace the material carriers. 5. Place the carrier on a flat stable surface. CAUTION Do not push the material through the material guide back into the carrier - HP Designjet 3D | HP Designjet 3D Printer Series - User Guide (English) - Page 32
Removing the EEproms from the material guides" on page 60 5. Recycle the empty material spool. See "Recycling" on page 60 6. Install a new material spool into the material carrier. Storing material spools If you will not be using the printer for more than 72 hours, unload and store model and support - HP Designjet 3D | HP Designjet 3D Printer Series - User Guide (English) - Page 33
Figure 23: Material retaining clips Material retaining clips 7. Place the material guide in the material guide slot on the spool. See Figure 24. 8. Place the material in the material notches. See Figure 24. Figure 24: Material guide slot and notches 9. Cut the excess material from material guide. 29 - HP Designjet 3D | HP Designjet 3D Printer Series - User Guide (English) - Page 34
lock in place 11. Remove the material spool from the material carrier. See Figure 26. Figure 26: Properly installed material retaining clips. 12. Place the material spool in the storage bag that came with the material carrier. Note: When not loaded in the printer, always store material spools in the - HP Designjet 3D | HP Designjet 3D Printer Series - User Guide (English) - Page 35
2. Press System. 3. Press Load Upgrade. The printer will then display "Send upgrade from workstation" followed by the printer's IP address. 4. Open HP Designjet 3D Software Solution and click on the Printer Services tab. 5. Click on the Update Software button. HP Designjet 3D Software Solution will - HP Designjet 3D | HP Designjet 3D Printer Series - User Guide (English) - Page 36
inspect the tip shields for damage or material build up. If there is material build up remove it as needed. If the material will not break free or there is damage to the tip shield, replace the tip shield. See "Tip shield replacement" on page 35 Remove debris buildup Remove all material buildup on - HP Designjet 3D | HP Designjet 3D Printer Series - User Guide (English) - Page 37
wipe assembly The tip wipe assembly should be replaced approximately every 500 hours. 1. Completely power down the printer. 2. Move the head to the right of the printer to gain access to the tip wipe assembly. Figure 28: Move the toggle head to the right 3. Remove the tip wipe assembly by lifting - HP Designjet 3D | HP Designjet 3D Printer Series - User Guide (English) - Page 38
Figure 29: Replacing the tip wipe assembly 4. Place the new tip wipe assembly over the two mounting posts making sure the assembly is fully installed. See Figure 30 Figure 30: Installing tip wipe assembly 5. Power the printer back up. 34 - HP Designjet 3D | HP Designjet 3D Printer Series - User Guide (English) - Page 39
on the surface finish and detail of models. Replace the tip shields every 500 hours. Figure 31: Tip Shield damage New shield Worn shield 1. Enter head area is hot, wear gloves when working in this area of the printer. 2. Remove the head cover by pressing the tabs in and pulling away from the - HP Designjet 3D | HP Designjet 3D Printer Series - User Guide (English) - Page 40
Figure 33: Tip Shield removal Insert small standard screwdriver to pry tip shields from tips. Tip shield Tip plate 4. Clean the tip using the wire brush supplied with the Startup Kit to remove any debris. See Figure 34 Figure 34: Clean tips with wire brush Clean the tips using a wire brush. 5. - HP Designjet 3D | HP Designjet 3D Printer Series - User Guide (English) - Page 41
Figure 35: Tip Shield installation 6. Replace head cover. Note: If the head cover is not replaced the printer may not function properly. 7. Exit Maintenance, press Done until back at Idle. 37 - HP Designjet 3D | HP Designjet 3D Printer Series - User Guide (English) - Page 42
printer and remove the material carriers. 2. Disconnect the material tubes from the rear of the material bay(s). Leave them attached to the Y block. 3. Locate the entrance hole to the Filament Present Switch in the material bay(s). See Figure 36 Figure 36: Filament Present Switch location Support - HP Designjet 3D | HP Designjet 3D Printer Series - User Guide (English) - Page 43
around the tips. HP Designjet 3D Software Solution displays the tip time (hrs) - from the Printer Services Tab - Printer Info button (Tip time will reset to zero after replacement). Removing tips: 1. You will need to make sure the printer is powered ON before replacing the extrusion tips. 2. From - HP Designjet 3D | HP Designjet 3D Printer Series - User Guide (English) - Page 44
- or until the top of the screws are flush with the metal cover. DO NOT remove the screws entirely. See Figure 40. Figure 40: Tip Removal Loosen but do not remove heater block screws Loosen but do not remove heater block screws B. Use needle nose pliers to grasp the stainless steel shield of the - HP Designjet 3D | HP Designjet 3D Printer Series - User Guide (English) - Page 45
Pull tips down to remove D. Repeat for second tip if necessary. Installing tips: 1. Place the tip shield on the tip. Be sure to install the proper tip. See Figure 42 Figure 42: Tip shield alignment Slotted end Slotted end Align the tip shield so the slotted end is facing the back of the printer - HP Designjet 3D | HP Designjet 3D Printer Series - User Guide (English) - Page 46
tip. 4. Pull the tip shield toward you, then lift up to install the tip. 5. Push the tip toward the back of the printer once it is all the way up against the heater block. 6. Verify the tip block clamp screws. See Figure 44 Note: Make sure the tip remains all the way up against the heater block as - HP Designjet 3D | HP Designjet 3D Printer Series - User Guide (English) - Page 47
part is complete the printer will display Remove Part and Select XY Adjustment - X:0, Y:0 3. Remove the XY tip calibration part from the printer. 4. Inspect the part and calibrate the X and Y axis (See Figure 45). A. Use the magnifier from the Startup kit to view the support road (shown in red - HP Designjet 3D | HP Designjet 3D Printer Series - User Guide (English) - Page 48
Figure 45: Example XY Tip Offset Part. This example requires an adjustment of X = + 2, Y = - 4 5. Select Done after you have input the X and Y offsets. The printer will return to Maintenance. Run the XY calibration a second time to be sure the values changed the offset properly. 6. When finished, - HP Designjet 3D | HP Designjet 3D Printer Series - User Guide (English) - Page 49
harness by squeezing the wiring harness clip while pulling down. 4. Remove the light bar by removing the three attachment screws (top, middle, bottom) - use the 7/64 T- handle wrench supplied in the startup kit. 5. Install a replacement light bar with the three attachment screws - do not overtighten - HP Designjet 3D | HP Designjet 3D Printer Series - User Guide (English) - Page 50
STL in HP Designjet 3D Software Solution and redownload to printer. Error message on display panel Can't Find Home - Check Modeling Base Recommendation 1. Verify a modeling base is inserted. 2. Modeling base may be used or defective - replace. Material Error Filament error 1. Remove the carrier - HP Designjet 3D | HP Designjet 3D Printer Series - User Guide (English) - Page 51
it is not empty. 2. Replace material spool. 3. Reload material. 1. Remove the carrier and verify material is coming out of the material guide. 2. Verify material pulls freely from the carrier. 3. Verify the material tubes are free of material. 4. Reload material. 1. Remove the carrier and verify - HP Designjet 3D | HP Designjet 3D Printer Series - User Guide (English) - Page 52
, you may need to export a configuration (.cfg) file from your printer to send to Customer Care. Exporting configuration file from printer: 1. Open HP Designjet 3D Software Solution from your workstation. 2. Click on the Printer Services tab. 3. Click on the Export Configuration button. 4. Browse to - HP Designjet 3D | HP Designjet 3D Printer Series - User Guide (English) - Page 53
flowed from the model tip, the model tip is functioning properly. 9. Test the support material tip by choosing: Select Drive. 10. Determine if there is a support material extrusion problem by pressing Forward. Watch the support tip (left tip) for any extrusion (material purge). 11. Press Stop - HP Designjet 3D | HP Designjet 3D Printer Series - User Guide (English) - Page 54
heat up beyond operating temperature. If material starts to extrude the tip is no longer clogged. If material does not extrude see "Recovering from loss of extrusion" on page 53 9. Press Done. 10. Replace head cover. Note: If the head cover is not replaced the printer may not function properly. 11 - HP Designjet 3D | HP Designjet 3D Printer Series - User Guide (English) - Page 55
area is hot. Use leather gloves when working in this area of printer. Figure 48: Remove the head cover Head Cover Press tabs in to remove head cover 6. Inspect tip inlets for material build up see Figure 49. If there is excess material build up see "Recovering from loss of extrusion" on page 53 - HP Designjet 3D | HP Designjet 3D Printer Series - User Guide (English) - Page 56
temperature. If material starts to extrude the tip is no longer clogged. If material does not extrude see "Recovering from loss of extrusion" on page 53. If material extrudes, you can continue building your part. 10. Replace head cover. Note: If the head cover is not replaced the printer may not - HP Designjet 3D | HP Designjet 3D Printer Series - User Guide (English) - Page 57
working in this area of printer. 2. Remove the head cover by pressing the tabs in and pulling away from the Remove the head cover Head Cover Press tabs in to remove head cover 3. Place the toggle bar in neutral position (bar will extend equally from both sides of head). This can be done manually - HP Designjet 3D | HP Designjet 3D Printer Series - User Guide (English) - Page 58
Support side idler wheel Heater block Toggle bar Figure 51: Head Components Toggle spring Model side idler wheel Drive wheel Figure 52: Toggle bar in neutral position 4. Remove any excess material found around the head area. Note: Material fed to the tip can sometimes jam causing a build-up of - HP Designjet 3D | HP Designjet 3D Printer Series - User Guide (English) - Page 59
equivalent tool. CAUTION The end of the tip where the material enters is called the extrusion tube. Extrusion cleaned, move the material idler wheels out of the way (there is one idler wheel for support material and one for model material, see Figure 51) kit) into the fixture hole. See Figure 54 55 - HP Designjet 3D | HP Designjet 3D Printer Series - User Guide (English) - Page 60
Note: Make sure that all loose material is removed from the affected area. E. replaced the printer may not function properly. 8. Press Done on the display panel. 9. Display will ask Which Materials Loaded? Press Model if only model material is loaded, press Sup- port if only support material - HP Designjet 3D | HP Designjet 3D Printer Series - User Guide (English) - Page 61
10. Display will ask you to remove the carrier of the materials that are not loaded. Remove the carrier and cut the excess material. 11. Press Done until back at Idle. 12. Reload the material that is not loaded. 57 - HP Designjet 3D | HP Designjet 3D Printer Series - User Guide (English) - Page 62
you HP Designjet 3D products and solutions. Join the HP community at the Knowledge Center, your large-format printing community, for 24x7 access to: • Multimedia tutorials. • Step-by-step how-to guides. • Downloads - the latest printer firmware, drivers, software, etc. • Technical support - online - HP Designjet 3D | HP Designjet 3D Printer Series - User Guide (English) - Page 63
connects the printer for you. This is one of the HP Care Pack services; for more information, please visit http://www.hp.com/go/ printservices/. Contact HP Support HP Support is available to you by telephone. What to do before you call: • Review the troubleshooting suggestions in this guide. • If - HP Designjet 3D | HP Designjet 3D Printer Series - User Guide (English) - Page 64
Follow your local recycling guidelines when recycling electronic components. Removing the EEproms from the material guides 1. Open the model and support material carriers and remove the material guides. 2. With a small standard screwdriver, pry the two material guide halves apart. See Figure 56. 60 - HP Designjet 3D | HP Designjet 3D Printer Series - User Guide (English) - Page 65
standard screwdriver 3. Recycle the EEPROM per your local electronics recycling guidelines. 4. Recycle the material guides per your local guidelines. See Figure 55. Removing the desiccant from the material spool 1. Remove the excess material from the material spool. 2. Use a standard screwdriver - HP Designjet 3D | HP Designjet 3D Printer Series - User Guide (English) - Page 66
The information in this section is applicable to both HP Designjet 3D and HP Designjet Color 3D printers. Physical specifications Height Width Depth Weight 30 in (762 mm) 26 in (660 mm) 26 in (660 mm) 130 lbs (59 kg) Material bay height Material bay width 6 in (153 mm) 26 in (660 mm - HP Designjet 3D | HP Designjet 3D Printer Series - User Guide (English) - Page 67
can possibly cause intermittent power issues. Ecological specifications For the up-to-date ecological specifications of your printer, please go to http://www.hp.com/ and search for "ecological specifications". Environmental specifications Temperature range . 59◦F to 86◦F (15◦C to 30◦C) Relative - HP Designjet 3D | HP Designjet 3D Printer Series - User Guide (English) - Page 68
Supplemental Information HP Designjet 3D and HP Designjet Color 3D Printer series Hewlett Packard Limited Warranty Statement HP Product HP Designjet 3D Printer HP Designjet Color 3D Printer HP Designjet 3D Material Bay HP Designjet 3D ABS Material HP Designjet 3D Software Solution Limited - HP Designjet 3D | HP Designjet 3D Printer Series - User Guide (English) - Page 69
you or any HP support contract with you. However, if printer failure or damage is attributable to the use of a non-HP consumable product, HP will charge its standard time and materials charges to service the printer for the particular failure or damage. 6. If HP or a HP authorized service provider - HP Designjet 3D | HP Designjet 3D Printer Series - User Guide (English) - Page 70
12. Unless otherwise stated, and to the extent permitted by local law, HP products may be manufactured using new materials or new and used materials equivalent to new in performance and reliability. HP may repair or replace products (i) with equivalent products to the products being repaired or - HP Designjet 3D | HP Designjet 3D Printer Series - User Guide (English) - Page 71
Cugat del Vallès Barcelona, Spain declares that the product Product name and model: HP Designjet 3D printer series Regulatory Model Number(1): Product options: HP Designjet Color 3D printer series BCLAA-0903 All conforms to the following product specifications Safety: IEC 60950-1:2007 (2nd - HP Designjet 3D | HP Designjet 3D Printer Series - User Guide (English) - Page 72
This regulatory number should not be confused with the marketing name (such as HP Designjet 3D printer) or product numbers (such as Z####X, where Z and X are any , if not installed and used in accordance with the instructions, may cause harmful interference to radio communications. Operation of - HP Designjet 3D | HP Designjet 3D Printer Series - User Guide (English) - Page 73
reach Eco-Tips HP is committed to helping customers reduce their environmental footprint. HP has provided the Eco-Tips below to help you focus on ways to assess and reduce the impact of your printing choices. In addition to specific features in this product, please visit the HP Eco Solutions website - HP Designjet 3D | HP Designjet 3D Printer Series - User Guide (English) - Page 74
increasing number of product return and recycling programs in many countries/regions, and partners with some of the largest electronics recycling centers throughout the world. HP conserves resources by reselling some of its most popular products. For more information regarding recycling of
-
 1
1 -
 2
2 -
 3
3 -
 4
4 -
 5
5 -
 6
6 -
 7
7 -
8
-
9
-
10
-
11
-
12
-
13
-
14
-
15
-
16
-
17
-
18
-
19
-
20
-
21
-
22
-
23
-
24
-
25
-
26
-
27
-
28
-
29
-
30
-
31
-
32
-
33
-
34
-
35
-
36
-
37
-
38
-
39
-
40
-
41
-
42
-
43
-
44
-
45
-
46
-
47
-
48
-
49
-
50
-
51
-
52
-
53
-
54
-
55
-
56
-
57
-
58
-
59
-
60
-
61
-
62
-
63
-
64
-
65
-
66
-
67
-
68
-
69
-
70
-
71
-
72
-
73
-
74
 |
 |

CQ656-90004
CQ656-90004
HP Designjet 3D Printer
HP Designjet Color 3D Printer
User Guide